
You won’t believe the deliciousness of these low-carb snacks—it’s like discovering a hidden treasure trove for your taste buds. Whether you’re craving something crunchy, savory, or sweet, there’s a satisfying option waiting for you. From creamy avocado bites to zesty cheese crisps, these snacks cater to every craving. If you’re looking for tasty ways to stay on track with your diet, you’ll want to explore these mouthwatering choices further.
Avocado and Tuna Salad Bites
Avocado and Tuna Salad Bites are a delicious and nutritious low-carb snack that blends creamy avocado with protein-packed tuna. These bites aren’t only easy to prepare but also make for a perfect appetizer or a light meal option.
With their vibrant flavors and beautiful presentation, they’re sure to impress your family and friends while keeping your carb count in check.
To make these tasty bites, you simply need to combine ripe avocados with canned tuna, add a few simple seasonings, and serve them in bite-sized portions. They’re versatile and can be customized to your taste, allowing you to add ingredients like chopped onions, cilantro, or even a splash of lime juice for extra zest. Enjoy these delightful morsels as part of a balanced low-carb diet.
Ingredients:
- 2 ripe avocados
- 1 can (5 oz) of tuna, drained
- 2 tablespoons mayonnaise
- 1 tablespoon Dijon mustard
- 1 tablespoon lemon juice
- Salt and pepper to taste
- Optional: diced red onion, chopped cilantro, or jalapeño for heat
Instructions:
In a medium bowl, mash the ripe avocados until smooth, then mix in the drained tuna, mayonnaise, Dijon mustard, lemon juice, salt, and pepper until well combined.
If you’re using any optional ingredients like diced onion or cilantro, fold them in gently. Once your mixture is ready, scoop it into bite-sized portions and serve it on cucumber slices, endive leaves, or simply on its own for a healthy low-carb treat.
Extra Tips:
For the best flavor, choose ripe avocados that are slightly soft to the touch, but not overly mushy.
If you prefer a more robust taste, feel free to add spices like garlic powder or paprika to the mixture. These salad bites can be made ahead of time and stored in the refrigerator for a few hours, but it’s best to enjoy them fresh to prevent the avocados from browning.
Cheese Crisps
Cheese crisps are a delicious and satisfying low-carb snack that can be enjoyed any time of the day. These crunchy bites aren’t only easy to make but also offer a great way to get your cheese fix while keeping your carb count low.
Perfect for pairing with dips, soups, or simply enjoying on their own, cheese crisps are a versatile addition to any low-carb diet.
To make cheese crisps, you only need a few ingredients, and the preparation is quick and straightforward. You can customize the flavors by using different types of cheese and adding spices according to your preference.
Whether you’re hosting a gathering or just looking for a quick snack, cheese crisps are sure to impress.
Ingredients:
- 1 cup shredded cheese (cheddar, parmesan, or your choice)
- 1 teaspoon garlic powder (optional)
- 1 teaspoon onion powder (optional)
- 1 teaspoon paprika or cayenne pepper (optional)
- Parchment paper
Cooking Instructions:
Preheat your oven to 400°F (200°C) and line a baking sheet with parchment paper. In a bowl, combine the shredded cheese with any optional seasonings you prefer, mixing well.
Using a tablespoon, scoop the cheese mixture onto the prepared baking sheet, leaving space between each scoop to allow for spreading. Bake for 5-7 minutes or until the edges are golden and the cheese has melted into crisp rounds.
Allow them to cool on the baking sheet before enjoying.
Extra Tips:
For the best results, use finely shredded cheese, as it melts more evenly and creates a crispier texture.
Experiment with different cheese blends to find your favorite flavor combinations. If you want to make them spicier, consider adding crushed red pepper flakes or a dash of hot sauce to the mixture before baking.
Store any leftover cheese crisps in an airtight container to maintain their crunch, but they’re best enjoyed fresh!
Cucumber Hummus Boats
Cucumber hummus boats are a delightful and invigorating low-carb snack that combines the crispness of cucumbers with the creamy texture of hummus. Perfect for a quick bite during the day or as an appetizer for gatherings, these boats aren’t only easy to make but also packed with flavor and nutrition.
The subtle crunch of the cucumber pairs beautifully with the rich taste of hummus, making this dish a hit among both health enthusiasts and casual snackers alike.
To prepare cucumber hummus boats, you can customize them with your favorite flavors of hummus, whether it’s classic, roasted red pepper, or garlic. This versatility allows you to cater to different taste preferences, making them an excellent choice for parties or family gatherings.
With minimal preparation time and no cooking required, these boats are a fantastic option for anyone looking to enjoy a light, satisfying snack without the carbs.
Ingredients:
- 1 large cucumber
- 1 cup hummus (your choice of flavor)
- Cherry tomatoes, halved (for garnish)
- Fresh parsley or cilantro, chopped (for garnish)
- Salt and pepper to taste
- Optional: olives or feta cheese for additional toppings
Instructions:
To create the cucumber hummus boats, start by washing the cucumber thoroughly and slicing it in half lengthwise.
Scoop out the seeds from the center using a spoon to create a hollow space for the hummus. Next, fill each half with a generous amount of hummus, smoothing it out with a spatula or knife.
Once filled, top with halved cherry tomatoes, sprinkle with fresh herbs, and season with salt and pepper. If desired, add olives or feta cheese for an extra flavor punch.
Slice the cucumber into bite-sized pieces and serve immediately for the best crunch.
Extra Tips:
For an even more vibrant presentation, consider using a variety of colorful hummus flavors and garnishes.
You can also experiment with different toppings based on your personal preference or what you have on hand.
If you’re preparing these ahead of time, store the filled cucumber boats in an airtight container in the refrigerator to keep them fresh, and add the garnishes right before serving to maintain their crispness.
Almond Butter Celery Sticks
Almond butter celery sticks are a quick, nutritious snack that offer a delightful crunch and a satisfying taste. This combination brings together the crispness of celery and the creamy richness of almond butter, making it a perfect low-carb option for those looking to maintain a healthy lifestyle.
Whether you need a midday snack, a pre-workout boost, or a simple appetizer, these celery sticks are sure to please both your taste buds and your dietary goals.
Preparing almond butter celery sticks is incredibly easy and requires minimal ingredients. You can whip them up in just a few minutes, making them an ideal choice for busy days or gatherings.
This snack isn’t only packed with healthy fats and fiber, but it’s also a fantastic way to incorporate more vegetables into your diet. Get ready to enjoy a crunchy, satisfying treat that aligns perfectly with your low-carb lifestyle!
Ingredients:
- 4 celery stalks
- 1/2 cup almond butter
- 1 tablespoon honey (optional)
- A sprinkle of cinnamon (optional)
- Chopped nuts or seeds for garnish (optional)
Instructions:
Begin by washing and drying the celery stalks, then cut them into 3-4 inch pieces. Spread a generous amount of almond butter within the grooves of each celery stick, ensuring an even coating.
If desired, drizzle a bit of honey over the almond butter for added sweetness, and sprinkle with cinnamon or garnish with chopped nuts or seeds for an extra crunch.
Extra Tips:
When preparing almond butter celery sticks, feel free to experiment with different nut butters, such as peanut or cashew butter, for a unique twist.
You can also add toppings like raisins or coconut flakes for added flavor and texture. If you’re making these for a gathering, consider arranging them on a platter with a variety of nut butters and toppings to create a fun and interactive snack experience. Enjoy!
Hard-Boiled Eggs With Paprika
Hard-boiled eggs are a classic snack that isn’t only simple to prepare but also packed with protein and essential nutrients. When paired with paprika, they transform into a flavorful treat that can satisfy your cravings without the carbs. This low-carb snack is perfect for those looking for a nutritious option that’s easy to make and can be enjoyed at any time of the day.
Preparing hard-boiled eggs with paprika doesn’t require any culinary expertise, making it an ideal recipe for both beginners and seasoned cooks. The smoky flavor of paprika adds a delightful kick to the creamy egg yolk, making this snack not only healthy but also delicious.
Whether you’re prepping for a busy week or looking for a quick bite, these hard-boiled eggs will keep you full and energized.
Ingredients:
- 4 large eggs
- Water (enough to cover the eggs)
- 1 teaspoon paprika
- Salt (to taste)
- Pepper (to taste)
Cooking Instructions:
To make hard-boiled eggs with paprika, start by placing the eggs in a single layer in a saucepan and covering them with water. Bring the water to a boil over medium-high heat, then cover the pot, remove it from the heat, and let it sit for about 12 minutes.
After the time is up, carefully transfer the eggs to a bowl of ice water to cool for at least 5 minutes. Once cooled, peel the eggs, slice them in half, sprinkle with paprika, and season with salt and pepper to taste.
Extra Tips:
For best results, use eggs that are a few days old, as they tend to peel more easily than fresh ones. You can also experiment with different spices or herbs, such as cayenne pepper or dill, to customize the flavor to your liking.
Store any leftovers in the refrigerator for up to a week, making them a convenient snack option on busy days.
Greek Yogurt With Berries
Greek yogurt with berries is a delicious and nutritious low-carb snack that’s perfect for any time of day. This simple dish combines the creamy richness of Greek yogurt with the natural sweetness and vibrant colors of fresh berries, making it not only a treat for your taste buds but also a feast for your eyes.
Greek yogurt is a great source of protein and probiotics, while berries are packed with antioxidants and vitamins, making this snack a healthy choice for anyone looking to maintain a balanced diet.
To prepare this delightful snack, you can customize the type of berries you use based on your preference or seasonal availability. Strawberries, blueberries, raspberries, or blackberries all work wonderfully and can even be mixed together for a colorful berry medley.
This recipe is quick to make and can be enjoyed on its own or as a topping for other low-carb treats like almond flour pancakes or chia seed pudding.
Ingredients
- 1 cup Greek yogurt (unsweetened)
- 1/2 cup mixed berries (strawberries, blueberries, raspberries, or blackberries)
- 1 tablespoon honey or stevia (optional)
- 1 tablespoon chopped nuts (almonds, walnuts, or pecans) for garnish
- A sprinkle of cinnamon (optional)
Cooking Instructions
In a bowl, scoop out the Greek yogurt and top it with the mixed berries. If you prefer a touch of sweetness, drizzle honey or sprinkle stevia over the yogurt and berries.
Gently mix everything together, and for added texture and flavor, sprinkle some chopped nuts and a dash of cinnamon on top before serving.
Extra Tips
For a creamier texture, you can whip the Greek yogurt with a hand mixer before adding the berries. This dish is highly customizable, so feel free to experiment with different flavorings such as vanilla extract or a dollop of nut butter for an extra boost of flavor.
Additionally, if you’re preparing this snack for later, store the yogurt and berries separately to prevent the berries from making the yogurt watery.
Zucchini Chips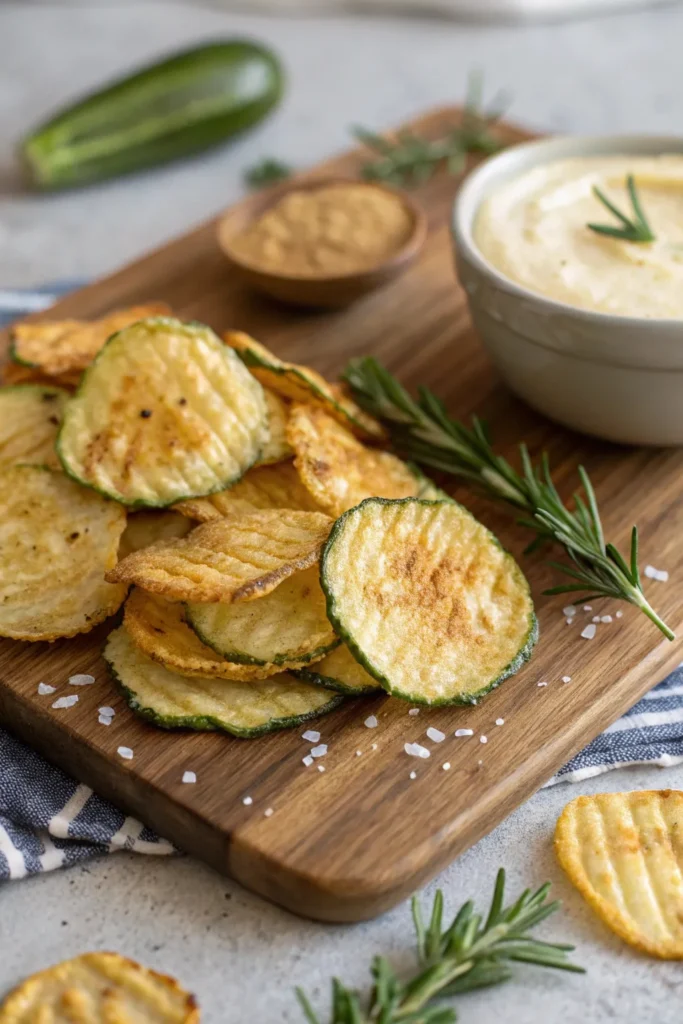
Zucchini chips are a delicious and healthy alternative to traditional potato chips, perfect for those following a low-carb diet. These crispy, baked snacks are easy to make and can satisfy your crunchy cravings without the guilt.
With just a few simple ingredients, you can transform fresh zucchini into a savory, crunchy treat that pairs well with dip or can be enjoyed on their own. Making zucchini chips isn’t only a tasty endeavor but also a great way to incorporate more vegetables into your diet.
Zucchini is low in calories and high in vitamins and minerals, making it an excellent choice for a nutritious snack. Plus, the versatility of this recipe allows you to season the chips to your liking, whether you prefer classic salt and pepper or more adventurous flavors like garlic powder or paprika.
Ingredients:
- 2 medium zucchini
- 1 tablespoon olive oil
- 1 teaspoon salt
- 1/2 teaspoon black pepper
- Optional seasonings (e.g., garlic powder, onion powder, paprika, Parmesan cheese)
Cooking Instructions:
Preheat your oven to 225°F (110°C) and line a baking sheet with parchment paper. Slice the zucchini into thin rounds, about 1/8 inch thick, and place them in a bowl.
Drizzle with olive oil and sprinkle with salt, pepper, and any optional seasonings you desire. Toss until the zucchini slices are evenly coated. Arrange the slices in a single layer on the prepared baking sheet and bake for 1.5 to 2 hours, flipping halfway through, until they’re golden and crispy.
Extra Tips:
For the best results, make sure the zucchini slices are evenly cut for consistent cooking and crispiness. If you prefer your chips extra crisp, you can place them on a wire rack over the baking sheet to allow for better air circulation.
Additionally, experiment with different seasonings to find your favorite flavor combination, and store leftover chips in an airtight container to maintain their crunch.
Pepperoni Chips
Pepperoni chips are a delicious and satisfying low-carb snack that can easily be made at home. They’re perfect for those who are following a ketogenic diet or anyone looking to reduce their carbohydrate intake while still enjoying a crunchy treat.
These chips aren’t only simple to prepare but also pack a flavorful punch that will satisfy your cravings for something savory and crispy.
Making pepperoni chips is a quick process that involves baking or microwaving slices of pepperoni until they become crispy. The result is a delightful snack that can be enjoyed on its own, paired with cheese, or used as a topping for salads and other dishes.
With just a few minutes of preparation, you can whip up a batch of these tasty chips that are sure to become a staple in your low-carb snack repertoire.
Ingredients:
- 1 package of pepperoni slices
- Optional: seasonings such as garlic powder, paprika, or Italian herbs
Cooking Instructions:
Preheat your oven to 400°F (200°C). Line a baking sheet with parchment paper and arrange the pepperoni slices in a single layer, making sure they don’t overlap.
Bake in the preheated oven for about 10-12 minutes, or until the edges are crispy and slightly curled. If you prefer to use a microwave, place the pepperoni slices on a microwave-safe plate lined with paper towels and microwave on high for about 1-2 minutes, or until crispy.
Allow the chips to cool slightly before serving.
Extra Tips:
For added flavor, feel free to sprinkle your favorite seasonings over the pepperoni slices before baking or microwaving.
You can experiment with different spices to find the combination that suits your taste. Additionally, store any leftover chips in an airtight container to maintain their crispiness, but they’re best enjoyed fresh!
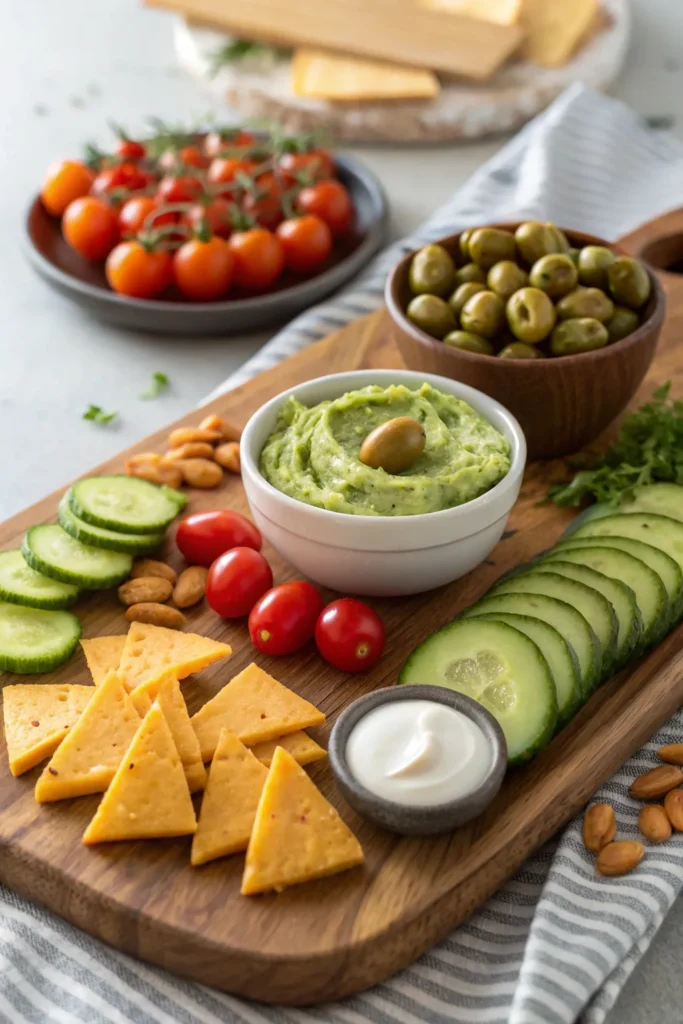
Cauliflower Hummus
Cauliflower hummus is a delicious and healthy alternative to traditional chickpea hummus, making it an excellent choice for those following a low-carb diet. This creamy dip isn’t only packed with flavor but also boasts a variety of nutritional benefits. Cauliflower is rich in vitamins C, K, and B6, as well as fiber, making this hummus not only a guilt-free snack but also a nutritious one.
Pair it with your favorite low-carb veggies or use it as a spread for wraps and sandwiches.
Making cauliflower hummus is simple and requires just a few ingredients. The base of this recipe is steamed cauliflower, which provides a smooth and creamy texture when blended. You can customize the flavor by adding garlic, lemon juice, and tahini, or by incorporating spices such as cumin or paprika.
Whether you’re serving it at a gathering or enjoying it as a personal snack, cauliflower hummus is sure to please.
Ingredients:
- 1 medium head of cauliflower, chopped into florets
- 2 tablespoons tahini
- 2 tablespoons olive oil
- 2 tablespoons lemon juice
- 1 clove garlic, minced
- Salt to taste
- Freshly ground black pepper to taste
- Paprika or cumin for garnish (optional)
To prepare the cauliflower hummus, steam the cauliflower florets until they’re tender, about 8-10 minutes. Once steamed, transfer them to a food processor along with tahini, olive oil, lemon juice, minced garlic, salt, and pepper.
Blend until smooth and creamy, adding a little water if needed to reach your desired consistency. Taste and adjust seasonings as necessary. Transfer to a bowl and sprinkle with paprika or cumin if using.
When making cauliflower hummus, feel free to experiment with additional flavors. You can add roasted red peppers, sun-dried tomatoes, or fresh herbs like parsley or cilantro for a unique twist.
If you find the hummus too thick, simply add a bit more olive oil or water until you achieve your preferred texture. Enjoy this versatile dip with sliced vegetables, low-carb crackers, or spread it on your favorite wraps for a tasty and healthy option!
Beef Jerky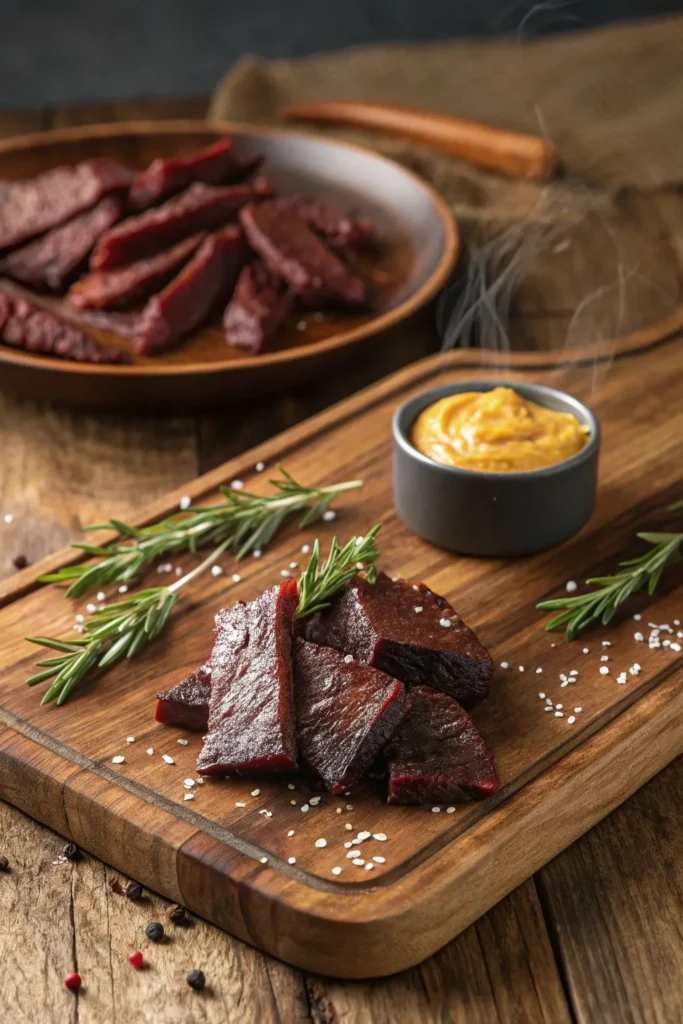
Beef jerky is a classic low-carb snack that’s not only delicious but also incredibly easy to make at home. With just a few ingredients, you can create a flavorful, protein-packed treat that can satisfy your cravings without the carbs.
Whether you’re hiking, traveling, or just looking for a healthy snack option, homemade beef jerky is a convenient choice that you can customize to your taste.
To begin your jerky-making journey, you’ll need to choose the right cut of beef. Flank steak, sirloin, or round are ideal cuts due to their low-fat content, which allows for better preservation and a chewier texture.
By marinating the beef in your favorite spices and seasonings, you can create a jerky flavor that suits your palate. Plus, making it yourself guarantees that you can control the ingredients, making it a healthier alternative to store-bought versions.
Ingredients:
- 2 pounds of lean beef (flank steak, sirloin, or round)
- 1/4 cup soy sauce (or coconut aminos for a gluten-free option)
- 1 tablespoon Worcestershire sauce
- 1 tablespoon liquid smoke (optional)
- 1 tablespoon garlic powder
- 1 tablespoon onion powder
- 1 teaspoon black pepper
- 1 teaspoon paprika
- 1 teaspoon red pepper flakes (optional for heat)
- 1 teaspoon salt
Cooking Instructions:
Slice the beef into thin strips, about 1/8 inch thick, against the grain for a tender chew.
In a bowl, combine all the marinade ingredients and mix well. Add the beef strips to the marinade, making certain they’re fully coated, and let it marinate in the refrigerator for at least 4 hours, or preferably overnight for deeper flavor.
Preheat your oven to 170°F (or use a dehydrator if you have one). Place the marinated beef strips on a baking sheet lined with parchment paper, making sure they aren’t overlapping.
Bake for 4 to 6 hours, flipping halfway through, until the jerky is dry but still slightly pliable.
Extra Tips:
When making beef jerky, it’s important to slice the meat uniformly to guarantee even drying.
If you’re short on time, you can partially freeze the beef for about 1-2 hours to make slicing easier. Additionally, taste your marinade before adding the beef; you can always adjust the seasonings to suit your preferences.
Remember to store your jerky in an airtight container or vacuum-sealed bag to keep it fresh for longer, and enjoy your homemade snack whenever you need a low-carb pick-me-up!
Nuts and Seeds Mix
Creating a delicious and nutritious nuts and seeds mix is an excellent way to keep your snacking low-carb and satisfying. This mix is perfect for those on a low-carb diet, providing a crunchy texture and a variety of flavors that can curb cravings and keep you energized throughout the day.
The combination of nuts and seeds not only delivers healthy fats and protein but also offers a range of vitamins and minerals essential for your well-being.
To make your nuts and seeds mix even more enjoyable, consider adding a few spices or seasonings to elevate the flavors. You can customize your mix by including your favorite nuts and seeds or even adding in some unsweetened coconut flakes or a sprinkle of dark chocolate for an extra treat.
This recipe is simple, quick to prepare, and can be stored for a long time, making it a perfect snack to have on hand.
Ingredients:
- 1 cup almonds
- 1 cup walnuts
- 1 cup pumpkin seeds
- 1 cup sunflower seeds
- 1/2 cup pecans
- 1 teaspoon sea salt
- 1 teaspoon garlic powder (optional)
- 1 teaspoon paprika (optional)
- 1 tablespoon olive oil (optional)
Cooking Instructions:
In a large mixing bowl, combine all the nuts and seeds, and if desired, drizzle with olive oil. Toss the mixture until the nuts and seeds are evenly coated.
Next, spread the mixture onto a baking sheet lined with parchment paper in an even layer. If you’re using garlic powder or paprika, sprinkle it evenly over the top.
Roast in a preheated oven at 350°F (175°C) for about 10 to 15 minutes, stirring occasionally, until golden and fragrant. Allow the mix to cool completely before transferring it to an airtight container for storage.
Extra Tips:
When preparing your nuts and seeds mix, feel free to experiment with different nuts and seeds based on your taste preferences or what you have available.
You can also try adding a touch of cinnamon or cayenne pepper for an unexpected flavor twist. Store your mix in a cool, dry place to keep it fresh, and remember to enjoy it in moderation, as nuts are calorie-dense despite being healthy!
Radishes With Cream Cheese
Radishes with cream cheese make for a revitalizing and satisfying low-carb snack that isn’t only quick to prepare but also bursting with flavor. Radishes, with their crisp texture and peppery taste, offer a delightful contrast to the rich and creamy cream cheese. This combination not only satisfies your snack cravings but also provides a healthy serving of vitamins and minerals, making it an excellent choice for anyone looking to maintain a low-carb lifestyle.
This easy-to-make snack can be enjoyed at any time of the day, whether it’s for a mid-afternoon pick-me-up or as an appetizer at a gathering. You can customize it by adding herbs or spices to the cream cheese for an extra flavor boost. The simplicity of the dish allows the natural taste of the radishes to shine, while the cream cheese adds a luscious creaminess that balances the dish perfectly.
Ingredients:
- Fresh radishes
- Cream cheese (softened)
- Salt (to taste)
- Fresh chives or dill (optional, for garnish)
- Black pepper (optional)
Instructions:
Begin by washing the radishes thoroughly under cold water to remove any dirt and debris, then slice them into halves or quarters, depending on your preference for size.
In a separate bowl, mix the softened cream cheese with a pinch of salt and black pepper, and stir until well combined. For an extra touch, you can finely chop fresh chives or dill and fold them into the cream cheese mixture.
Once the radishes are cut, spread a generous amount of the cream cheese mixture on each piece, and arrange them on a serving platter.
Extra Tips:
For added flavor, consider mixing in some garlic powder or a squeeze of lemon juice into the cream cheese. If you like a bit of heat, try sprinkling some red pepper flakes on top of the cream cheese before serving.
These radishes with cream cheese can be prepared ahead of time; just store them in the refrigerator for a quick grab-and-go snack when you need it!
Mini Caprese Skewers
Mini Caprese Skewers are a delightful and invigorating low-carb snack that combines the classic flavors of a traditional Caprese salad into a fun, bite-sized format.
Perfect for parties, picnics, or just a casual snack at home, these skewers aren’t only easy to prepare but also visually appealing. The combination of juicy cherry tomatoes, creamy mozzarella balls, and fragrant fresh basil drizzled with a balsamic reduction creates a burst of flavor that will satisfy your cravings without the carb overload.
To make your Mini Caprese Skewers even more enjoyable, consider experimenting with different types of cheese or adding a sprinkle of your favorite seasonings. These skewers are versatile and can be served as an appetizer, a side dish, or even a main course when paired with a protein.
Gather your ingredients and get ready to impress your guests with this simple yet elegant low-carb treat.
Ingredients:
- Cherry tomatoes
- Fresh mozzarella balls (bocconcini)
- Fresh basil leaves
- Balsamic glaze
- Salt and pepper (to taste)
- Skewers or toothpicks
Instructions:
Begin by washing the cherry tomatoes and basil leaves thoroughly.
Take a skewer or toothpick and thread one cherry tomato, followed by a fresh basil leaf, and then a mozzarella ball. Repeat this process until you have filled the skewer, usually with two or three sets per skewer.
Once assembled, arrange the skewers on a platter and drizzle with balsamic glaze, then sprinkle with salt and pepper to taste.
Extra Tips:
For added flavor, you can marinate the mozzarella balls in olive oil, garlic, and herbs for a few hours prior to assembly.
This will elevate the taste and make your Mini Caprese Skewers even more delicious. If you want to prepare them in advance, assemble the skewers and store them in the refrigerator, adding the balsamic glaze right before serving to keep them fresh and vibrant.
Dark Chocolate Covered Almonds
Dark chocolate covered almonds are a delightful snack that balances the rich flavor of dark chocolate with the satisfying crunch of almonds. Not only do they make for a delicious treat, but they’re also low in carbohydrates and packed with healthy fats, making them a perfect option for those following a low-carb diet.
These sweet and nutty bites can be enjoyed on their own or as a topping for yogurt and desserts.
Making dark chocolate covered almonds at home is incredibly simple and requires just a few ingredients. By melting quality dark chocolate and coating your almonds, you can create a snack that’s both indulgent and nutritious. Plus, this recipe allows you to control the sweetness and the type of chocolate used, ensuring you get the perfect flavor that suits your taste.
Ingredients:
- 1 cup raw almonds
- 6 oz dark chocolate (70% cacao or higher)
- 1 teaspoon coconut oil (optional)
- Sea salt (optional)
Instructions:
Begin by roasting the raw almonds in a preheated oven at 350°F (175°C) for about 10-12 minutes or until they’re fragrant and slightly golden.
While the almonds are roasting, melt the dark chocolate and coconut oil together in a microwave-safe bowl in 30-second intervals, stirring in between until smooth.
Once the almonds are roasted, let them cool slightly before adding them to the melted chocolate. Stir until the almonds are fully coated, then use a fork to transfer them onto a baking sheet lined with parchment paper.
Optionally, sprinkle a little sea salt over the top before allowing them to cool and harden.
Extra Tips:
For an added flavor twist, consider mixing in a pinch of cinnamon or cayenne pepper to the melted chocolate for a spiced version.
If you prefer a sweeter treat, you can use chocolate chips that contain stevia or erythritol as a low-carb sweetener.
Store your dark chocolate covered almonds in an airtight container at room temperature or in the refrigerator for a longer shelf life, but be sure to let them come to room temperature before enjoying for the best flavor and texture.


