

When you’re managing a gluten-free lifestyle, finding satisfying meals can be a challenge. You want lunches that not only fill you up but also excite your taste buds. From quinoa salads bursting with roasted vegetables to savory stuffed bell peppers, there are plenty of options that offer both nutrition and flavor. Let’s explore some hearty choices that will keep you energized and satisfied throughout your busy day. You might just discover a new favorite.
Quinoa Salad With Roasted Vegetables
Quinoa salad with roasted vegetables is a wholesome and nutritious dish that’s perfect for a gluten-free lunch. Quinoa, a complete protein, is rich in essential amino acids, fiber, and various vitamins and minerals. When paired with colorful roasted vegetables, it not only becomes visually appealing but also adds an array of flavors and textures.
This salad is versatile, allowing you to use seasonal vegetables or whatever you have on hand, making it a great option for meal prep or a quick lunch. The combination of warm roasted vegetables and fluffy quinoa creates a delightful contrast that can be enjoyed warm or chilled. You can also add a zesty dressing to elevate the flavors and make the dish even more satisfying.
This salad isn’t only filling but also packed with nutrients, making it a perfect choice for those looking to maintain a healthy diet without gluten.
Ingredients:
- 1 cup quinoa
- 2 cups water or vegetable broth
- 1 red bell pepper, diced
- 1 zucchini, diced
- 1 red onion, diced
- 1 cup cherry tomatoes, halved
- 2 tablespoons olive oil
- Salt and pepper to taste
- Fresh parsley or basil, chopped (for garnish)
- Juice of 1 lemon
Cooking Instructions:
Preheat your oven to 425°F (220°C). In a medium saucepan, combine the quinoa and water or vegetable broth. Bring to a boil, then reduce the heat to low, cover, and simmer for about 15 minutes, or until the quinoa is fluffy and the liquid is absorbed.
While the quinoa is cooking, toss the diced red bell pepper, zucchini, red onion, and cherry tomatoes in olive oil, salt, and pepper on a baking sheet. Roast the vegetables in the oven for 20-25 minutes until they’re tender and slightly caramelized.
Once the quinoa is ready, fluff it with a fork and combine it with the roasted vegetables and lemon juice in a large bowl. Serve warm or chilled, garnished with fresh herbs.
Extra Tips:
For added flavor, consider marinating the vegetables in balsamic vinegar or your favorite dressing before roasting. You can also mix in other ingredients such as black beans, avocados, or feta cheese for extra protein and taste.
If you want to prepare the salad ahead of time, store the quinoa and vegetables separately to keep the dish fresh and prevent sogginess.
Zucchini Noodles With Pesto and Grilled Chicken
Zucchini noodles, also known as “zoodles,” are a fantastic gluten-free alternative to traditional pasta. They provide a light and invigorating base for a variety of dishes, and when paired with homemade pesto and grilled chicken, they become a flavorful and nutritious meal.
This dish isn’t only suitable for those following a gluten-free diet but is also packed with vegetables, making it a great option for anyone looking to eat healthier.
Pesto adds a burst of flavor and richness to the zucchini noodles, while grilled chicken provides a satisfying source of protein. This recipe is simple and quick to prepare, making it perfect for a busy lunch or dinner. With just a few fresh ingredients and a bit of time, you can create a delicious meal that will impress your family or guests.
Ingredients:
- 4 medium zucchinis
- 2 cups fresh basil leaves
- 1/2 cup pine nuts
- 1/2 cup grated Parmesan cheese
- 2 cloves garlic
- 1/2 cup olive oil
- Salt and pepper to taste
- 2 boneless, skinless chicken breasts
- Olive oil for grilling
Cooking Instructions:
Begin by spiralizing the zucchinis to create noodles, then set them aside.
To make the pesto, combine the basil, pine nuts, Parmesan cheese, and garlic in a food processor, blending until finely chopped. While the processor is running, gradually add the olive oil until the mixture is smooth. Season with salt and pepper to taste.
Next, heat a grill pan over medium-high heat and brush the chicken breasts with olive oil, seasoning them with salt and pepper. Grill the chicken for about 6-7 minutes per side or until fully cooked, then let it rest before slicing.
In a large bowl, toss the zucchini noodles with the pesto until evenly coated, then serve with the grilled chicken on top.
Extra Tips:
For added flavor, consider marinating the chicken in a mix of olive oil, lemon juice, and garlic before grilling. This will infuse the meat with extra zest.
Additionally, if you prefer a warmer dish, you can sauté the zucchini noodles in a pan for a few minutes before mixing with the pesto, but be careful not to overcook them to maintain their crunch.
Feel free to customize the pesto by adding ingredients like sun-dried tomatoes or spinach for more variety. Enjoy your delicious gluten-free lunch!
Chickpea and Avocado Wraps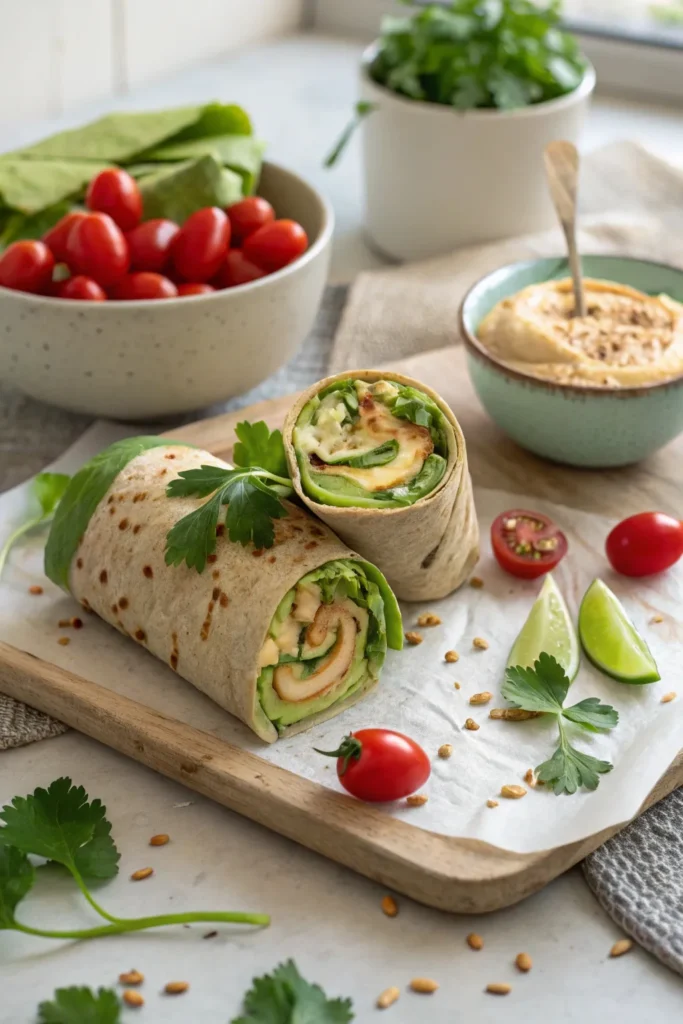
Chickpea and avocado wraps are a delicious and nutritious gluten-free lunch option that’s both easy to prepare and packed with flavor. The combination of creamy avocado with protein-rich chickpeas creates a satisfying filling that will keep you energized throughout the day.
These wraps can be customized with your favorite veggies and served with a zesty dressing, making them a versatile choice for any palate. Not only are these wraps gluten-free, but they’re also vegan, making them a great option for those with dietary restrictions.
They’re perfect for meal prepping and can be enjoyed cold or at room temperature, making them ideal for lunchboxes or picnics. With just a few simple ingredients, you can whip up a delightful meal that’s both healthy and satisfying.
Ingredients:
- 1 can chickpeas, drained and rinsed
- 1 ripe avocado
- 1 tablespoon lemon juice
- 1 teaspoon garlic powder
- Salt and pepper to taste
- 4 gluten-free wraps or tortillas
- 1 cup mixed greens (spinach, arugula, etc.)
- 1 small cucumber, sliced
- 1 small carrot, grated
- Optional: your favorite dressing or hummus
Instructions:
In a medium bowl, mash the chickpeas and avocado together until well combined but still slightly chunky. Stir in the lemon juice, garlic powder, salt, and pepper to taste.
Lay out the gluten-free wraps or tortillas and evenly distribute the chickpea and avocado mixture in the center. Top with mixed greens, cucumber slices, and grated carrot. Roll the wraps tightly, folding in the sides as you go, and slice them in half to serve.
Extra Tips:
For added flavor, consider mixing in some chopped herbs such as cilantro or parsley into the chickpea and avocado mixture. You can also include other vegetables like bell peppers or cherry tomatoes for more crunch and color.
If you want a little extra zing, try adding a splash of hot sauce or a sprinkle of red pepper flakes to the filling. These wraps can be stored in an airtight container in the fridge for up to 3 days, making them a great option for meal prep!
Stuffed Bell Peppers With Ground Turkey and Rice
Stuffed bell peppers are a delicious and nutritious option for a gluten-free lunch. This dish combines vibrant bell peppers with a savory filling made of ground turkey, rice, and a blend of spices. It’s not only visually appealing but also packed with protein and fiber, making it a fulfilling meal.
Whether you’re preparing lunch for yourself or a family gathering, these stuffed peppers are sure to impress!
To prepare this dish, you can use any color of bell pepper, including red, yellow, or green, depending on your preference. The ground turkey provides a lean source of protein, while the rice adds a comforting texture. You can also customize the filling by adding vegetables such as diced tomatoes, corn, or black beans for extra flavor and nutrition.
This recipe is easy to make and can be prepared in advance for busy weekdays.
Ingredients:
- 4 large bell peppers
- 1 lb ground turkey
- 1 cup cooked rice
- 1 small onion, diced
- 2 cloves garlic, minced
- 1 cup diced tomatoes (canned or fresh)
- 1 tsp Italian seasoning
- 1 tsp paprika
- Salt and pepper to taste
- 1 cup shredded cheese (optional)
- Olive oil for cooking
Cooking Instructions:
Preheat your oven to 375°F (190°C). Cut the tops off the bell peppers and remove the seeds and membranes.
In a skillet, heat olive oil over medium heat and sauté the diced onion and garlic until fragrant. Add the ground turkey and cook until browned. Stir in the cooked rice, diced tomatoes, Italian seasoning, paprika, salt, and pepper.
Once well combined, stuff the mixture into the hollowed bell peppers, placing them upright in a baking dish. If using cheese, sprinkle it on top of the stuffed peppers. Cover the dish with foil and bake for 30 minutes, then remove the foil and bake for an additional 10 minutes, or until the peppers are tender.
Extra Tips:
For added flavor, consider seasoning the filling with your favorite hot sauce or fresh herbs like parsley or basil.
You can also prepare the stuffed peppers in advance and store them in the refrigerator for up to 2 days before baking. If you’re looking to make this dish even heartier, try adding black beans or corn to the filling mixture.
Enjoy your gluten-free stuffed bell peppers as a meal prep option, or serve them alongside a fresh salad for a complete lunch!
Sweet Potato and Black Bean Bowl
Sweet Potato and Black Bean Bowls are a delicious and nutritious option for a gluten-free lunch. Packed with fiber, protein, and essential vitamins, this dish combines the natural sweetness of roasted sweet potatoes with the hearty texture of black beans.
It’s not only filling but also incredibly versatile, allowing you to customize it with your favorite toppings or sauces. This bowl is perfect for meal prep, as it stores well in the refrigerator and can be enjoyed throughout the week.
Whether you’re looking for a quick lunch or a satisfying dinner, the Sweet Potato and Black Bean Bowl is sure to become a favorite in your gluten-free recipe collection. Let’s get started!
Ingredients:
- 2 medium sweet potatoes, peeled and diced
- 1 can (15 oz) black beans, drained and rinsed
- 1 tablespoon olive oil
- 1 teaspoon smoked paprika
- 1 teaspoon cumin
- Salt and pepper to taste
- 1 avocado, sliced
- ¼ cup fresh cilantro, chopped
- Lime wedges for serving
- Optional toppings: salsa, Greek yogurt, or cheese
Instructions:
Preheat your oven to 425°F (220°C). Toss the diced sweet potatoes with olive oil, smoked paprika, cumin, salt, and pepper in a mixing bowl.
Spread the sweet potatoes evenly on a baking sheet and roast for about 25-30 minutes, or until tender and slightly caramelized, stirring halfway through.
Once the sweet potatoes are cooked, assemble your bowls by layering the roasted sweet potatoes, black beans, avocado slices, and cilantro. Serve with lime wedges and any optional toppings you desire.
Extra Tips:
For an extra kick of flavor, consider adding a drizzle of hot sauce or a sprinkle of chili flakes over your bowl.
You can also experiment with different grains like quinoa or brown rice as a base for your bowl, enhancing both the texture and nutritional value. This recipe is highly customizable, so feel free to add other roasted vegetables, such as bell peppers or zucchini, to suit your taste. Enjoy!
Lentil Soup With Spinach and Carrots
Lentil soup is a hearty, nutritious dish that’s perfect for lunch, especially when you’re looking for something gluten-free. Packed with protein from the lentils, vitamins from the spinach and carrots, and a comforting blend of spices, this soup isn’t only satisfying but also easy to prepare. The combination of flavors melds beautifully as it simmers, making it a delightful meal any day of the week.
This recipe for Lentil Soup with Spinach and Carrots is a breeze to make and can be enjoyed on its own or paired with gluten-free bread for a complete meal. It’s an excellent choice for meal prep as it stores well in the refrigerator and can even be frozen for later use. With just a few simple ingredients, you can whip up a nourishing soup that will warm you from the inside out.
Ingredients:
- 1 cup dried green or brown lentils, rinsed
- 1 tablespoon olive oil
- 1 onion, diced
- 2 carrots, diced
- 2 celery stalks, diced
- 3 cloves garlic, minced
- 6 cups vegetable broth
- 2 cups fresh spinach, chopped
- 1 teaspoon dried thyme
- 1 teaspoon cumin
- Salt and pepper to taste
- Juice of 1 lemon (optional)
Instructions:
In a large pot, heat the olive oil over medium heat and add the diced onion, carrots, and celery. Sauté for about 5-7 minutes until the vegetables are softened, then add the minced garlic and cook for an additional minute until fragrant.
Stir in the rinsed lentils, vegetable broth, thyme, cumin, salt, and pepper, and bring the mixture to a boil. Reduce heat to low and let it simmer for about 25-30 minutes, or until the lentils are tender. In the last few minutes of cooking, stir in the chopped spinach until wilted. If desired, add a splash of lemon juice before serving.
Extra Tips:
For added flavor, consider incorporating diced tomatoes or a bay leaf while the soup simmers. If you prefer a creamier texture, blend a portion of the soup with an immersion blender.
This soup is highly customizable, so feel free to add other vegetables like zucchini or bell peppers, or even some cooked sausage for extra protein. Store leftovers in an airtight container in the refrigerator for up to a week or freeze them for later enjoyment.
Cauliflower Fried Rice
Cauliflower fried rice is a delightful and nutritious alternative to traditional fried rice, perfect for those following a gluten-free diet. This dish isn’t only low in carbohydrates but also packed with vitamins and minerals, making it a great option for a healthy lunch.
The texture of riced cauliflower closely mimics that of regular rice, while absorbing all the flavors of the ingredients you choose to add, guaranteeing every bite is delicious.
Making cauliflower fried rice is incredibly simple and quick, making it an ideal choice for busy weekdays. You can customize this dish with your favorite vegetables, proteins, or sauces to suit your taste preferences. Whether you’re looking to use up leftover vegetables or simply want a quick meal, this recipe is versatile and satisfying.
Ingredients:
- 1 medium head of cauliflower, riced
- 2 tablespoons olive oil or sesame oil
- 3 green onions, chopped
- 2 cloves garlic, minced
- 1 cup mixed vegetables (carrots, peas, bell peppers)
- 2 large eggs, beaten
- 2-3 tablespoons gluten-free soy sauce or tamari
- Salt and pepper to taste
- Optional: cooked chicken, shrimp, or tofu for added protein
To prepare the cauliflower fried rice, start by ricing the cauliflower using a food processor or grater until it resembles the size of rice grains.
Heat the oil in a large skillet or wok over medium heat, then add the chopped green onions and minced garlic, stirring for about 1 minute until fragrant. Next, add the mixed vegetables and riced cauliflower, cooking for about 5-7 minutes until the cauliflower is tender.
Push the mixture to the side of the pan and pour in the beaten eggs, scrambling them until fully cooked. Finally, stir everything together, adding the gluten-free soy sauce, salt, and pepper to taste.
For best results, make sure that you don’t overcook the cauliflower to maintain its texture. You can also experiment with different vegetables or proteins based on what you have on hand.
If you prefer a bit of heat, consider adding a splash of sriracha or some red pepper flakes. This dish is best served immediately but can be stored in an airtight container in the refrigerator for up to three days.
Enjoy your delicious and healthy cauliflower fried rice!
Greek Salad With Feta and Olives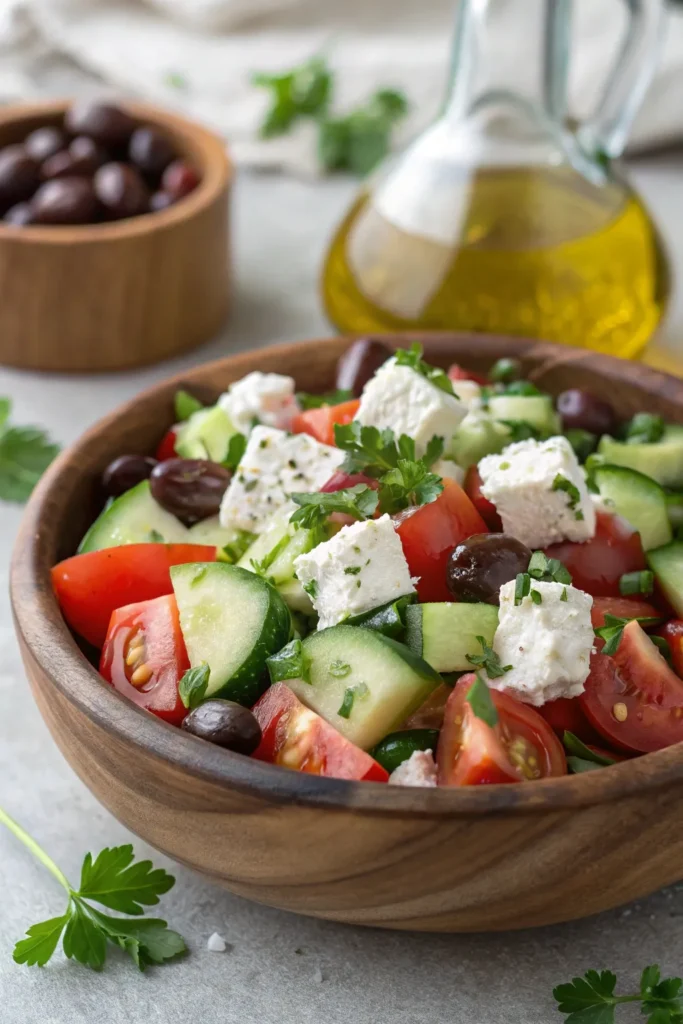
Greek Salad with Feta and Olives is a revitalizing and nutritious dish that brings the vibrant flavors of the Mediterranean right to your table. This salad isn’t only gluten-free but also packed with vitamins and minerals from the fresh vegetables. With its crisp cucumbers, ripe tomatoes, and tangy feta cheese, it’s the perfect accompaniment to any meal or a light lunch on its own.
Making a Greek salad is simple and quick, making it an ideal choice for busy weekdays. The bright colors and varied textures create an appealing presentation, while the harmonious blend of olives and feta adds a salty richness that elevates the dish. Whether you’re enjoying it at home or taking it to a picnic, this salad is sure to please.
Ingredients:
- 2 cups of cherry tomatoes, halved
- 1 cucumber, diced
- 1 red onion, thinly sliced
- 1 bell pepper (any color), diced
- 1 cup Kalamata olives, pitted
- 1 cup feta cheese, crumbled
- 1/4 cup extra virgin olive oil
- 2 tablespoons red wine vinegar
- 1 teaspoon dried oregano
- Salt and pepper to taste
In a large bowl, combine the cherry tomatoes, cucumber, red onion, bell pepper, and Kalamata olives. Gently toss the vegetables together to mix.
In a separate small bowl, whisk together the olive oil, red wine vinegar, oregano, salt, and pepper to create the dressing. Pour the dressing over the salad and toss to combine. Finally, sprinkle the crumbled feta cheese on top and serve immediately, or chill in the refrigerator for about 30 minutes to allow the flavors to meld.
When preparing Greek Salad, feel free to customize it by adding other ingredients such as avocados, artichoke hearts, or even grilled chicken for added protein.
For the freshest taste, use in-season vegetables and high-quality feta cheese. Additionally, if you prefer a creamier texture, try using a Greek yogurt dressing instead of traditional olive oil and vinegar.
Gluten-Free Turkey and Cheese Sandwich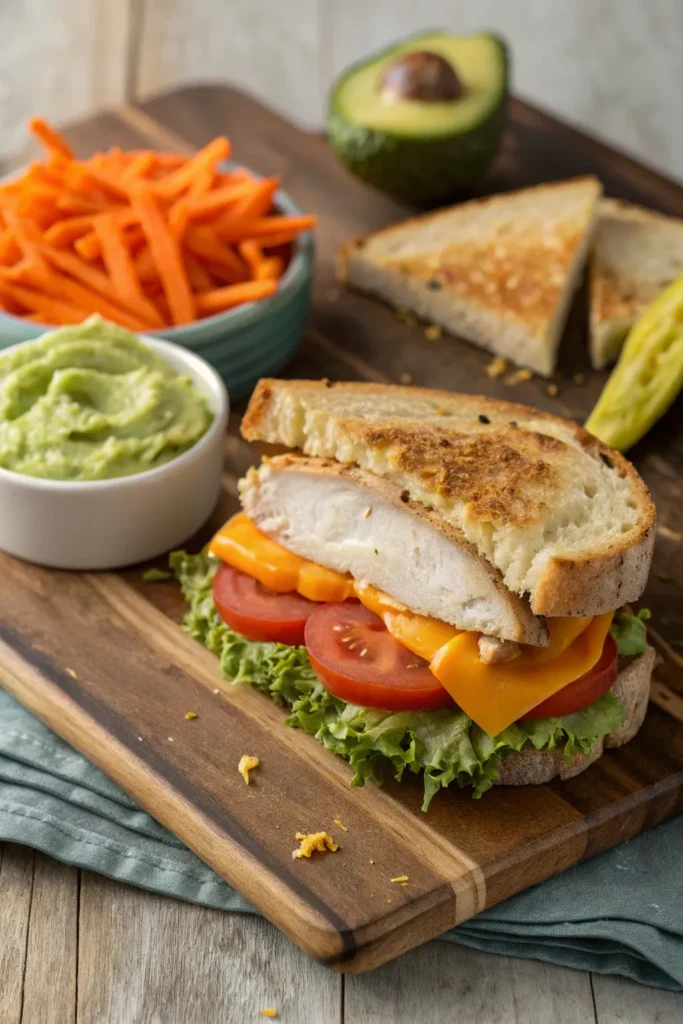
Making a gluten-free turkey and cheese sandwich is a simple and delicious way to enjoy a classic lunch without the gluten. This sandwich isn’t only quick to prepare but also versatile, allowing for various additions such as vegetables or spreads to suit your taste.
Whether you’re packing lunch for work or school or simply looking for a satisfying meal at home, this sandwich is sure to please.
To start, selecting the right gluten-free bread is essential. Many stores offer a variety of gluten-free bread options made from rice flour, almond flour, or other gluten-free grains.
Pair your chosen bread with slices of turkey breast and your favorite cheese for a filling and nutritious meal. Adding fresh vegetables, like lettuce, tomato, or cucumber, can provide extra crunch and flavor, making this sandwich a well-rounded choice.
Ingredients:
- 2 slices of gluten-free bread
- 4-6 slices of deli turkey
- 1-2 slices of cheese (cheddar, Swiss, or your choice)
- Lettuce leaves
- Tomato slices
- Mayonnaise or mustard (optional)
- Salt and pepper (to taste)
To assemble the sandwich, start by spreading mayonnaise or mustard on one or both slices of gluten-free bread if desired.
Layer the turkey slices evenly on one slice, followed by the cheese, lettuce, and tomato. Season with salt and pepper if you like.
Top it with the second slice of bread, press down gently, and cut the sandwich in half for easier handling.
When making gluten-free sandwiches, be sure to keep an eye on cross-contamination. Use clean utensils and cutting boards that haven’t been in contact with gluten-containing foods.
Also, if you’re bringing the sandwich to work or school, consider packing it in an airtight container to maintain freshness and prevent it from becoming soggy.
Enjoy your tasty and safe gluten-free meal!
Shrimp Tacos With Cabbage Slaw
Shrimp tacos with cabbage slaw are a delicious and invigorating meal that can be enjoyed any time of the year. This dish combines succulent shrimp with a crunchy, tangy slaw, all wrapped in soft corn tortillas, making for a perfect gluten-free lunch option. With a burst of flavors and textures, these tacos are sure to satisfy your cravings while keeping things light and healthy.
The beauty of shrimp tacos lies not only in their taste but also in their simplicity. Shrimp cooks quickly, and when paired with a vibrant cabbage slaw, you have a meal that comes together in no time. This recipe will guide you through creating a delightful dish that’s easy to make and packed with nutrients. So, gather your ingredients and get ready to savor these mouthwatering shrimp tacos!
Ingredients:
- 1 lb large shrimp, peeled and deveined
- 1 tablespoon olive oil
- 1 teaspoon chili powder
- 1 teaspoon cumin
- 1/2 teaspoon garlic powder
- Salt and pepper, to taste
- 4 corn tortillas
- 2 cups green cabbage, thinly sliced
- 1/2 cup carrots, grated
- 1/4 cup red onion, thinly sliced
- 1/4 cup cilantro, chopped
- 1 lime, juiced
- 1 tablespoon apple cider vinegar
- Optional toppings: avocado, salsa, or hot sauce
To prepare the shrimp tacos, start by marinating the shrimp in olive oil, chili powder, cumin, garlic powder, salt, and pepper for about 15 minutes.
While the shrimp is marinating, mix the cabbage, carrots, red onion, cilantro, lime juice, and apple cider vinegar in a bowl to create the slaw.
Heat a skillet over medium-high heat and cook the shrimp for 2-3 minutes on each side until they’re pink and cooked through.
Warm the corn tortillas in a separate skillet or microwave, then assemble the tacos by placing a few shrimp on each tortilla, topping with the cabbage slaw, and adding any optional toppings you desire.
For the best results, verify that your shrimp are fresh and not overcooked, as this can lead to a rubbery texture.
Feel free to customize the slaw by adding other ingredients like diced bell peppers or jalapeños for extra flavor.
Additionally, using homemade corn tortillas can elevate the dish even further, enhancing both the taste and texture of your shrimp tacos.
Enjoy your meal with a side of lime wedges for an added citrusy kick!


