
Is it possible to create gluten-free meals that everyone in the family will enjoy? Many believe that gluten-free options lack flavor and variety. However, there are numerous dishes that not only cater to gluten-free diets but also tantalize the taste buds. From hearty stuffed peppers to vibrant quinoa bowls, you might be surprised by the options available. Let’s explore some easy dinner ideas that could transform your weeknight meals.
Quinoa-Stuffed Bell Peppers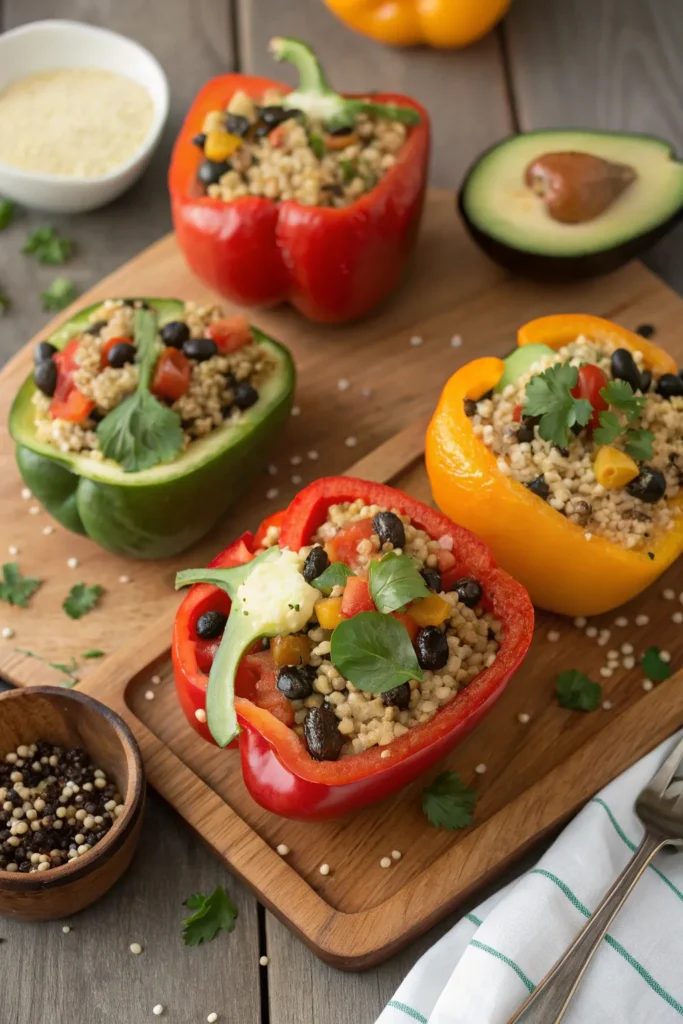
Quinoa-stuffed bell peppers are a nutritious and colorful dish that not only looks stunning on the plate but is also packed with flavor and health benefits. This gluten-free recipe is perfect for a weeknight dinner or a gathering with friends and family. The combination of quinoa, vegetables, and spices creates a hearty filling that complements the sweetness of the bell peppers. Plus, it’s a great way to sneak in some extra veggies!
To make this dish even more delightful, you can customize the filling according to your taste preferences. Add in some black beans for a protein boost, sprinkle in your favorite herbs, or top with cheese for a deliciously melty finish. These quinoa-stuffed bell peppers aren’t only filling but also versatile, making them a go-to option for a satisfying and healthy meal.
Ingredients:
- 4 large bell peppers (any color)
- 1 cup quinoa, rinsed
- 2 cups vegetable broth or water
- 1 can (15 oz) black beans, drained and rinsed
- 1 cup corn (frozen or canned)
- 1 cup diced tomatoes (fresh or canned)
- 1 teaspoon cumin
- 1 teaspoon paprika
- ½ teaspoon garlic powder
- Salt and pepper to taste
- Fresh cilantro or parsley for garnish (optional)
- Lime wedges for serving (optional)
Instructions:
Preheat the oven to 375°F (190°C). Cut the tops off the bell peppers and remove the seeds and membranes.
In a saucepan, combine quinoa and vegetable broth or water, bring to a boil, then reduce heat and simmer for 15 minutes or until the liquid is absorbed.
In a large bowl, mix the cooked quinoa, black beans, corn, diced tomatoes, cumin, paprika, garlic powder, salt, and pepper.
Fill each bell pepper with the quinoa mixture, place them upright in a baking dish, cover with foil, and bake for 25-30 minutes. Remove the foil and bake for an additional 10 minutes until the peppers are tender.
Extra Tips:
For added flavor, consider roasting the bell peppers in the oven for about 10 minutes before stuffing them to enhance their sweetness.
You can also vary the spices based on your preferences, using chili powder for a kick or Italian seasoning for a different flavor profile.
If you want a cheesy topping, sprinkle some shredded cheese on top of the stuffed peppers during the last 10 minutes of baking.
Enjoy your delicious and healthy quinoa-stuffed bell peppers!
Zucchini Noodles With Pesto and Cherry Tomatoes
Zucchini noodles, or “zoodles,” are a fantastic gluten-free alternative to traditional pasta. They aren’t only light and invigorating, but they also absorb flavors beautifully, making them a perfect canvas for a vibrant pesto sauce. This dish is a delightful way to incorporate more vegetables into your diet while still enjoying a satisfying meal.
When combined with sweet cherry tomatoes, the flavors burst in your mouth, creating a dish that feels indulgent without the heaviness. Making zucchini noodles is quick and easy, and this recipe is perfect for a weeknight dinner or a special occasion. The fresh basil pesto adds an aromatic touch, while the cherry tomatoes provide a juicy contrast.
This dish isn’t only gluten-free, but it’s also low in carbs and packed with nutrients, making it a healthy choice for anyone looking to enjoy a delicious meal without compromise.
Ingredients:
- 4 medium zucchinis
- 1 cup cherry tomatoes, halved
- 1 cup fresh basil leaves
- 2 cloves garlic
- 1/3 cup pine nuts (or walnuts)
- 1/2 cup grated Parmesan cheese (or nutritional yeast for a vegan option)
- 1/3 cup extra virgin olive oil
- Salt and pepper to taste
- Optional: crushed red pepper flakes for heat
To prepare the dish, start by spiralizing the zucchinis to create noodles. Heat a large skillet over medium heat and add a drizzle of olive oil. Sauté the zucchini noodles for about 2-3 minutes until they’re slightly tender but still al dente.
Remove the skillet from heat and toss in the halved cherry tomatoes. For the pesto, blend the basil, garlic, pine nuts, Parmesan cheese, and olive oil in a food processor until smooth. Season with salt and pepper. Combine the pesto with the zucchini noodles and cherry tomatoes, mixing well until everything is evenly coated.
Extra Tips: When spiralizing zucchinis, try to choose firm, fresh zucchinis for the best texture. You can also lightly salt the zucchini noodles before cooking to draw out excess moisture, which helps prevent the dish from becoming watery.
If you want to enhance the flavors further, consider adding grilled chicken or shrimp for protein, or toss in other seasonal vegetables for added nutrition. Enjoy your delicious and healthy gluten-free dinner!
Chicken Fajitas With Corn Tortillas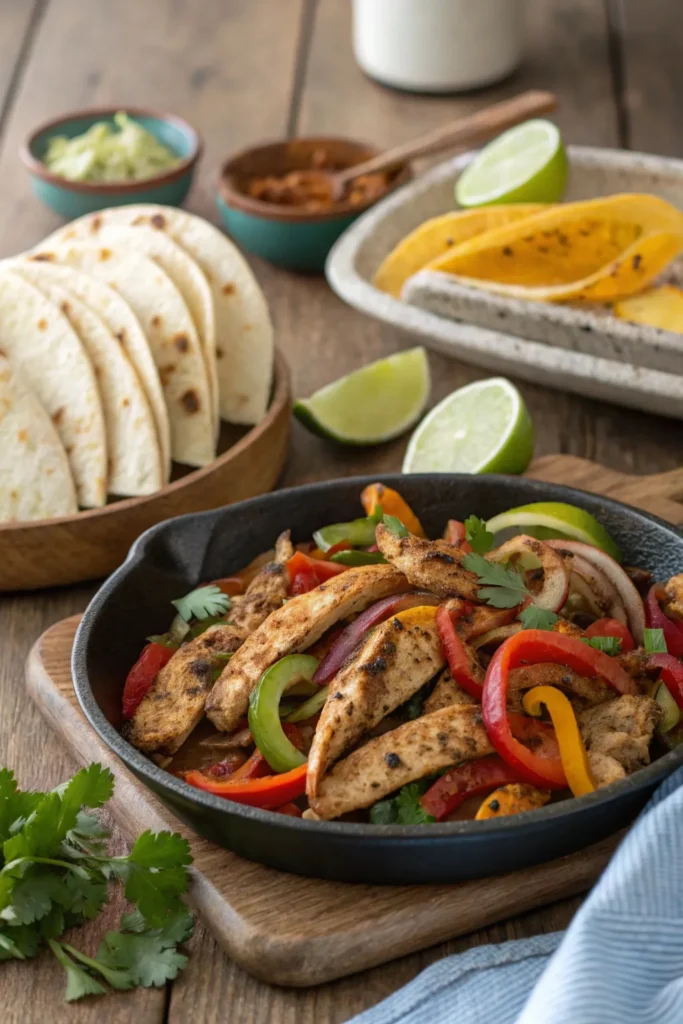
Chicken fajitas are a delicious and versatile dish that can easily be adapted to fit a gluten-free diet. Bursting with flavor, these fajitas are made with tender strips of chicken, colorful bell peppers, and onions, all seasoned with a perfect blend of spices. When served with warm corn tortillas, they create a satisfying meal that everyone can enjoy, regardless of dietary restrictions.
To make your chicken fajitas gluten-free, it’s important to use corn tortillas instead of traditional flour ones. Corn tortillas are naturally gluten-free and provide a great base for the savory filling. This recipe isn’t only simple to prepare but also allows for customization with your favorite toppings, such as guacamole, salsa, or dairy-free cheese. Gather your ingredients and get ready to enjoy a flavorful and healthy dinner!
Ingredients:
- 1 lb boneless, skinless chicken breasts
- 2 tablespoons olive oil
- 1 teaspoon chili powder
- 1 teaspoon cumin
- 1 teaspoon paprika
- 1 teaspoon garlic powder
- 1 teaspoon onion powder
- Salt and pepper, to taste
- 1 red bell pepper, sliced
- 1 green bell pepper, sliced
- 1 onion, sliced
- Corn tortillas
- Optional toppings: avocado, salsa, cilantro, lime wedges
Cooking Instructions:
In a large skillet, heat the olive oil over medium-high heat. Slice the chicken breasts into thin strips and season with chili powder, cumin, paprika, garlic powder, onion powder, salt, and pepper.
Add the seasoned chicken to the skillet and cook until browned and cooked through, about 5-7 minutes. Remove the chicken from the skillet and add the sliced bell peppers and onion, sautéing until tender and slightly charred.
Return the chicken to the skillet, mix well, and heat everything through for an additional 2-3 minutes.
Extra Tips:
For an even more flavorful dish, consider marinating the chicken in the spice mixture for at least 30 minutes before cooking. This allows the flavors to penetrate the meat more deeply.
Additionally, if you’re looking for a bit of heat, feel free to add sliced jalapeños or a dash of hot sauce. Serve the fajitas with a side of lime wedges for a zesty finish and enjoy experimenting with different toppings to find your favorite combination!
Baked Salmon With Asparagus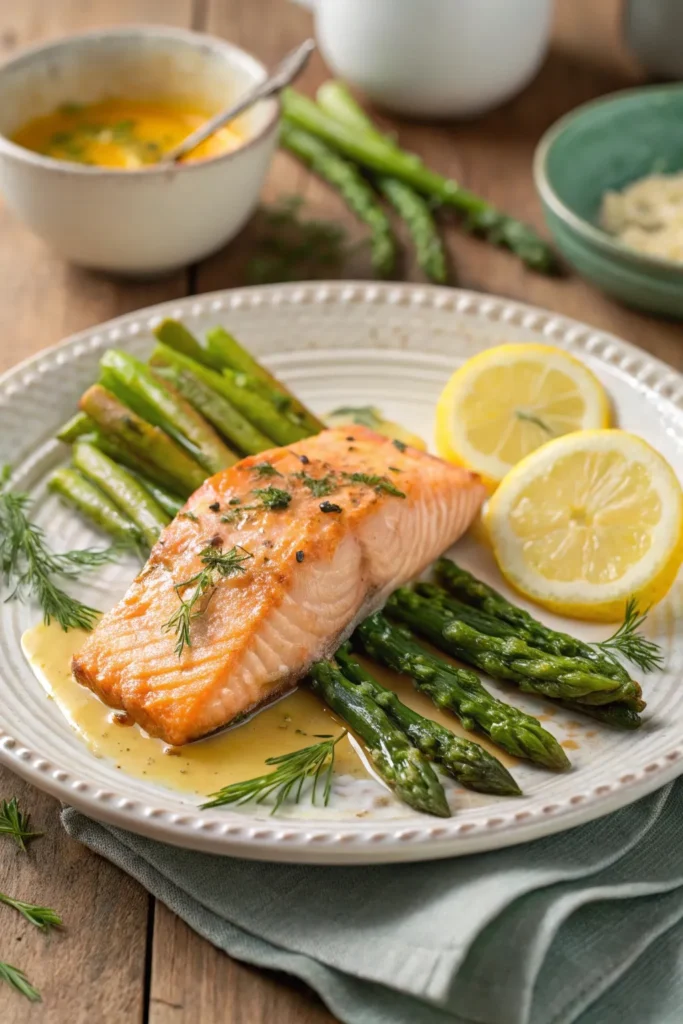
Baked salmon with asparagus is a delightful and nutritious dish that brings together the rich flavors of fresh salmon and crisp asparagus, making it an excellent choice for a gluten-free dinner. This meal isn’t only simple to prepare but also packed with omega-3 fatty acids, essential vitamins, and minerals.
The combination of tender salmon and vibrant asparagus creates a colorful presentation that’s sure to impress your family or guests. To enhance the flavors, you can season the dish with various herbs and spices, allowing you to customize it to your taste preferences.
Whether you serve it with a side of quinoa, brown rice, or a fresh salad, this baked salmon with asparagus is a satisfying and healthy option for any night of the week.
Ingredients:
- 4 salmon fillets
- 1 bunch of asparagus, trimmed
- 2 tablespoons olive oil
- 2 cloves garlic, minced
- 1 lemon, sliced
- Salt and pepper to taste
- Fresh lemon juice (optional)
- Fresh herbs (such as dill or parsley) for garnish (optional)
Cooking Instructions:
Preheat your oven to 400°F (200°C). Line a baking sheet with parchment paper. Place the salmon fillets in the center of the baking sheet and arrange the asparagus around them.
Drizzle olive oil over the salmon and asparagus, then sprinkle with minced garlic, salt, and pepper. Lay lemon slices on top of the salmon. Bake for 12-15 minutes, or until the salmon is cooked through and flakes easily with a fork, and the asparagus is tender-crisp.
Extra Tips:
For an added depth of flavor, consider marinating the salmon in a mixture of olive oil, lemon juice, and your favorite herbs for about 30 minutes before cooking.
If you prefer a crispy exterior, you can broil the salmon for an additional 2-3 minutes at the end of baking. Always check the internal temperature of the salmon to verify it reaches 145°F (63°C) for peak safety and quality.
Enjoy this dish with a glass of white wine for a perfect pairing!
Sweet Potato and Black Bean Tacos
Sweet potato and black bean tacos are a delicious and nutritious option for a gluten-free dinner. The combination of sweet potatoes and black beans provides a hearty filling that’s packed with flavor and essential nutrients. These tacos aren’t only satisfying but also easy to prepare, making them a perfect choice for busy weeknights or casual gatherings. You can customize them with your favorite toppings for an extra burst of flavor.
To make these tacos even more enjoyable, consider adding fresh ingredients like avocado, cilantro, or a zesty lime dressing. The sweet potatoes can be roasted to bring out their natural sweetness, while the black beans add a rich, earthy depth. Together, they create a vibrant and colorful dish that’s sure to impress both gluten-free eaters and those who simply enjoy great food.
Ingredients:
- 2 medium sweet potatoes, peeled and diced
- 1 can (15 oz) black beans, rinsed and drained
- 1 tablespoon olive oil
- 1 teaspoon ground cumin
- 1 teaspoon chili powder
- Salt and pepper to taste
- Corn tortillas
- Avocado, sliced (for topping)
- Fresh cilantro, chopped (for topping)
- Lime wedges (for serving)
Cooking Instructions:
Preheat your oven to 400°F (200°C). Toss the diced sweet potatoes in olive oil, cumin, chili powder, salt, and pepper, then spread them out on a baking sheet. Roast in the oven for about 25-30 minutes until tender and caramelized.
In the meantime, heat the black beans in a saucepan over medium heat until warmed through. Once the sweet potatoes are ready, assemble the tacos by placing a generous scoop of sweet potatoes and black beans onto each corn tortilla, then top with avocado slices and cilantro. Serve with lime wedges on the side for an added zing.
Extra Tips:
Feel free to experiment with different spices or add a touch of heat by including jalapeños or hot sauce. If you’re short on time, you can microwave the sweet potatoes instead of roasting them; just make sure to prick them with a fork and cook until soft.
Additionally, for a more filling meal, consider adding some sautéed onions or bell peppers to the filling. Enjoy your flavorful and wholesome tacos!
Creamy Mushroom Risotto
Creamy mushroom risotto is a delightful and comforting dish that’s perfect for any occasion, especially for those looking for gluten-free dinner options. This Italian classic is made by slowly cooking Arborio rice, allowing it to absorb the flavors of broth while releasing its starches, creating a creamy consistency without the need for added cream. The earthy flavors of mushrooms complement the rich texture of the risotto, making it a satisfying meal that can stand alone or be paired with a light salad.
To make this dish, you’ll need to gather fresh ingredients and be prepared for a bit of hands-on cooking. Risotto requires patience as you stir the rice and gradually add broth, but the result is well worth the effort. This dish can be customized with different types of mushrooms and herbs, so feel free to experiment with your favorites. With a few simple steps, you can create a delicious and gluten-free risotto that will impress your family and friends.
Ingredients:
- 1 cup Arborio rice
- 4 cups vegetable or chicken broth (gluten-free)
- 2 tablespoons olive oil
- 1 small onion, finely chopped
- 2 cloves garlic, minced
- 8 ounces mushrooms, sliced (such as cremini or shiitake)
- 1/2 cup dry white wine (optional)
- 1/2 cup grated Parmesan cheese (or nutritional yeast for a vegan option)
- Salt and pepper to taste
- Fresh parsley, chopped for garnish
Cooking Instructions:
In a large skillet, heat the olive oil over medium heat and sauté the onion until translucent, about 5 minutes. Add the garlic and sliced mushrooms, cooking until the mushrooms are browned.
Stir in the Arborio rice and cook for 1-2 minutes until the rice is slightly toasted. If using white wine, pour it in and let it simmer until mostly absorbed. Gradually add the warm broth, one ladle at a time, stirring frequently and allowing the liquid to be absorbed before adding more.
Continue this process until the rice is creamy and al dente, about 18-20 minutes. Remove from heat and stir in the Parmesan cheese, seasoning with salt and pepper to taste. Serve garnished with fresh parsley.
Extra Tips:
For the best texture, make sure to use Arborio rice, as its high starch content is essential for achieving the creamy consistency of risotto.
Keep the broth warm in a separate pot while cooking, as adding cold broth can slow down the cooking process. Additionally, don’t rush the stirring; this helps release the starch from the rice and contributes to the desired creaminess.
Feel free to add seasonal vegetables or proteins, such as chicken or shrimp, to make the dish even more filling.
Gluten-Free Pasta Primavera
Gluten-Free Pasta Primavera is a delightful and colorful dish that celebrates the freshness of seasonal vegetables paired with gluten-free pasta. This vibrant and nutritious meal isn’t only satisfying but also quick to prepare, making it perfect for busy weeknights or a leisurely weekend dinner.
The combination of a variety of vegetables, such as bell peppers, zucchini, and cherry tomatoes, brings a burst of flavor and texture that will please both gluten-free and non-gluten-free eaters alike. This recipe is highly adaptable, allowing you to use whatever vegetables are in season or available in your fridge.
Toss in some freshly grated Parmesan cheese or a sprinkle of nutritional yeast for a cheesy flavor, and finish with a drizzle of olive oil and a squeeze of lemon juice for brightness. With just a few simple ingredients and minimal cooking time, you can create a delicious and wholesome dinner that everyone will love.
Ingredients:
- 8 ounces gluten-free pasta (such as brown rice or quinoa pasta)
- 2 tablespoons olive oil
- 1 cup cherry tomatoes, halved
- 1 cup bell peppers, sliced (any color)
- 1 cup zucchini, sliced
- 1 cup broccoli florets
- 2 cloves garlic, minced
- Salt and pepper to taste
- Fresh basil or parsley for garnish
- Grated Parmesan cheese or nutritional yeast (optional)
Cooking Instructions:
Cook the gluten-free pasta according to the package instructions; drain and set aside.
In a large skillet, heat the olive oil over medium heat, then add the garlic and sauté for about 30 seconds until fragrant. Add the cherry tomatoes, bell peppers, zucchini, and broccoli to the skillet, cooking for 5-7 minutes until the vegetables are tender but still vibrant.
Combine the cooked pasta with the sautéed vegetables, season with salt and pepper, and toss everything together until well mixed.
Extra Tips:
For added flavor, consider roasting the vegetables in the oven before adding them to the pasta, which will enhance their natural sweetness.
You can also customize this dish by adding protein such as grilled chicken, shrimp, or chickpeas for a heartier meal. Don’t hesitate to experiment with different herbs and spices to suit your taste preferences; a pinch of red pepper flakes can also add a nice kick!
Cauliflower Fried Rice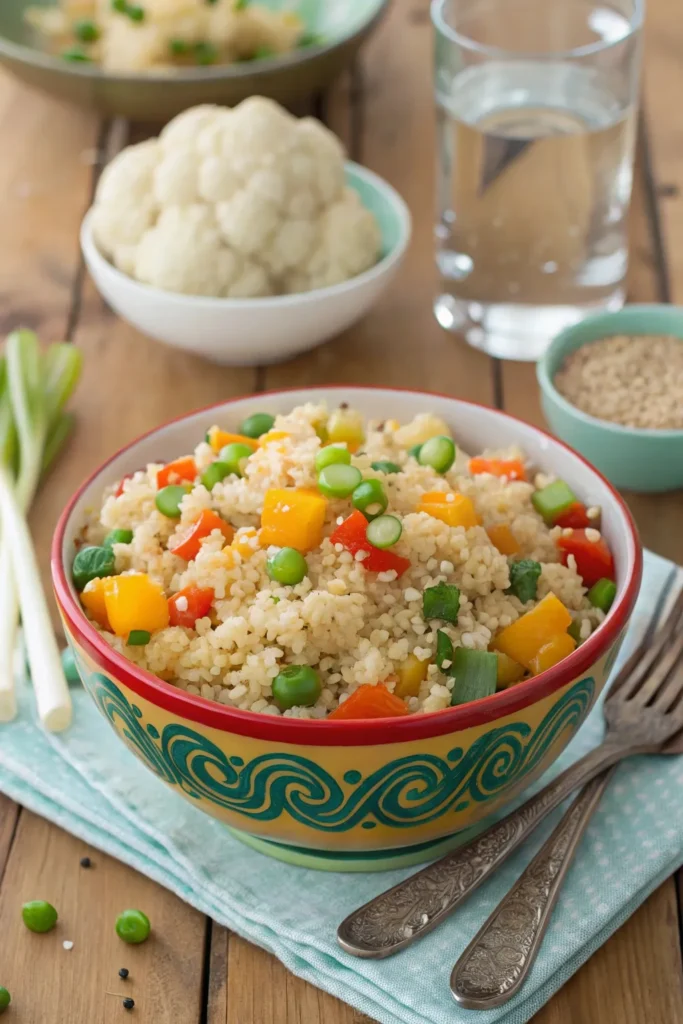
Cauliflower Fried Rice is a delicious and healthy alternative to traditional fried rice, making it a perfect gluten-free option for dinner. This dish isn’t only low in carbohydrates but also packed with nutrients, making it a great choice for anyone looking to enjoy a satisfying meal without the added gluten.
The versatility of cauliflower allows it to absorb the flavors of the ingredients you choose, providing a flavorful and colorful plate that everyone will love.
Preparing Cauliflower Fried Rice is quick and easy, making it an ideal option for busy weeknights. You can customize the recipe by adding your choice of vegetables, proteins, and seasonings, allowing you to use whatever you have on hand.
This dish can serve as a side or a main course, and it’s a fantastic way to sneak in more veggies into your diet without sacrificing taste.
Ingredients:
- 1 medium head of cauliflower, riced
- 2 tablespoons of olive oil or sesame oil
- 2 large eggs, beaten
- 1 cup of mixed vegetables (carrots, peas, bell peppers)
- 3 green onions, chopped
- 2 cloves garlic, minced
- 2 tablespoons gluten-free soy sauce or tamari
- Salt and pepper to taste
- Optional: cooked protein (chicken, shrimp, or tofu)
To cook the Cauliflower Fried Rice, start by ricing the cauliflower using a food processor or grater until it resembles rice grains.
Heat the oil in a large skillet or wok over medium-high heat. Add the minced garlic and mixed vegetables, sautéing for about 2-3 minutes until they’re tender.
Push the vegetables to one side of the skillet, pour in the beaten eggs on the other side, and scramble them until fully cooked.
Next, add the riced cauliflower to the skillet along with the gluten-free soy sauce, and mix everything together. Stir-fry for another 5-7 minutes until the cauliflower is tender and heated through.
Season with salt and pepper to taste before serving.
When making Cauliflower Fried Rice, feel free to experiment with different vegetables and proteins based on your preference.
For added flavor, you can incorporate ginger or a splash of sesame oil. If you want a spicier kick, consider adding a dash of red pepper flakes or sriracha.
Additionally, make sure that you don’t overcook the cauliflower; it should retain a bit of crunch for the best texture. Enjoy your healthy and flavorful meal!
Beef and Broccoli Stir-Fry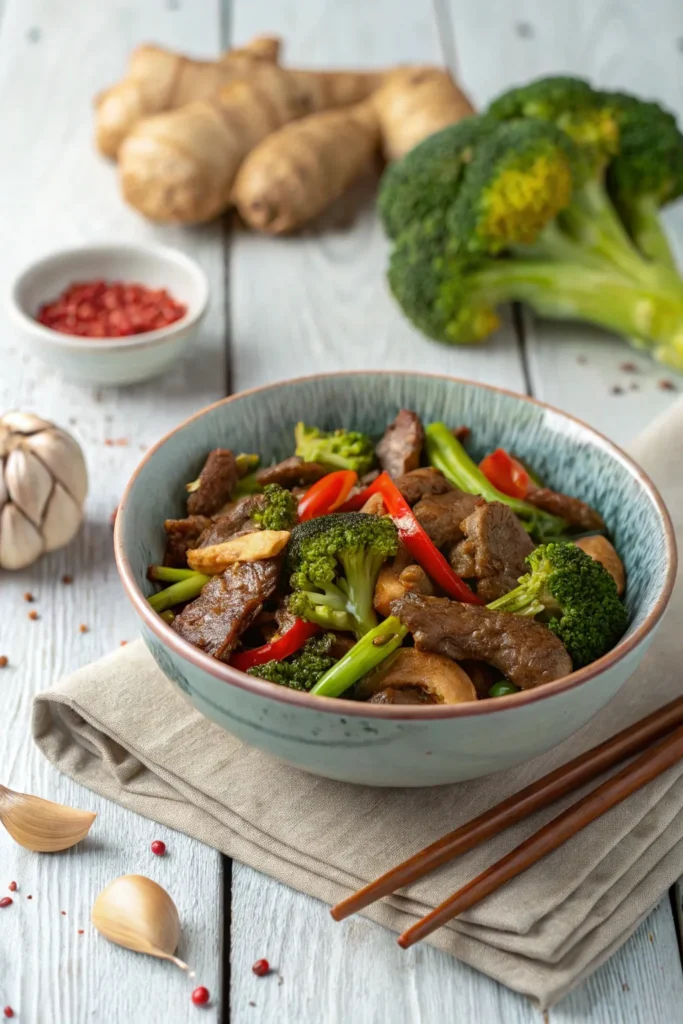
Beef and Broccoli Stir-Fry is a classic dish that combines tender beef with crisp, vibrant broccoli in a savory sauce. This gluten-free version guarantees that everyone can enjoy the rich flavors without compromising their dietary needs. With its quick cooking time and simple ingredients, this dish makes for a perfect weeknight dinner that’s both satisfying and nutritious.
To prepare Beef and Broccoli Stir-Fry, you’ll want to use high-quality beef, such as flank steak or sirloin, which can be sliced thinly for best tenderness. Fresh broccoli florets add a delightful crunch, while a homemade gluten-free soy sauce alternative enhances the umami flavor. This stir-fry isn’t only delicious but also packed with protein and fiber, making it a wholesome meal for any occasion.
Ingredients:
- 1 pound flank steak or sirloin, thinly sliced
- 4 cups fresh broccoli florets
- 2 tablespoons vegetable oil
- 3 cloves garlic, minced
- 1 tablespoon fresh ginger, minced
- 1/4 cup gluten-free soy sauce or tamari
- 2 tablespoons cornstarch
- 1 tablespoon sesame oil
- 1 tablespoon rice vinegar
- Salt and pepper to taste
- Cooked rice or quinoa for serving
Cooking Instructions:
In a large skillet or wok, heat the vegetable oil over medium-high heat. Add the sliced beef and stir-fry for about 3-4 minutes until browned and cooked through. Remove the beef from the skillet and set aside.
In the same skillet, add the minced garlic and ginger, sautéing for about 30 seconds until fragrant. Add the broccoli florets and stir-fry for another 3-4 minutes until they turn bright green and are tender-crisp.
In a small bowl, mix together the gluten-free soy sauce, cornstarch, sesame oil, and rice vinegar. Return the beef to the skillet, pour the sauce over the mixture, and stir until everything is well coated and the sauce thickens, about 1-2 minutes.
Season with salt and pepper to taste, and serve over cooked rice or quinoa.
Extra Tips:
For the best flavor, make sure to slice the beef against the grain, which helps to promote tenderness. You can also customize this stir-fry by adding other vegetables such as bell peppers, carrots, or snap peas.
If you prefer a bit of heat, consider adding red pepper flakes or a dash of chili sauce to the sauce mixture. Enjoy your delicious and healthy Beef and Broccoli Stir-Fry with family and friends!
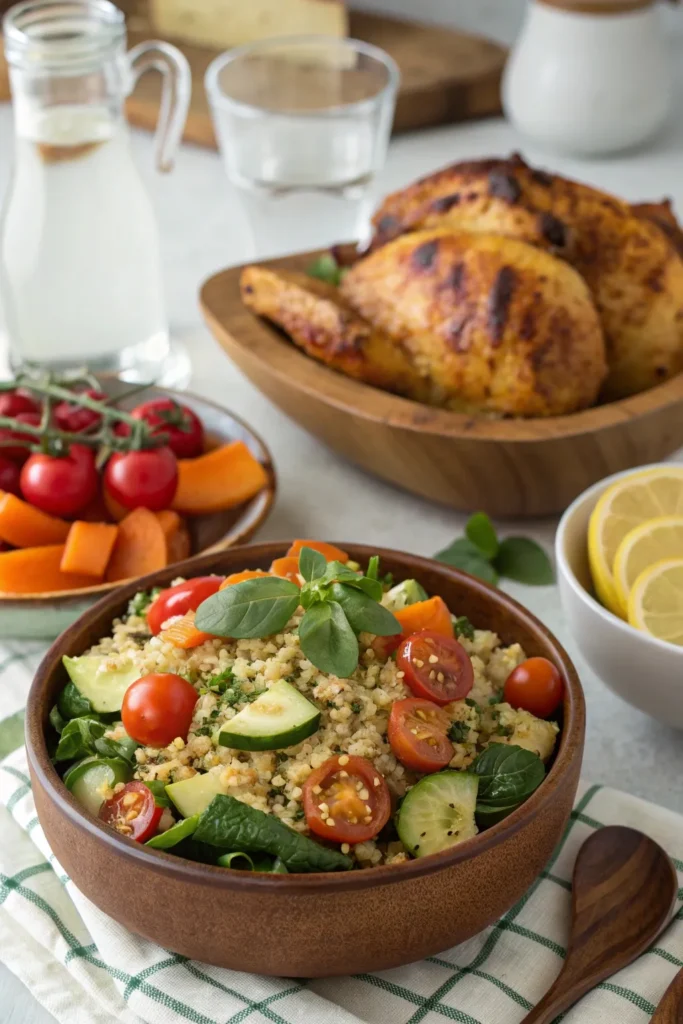
Mexican Quinoa Bowl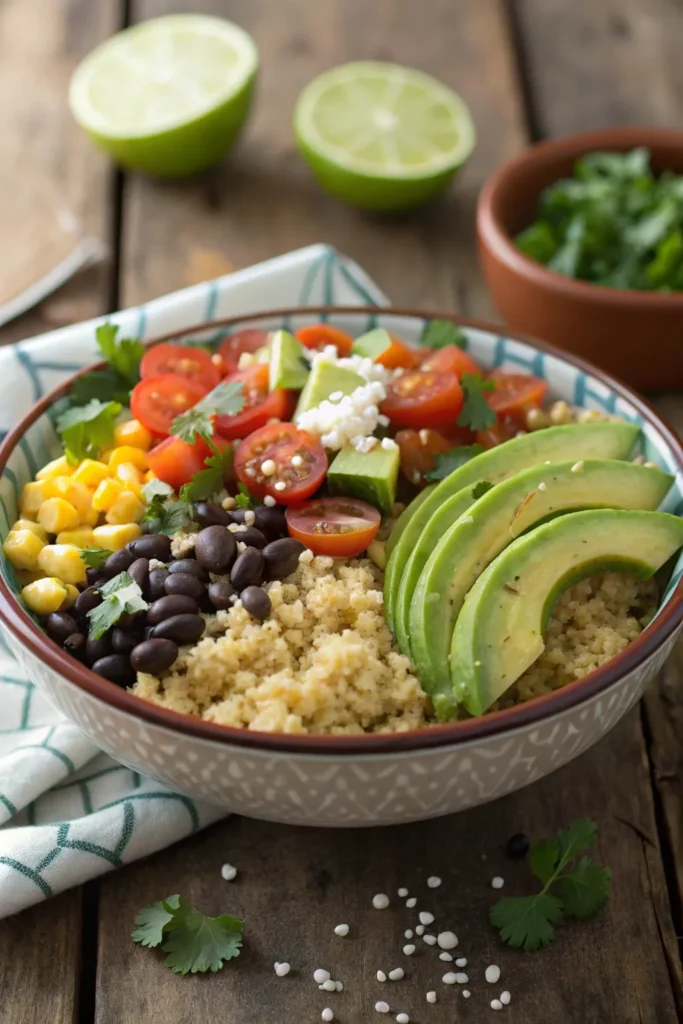
A Mexican Quinoa Bowl is a delicious and nutritious option for a gluten-free dinner. This vibrant dish is packed with protein, fiber, and a variety of colorful vegetables, making it a perfect choice for a wholesome meal. The combination of quinoa, black beans, corn, and fresh avocado, all seasoned with zesty lime and spices, creates a satisfying and flavorful experience that’s sure to please everyone at the table.
Not only is this recipe easy to prepare, but it’s also highly customizable. You can add your favorite toppings, such as salsa, cilantro, or cheese, and adjust the spices to suit your taste. This makes it an excellent option for meal prep, as you can prepare a large batch and enjoy it throughout the week. Gather your ingredients and get ready to whip up a vibrant Mexican Quinoa Bowl that will leave you feeling satisfied and nourished.
Ingredients:
- 1 cup quinoa
- 2 cups vegetable broth
- 1 can black beans, rinsed and drained
- 1 cup corn (fresh, frozen, or canned)
- 1 red bell pepper, diced
- 1 avocado, diced
- 1/2 red onion, diced
- 1 cup cherry tomatoes, halved
- 1 lime, juiced
- 1 teaspoon cumin
- 1 teaspoon chili powder
- Salt and pepper to taste
- Fresh cilantro, chopped (for garnish)
Cooking Instructions:
Start by rinsing the quinoa under cold water, then combine it with the vegetable broth in a medium saucepan. Bring to a boil, reduce the heat, and simmer for about 15 minutes or until the quinoa is cooked and the liquid is absorbed.
In a large mixing bowl, combine the cooked quinoa with black beans, corn, red bell pepper, red onion, cherry tomatoes, lime juice, cumin, chili powder, salt, and pepper. Toss everything together until well mixed, then serve in bowls topped with diced avocado and fresh cilantro.
Extra Tips:
For added flavor, consider marinating the black beans in lime juice and spices for a few hours before adding them to the bowl. You can also switch up the vegetables based on what you have on hand or what’s in season.
If you prefer a bit of heat, add diced jalapeños or a splash of hot sauce. Feel free to experiment with different toppings like feta cheese or sour cream for a creamier texture. Enjoy your colorful and nutritious meal!
Grilled Lemon Herb Chicken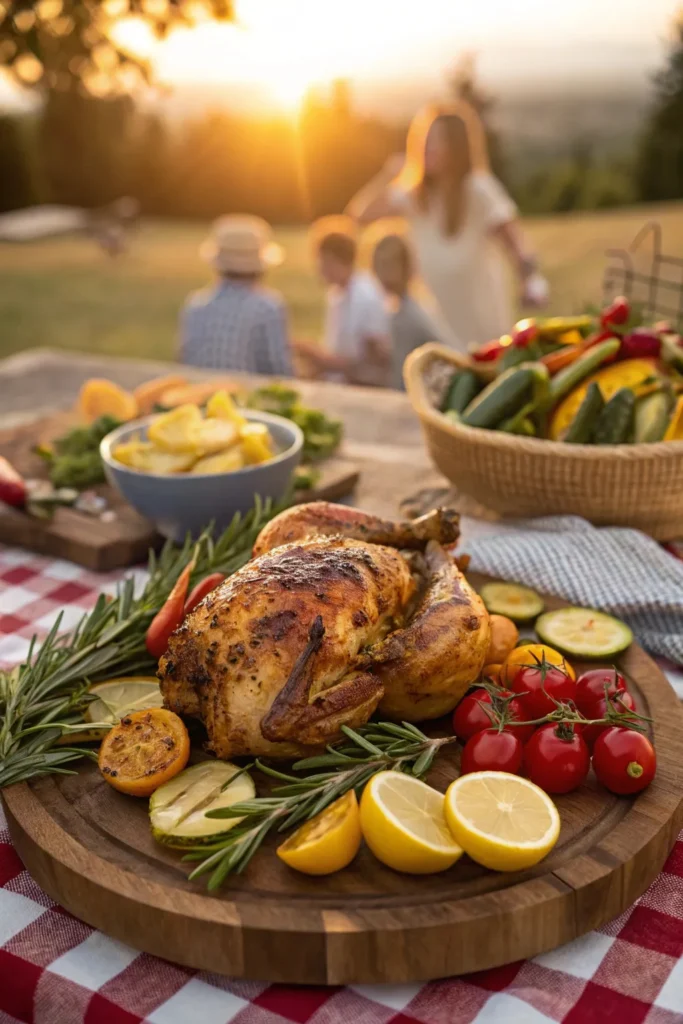
Grilled Lemon Herb Chicken is a flavorful and healthy option for a gluten-free dinner that’s sure to impress your family and friends. The combination of fresh herbs, zesty lemon, and tender chicken creates a delicious dish that’s perfect for a summer barbecue or a cozy weeknight meal. This recipe isn’t only gluten-free but also packed with protein, making it a nutritious choice for those seeking to maintain a balanced diet.
Marinating the chicken in a blend of lemon juice, olive oil, and herbs infuses it with vibrant flavors and helps to keep it moist during grilling. This dish pairs wonderfully with a side of grilled vegetables, a fresh salad, or even a quinoa pilaf for a complete meal.
Whether you’re a seasoned cook or just starting out, this Grilled Lemon Herb Chicken is easy to prepare and sure to become a favorite in your home.
Ingredients:
- 4 boneless, skinless chicken breasts
- 1/4 cup olive oil
- 1/4 cup fresh lemon juice
- Zest of 1 lemon
- 2 cloves garlic, minced
- 1 tablespoon fresh rosemary, chopped
- 1 tablespoon fresh thyme, chopped
- 1 tablespoon fresh parsley, chopped
- Salt and pepper to taste
To prepare the Grilled Lemon Herb Chicken, start by whisking together the olive oil, lemon juice, lemon zest, minced garlic, rosemary, thyme, parsley, salt, and pepper in a bowl.
Place the chicken breasts in a resealable plastic bag or shallow dish, then pour the marinade over the chicken, guaranteeing it’s well-coated. Seal the bag or cover the dish and refrigerate for at least 30 minutes, or up to 4 hours for more intense flavor.
Preheat the grill to medium-high heat, then grill the marinated chicken for about 6-7 minutes on each side, or until the internal temperature reaches 165°F. Remove the chicken from the grill and let it rest for a few minutes before slicing and serving.
For best results, verify that your chicken is at room temperature before grilling for even cooking. If you want to add an extra touch of flavor, consider garnishing the grilled chicken with additional fresh herbs or a sprinkle of lemon zest just before serving.
This dish can also be made ahead of time and served cold in salads or wraps, making it a versatile option for meal prep or picnics.
Mediterranean Chickpea Salad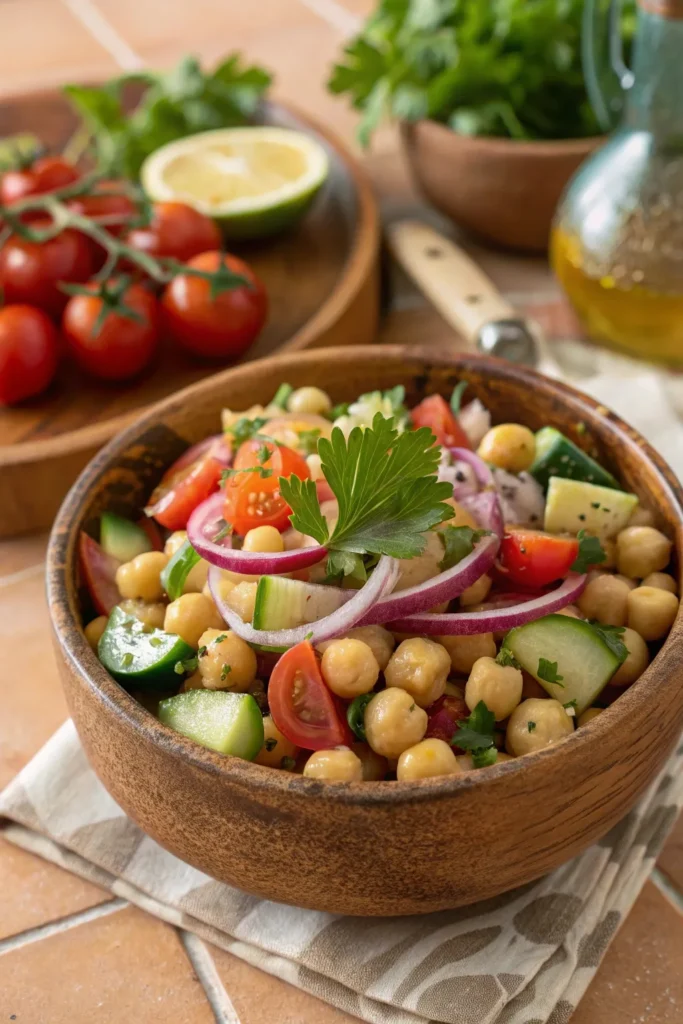
Mediterranean Chickpea Salad is a vibrant and invigorating dish that perfectly embodies the flavors of the Mediterranean region. This salad isn’t only gluten-free but also packed with protein and fiber, making it a healthy and satisfying choice for any meal. The combination of chickpeas, fresh vegetables, and a zesty dressing offers a delightful medley of textures and flavors that will tantalize your taste buds.
Whether served as a light lunch, a side dish, or a main course, this salad is sure to please everyone at the table. The beauty of this Mediterranean Chickpea Salad lies in its simplicity. With just a handful of ingredients, you can create a dish that’s both nutritious and delicious. You can customize it according to your preferences by adding or omitting ingredients.
This salad is also perfect for meal prep, as it holds up well in the refrigerator, allowing the flavors to meld together over time. Gather your ingredients and get ready to enjoy this nutrient-packed salad in no time!
Ingredients:
- 1 can (15 oz) chickpeas, drained and rinsed
- 1 cup cherry tomatoes, halved
- 1 cucumber, diced
- 1/2 red onion, finely chopped
- 1/2 bell pepper, diced (any color)
- 1/4 cup Kalamata olives, pitted and sliced
- 1/4 cup feta cheese, crumbled (optional)
- 1/4 cup fresh parsley, chopped
- 3 tablespoons olive oil
- 2 tablespoons red wine vinegar
- 1 teaspoon dried oregano
- Salt and pepper to taste
- Lemon wedges for serving
In a large mixing bowl, combine the chickpeas, cherry tomatoes, cucumber, red onion, bell pepper, Kalamata olives, feta cheese (if using), and parsley. In a separate small bowl, whisk together the olive oil, red wine vinegar, dried oregano, salt, and pepper until well combined.
Pour the dressing over the chickpea mixture and gently toss to combine, ensuring that all ingredients are evenly coated with the dressing. Allow the salad to sit for about 15 minutes to let the flavors meld before serving. Serve with lemon wedges on the side for an extra burst of invigoration.
For an added touch, consider incorporating other ingredients like avocado or roasted red peppers to enhance the flavor profile. This salad can also be served over a bed of greens for a heartier meal.
If you’re preparing it ahead of time, store the dressing separately and mix it in just before serving to keep the salad fresh and crisp. Enjoy experimenting with various herbs and spices to make this dish uniquely yours!
Stuffed Acorn Squash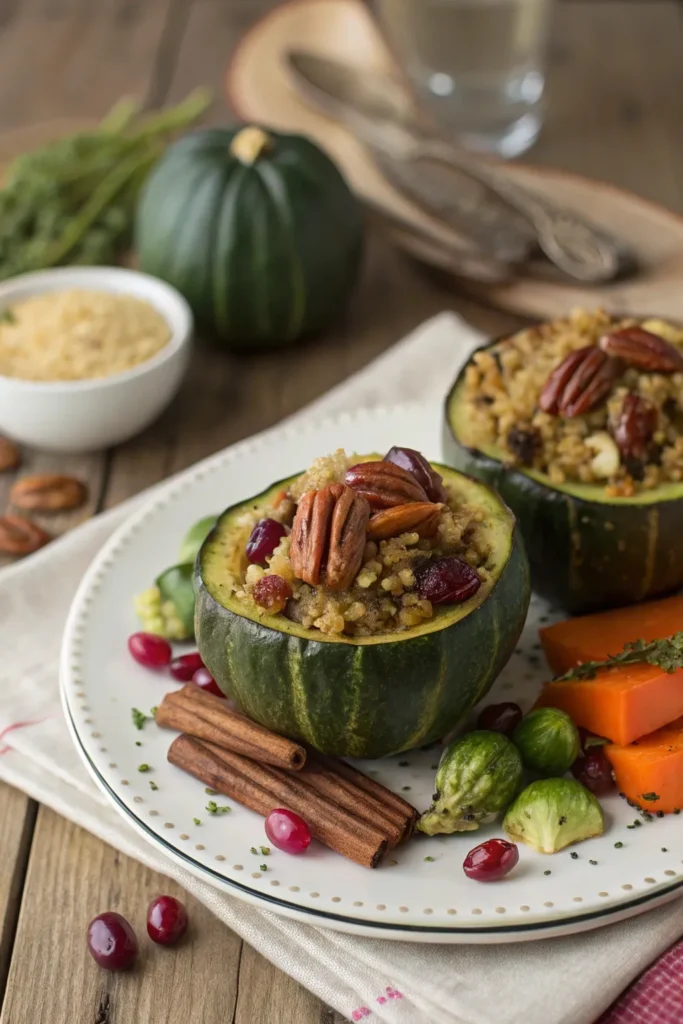
Stuffed acorn squash is a delicious and visually appealing dish that’s perfect for a gluten-free dinner. This recipe combines the natural sweetness of roasted acorn squash with a savory stuffing made from quinoa, vegetables, and spices, creating a wholesome meal that’s packed with flavor and nutrients. The squash serves as both the vessel and the star of the dish, making it a satisfying option for both vegetarians and meat-eaters alike.
Preparing stuffed acorn squash isn’t only simple but also allows for plenty of customization based on your preferences or what you have on hand. You can easily switch up the stuffing ingredients to include your favorite vegetables, legumes, or grains. This flexibility makes it a great dish for any occasion, whether it’s a cozy family dinner or a gathering with friends.
Ingredients:
- 2 acorn squashes
- 1 cup quinoa, rinsed
- 2 cups vegetable broth
- 1 small onion, diced
- 2 cloves garlic, minced
- 1 cup diced bell pepper (any color)
- 1 cup chopped spinach or kale
- 1 teaspoon dried thyme
- 1 teaspoon ground cumin
- 1/2 teaspoon salt
- 1/4 teaspoon black pepper
- 1/4 cup chopped walnuts or pecans (optional)
- Olive oil for drizzling
Instructions:
Preheat your oven to 400°F (200°C). Cut the acorn squashes in half and scoop out the seeds. Place them cut-side up on a baking sheet, drizzle with olive oil, and season with salt and pepper.
In a medium saucepan, combine the rinsed quinoa and vegetable broth, bringing it to a boil. Once boiling, reduce the heat to low, cover, and simmer for about 15 minutes or until the quinoa is fluffy.
Meanwhile, in a skillet over medium heat, sauté the onion and garlic until translucent. Then add the bell pepper, spinach or kale, thyme, cumin, salt, and pepper, cooking until the vegetables are tender.
Combine the sautéed vegetables with the cooked quinoa, and mix in the nuts if using. Stuff the quinoa mixture into the roasted acorn squash halves and return to the oven for an additional 15-20 minutes until everything is heated through and the squash is tender.
Extra Tips:
When selecting acorn squash, look for ones that feel heavy for their size and have a firm, unblemished skin. To make the preparation even easier, you can roast the acorn squash ahead of time and store it in the refrigerator until you’re ready to stuff it.
For added flavor, consider incorporating spices like paprika or chili powder into the stuffing, or topping the dish with a sprinkle of feta cheese or nutritional yeast for a cheesy flavor without gluten. Enjoy experimenting with different stuffing combinations to make this dish your own!


