
When it comes to meal prep, having a solid plan can make all the difference. You want lunches that not only taste great but also stay fresh throughout the week. Whether you’re craving something hearty or light, there’s a variety of options that fit the bill. From vibrant salads to protein-packed bowls, each choice offers unique flavors and nutrition. Let’s explore some of the best meals you can prepare to make your week easier and more delicious.
Mediterranean Quinoa Salad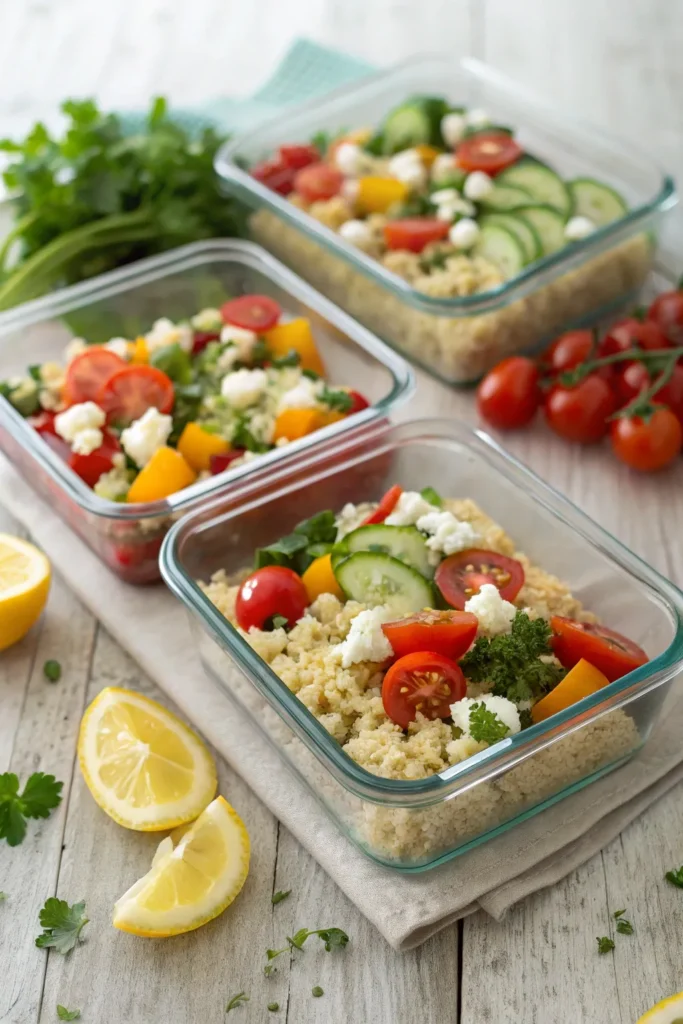
Mediterranean Quinoa Salad is a vibrant and nutritious dish that combines the wholesome goodness of quinoa with the fresh flavors of the Mediterranean. This salad not only serves as a delicious lunch option but is also perfect for meal prep, allowing you to enjoy it throughout the week. Packed with protein, fiber, and a variety of colorful vegetables, this salad is both satisfying and invigorating, making it an ideal choice for health-conscious eaters.
The beauty of this dish lies in its versatility; you can easily customize it to suit your taste preferences or what you have on hand. Whether you’re serving it as a side dish or a main course, Mediterranean Quinoa Salad is sure to impress with its bright flavors and delightful textures. It can be enjoyed chilled or at room temperature, making it perfect for picnics, potlucks, or a quick lunch at your desk.
Ingredients:
- 1 cup quinoa, rinsed
- 2 cups water or vegetable broth
- 1 cup cherry tomatoes, halved
- 1 cucumber, diced
- 1 bell pepper, diced (any color)
- 1/2 red onion, finely chopped
- 1/2 cup Kalamata olives, pitted and sliced
- 1/2 cup feta cheese, crumbled
- 1/4 cup fresh parsley, chopped
- 1/4 cup olive oil
- 2 tablespoons red wine vinegar
- 1 teaspoon dried oregano
- Salt and pepper to taste
In a medium saucepan, combine the rinsed quinoa and water (or vegetable broth) and bring to a boil over medium-high heat. Once boiling, reduce the heat to low, cover, and let it simmer for about 15 minutes or until the quinoa is fluffy and the liquid has been absorbed.
Allow the quinoa to cool slightly, then transfer it to a large mixing bowl. Add the cherry tomatoes, cucumber, bell pepper, red onion, olives, feta cheese, and parsley.
In a separate small bowl, whisk together the olive oil, red wine vinegar, oregano, salt, and pepper. Pour the dressing over the salad and toss gently to combine all the ingredients.
For best results, let the Mediterranean Quinoa Salad chill in the refrigerator for at least 30 minutes before serving. This allows the flavors to meld beautifully.
You can store leftovers in an airtight container in the fridge for up to five days. Feel free to add other ingredients such as grilled chicken, chickpeas, or avocado to make the salad even more filling. Adjust the dressing to your preference, adding more vinegar or olive oil if desired, and enjoy this healthy and colorful dish!
Chickpea and Avocado Wraps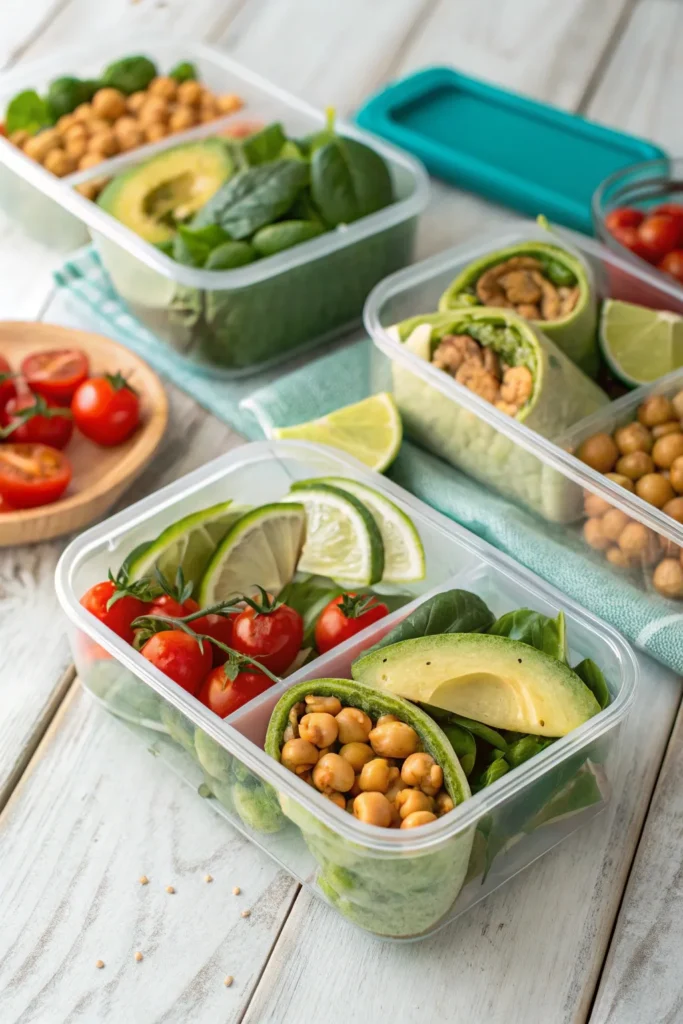
Chickpea and avocado wraps are a delicious and nutritious meal option perfect for meal prepping lunches. Packed with protein and healthy fats, these wraps provide sustained energy throughout the day. The combination of creamy avocado, hearty chickpeas, and fresh vegetables creates a satisfying and flavorful dish that can be enjoyed at home or on the go.
Making these wraps isn’t only simple but also allows for customization based on your preferences. You can add additional ingredients such as leafy greens, cucumbers, or even a splash of hot sauce for a little kick. These wraps can be prepared in advance, making them an ideal choice for busy weekdays or when you’re looking for a healthy lunch option.
Ingredients:
- 1 can chickpeas, drained and rinsed
- 1 ripe avocado
- 1 tablespoon lemon juice
- Salt and pepper, to taste
- 4 whole wheat tortillas
- 1 cup spinach or mixed greens
- 1 small cucumber, sliced
- Optional: hot sauce or your favorite dressing
Cooking Instructions:
In a mixing bowl, mash the avocado and combine it with the chickpeas, lemon juice, salt, and pepper until well mixed but still slightly chunky.
Lay out the tortillas and evenly spread the chickpea and avocado mixture on each one, leaving some space at the edges.
Top with spinach, cucumber slices, and any additional toppings you desire.
Roll the tortillas tightly and slice them in half to serve.
Extra Tips:
To make these wraps even more flavorful, consider adding some spices like cumin or paprika to the chickpea mixture.
If you’re meal prepping for the week, wrap each individual wrap in foil or parchment paper to keep them fresh.
Store them in the refrigerator for up to five days.
When ready to eat, you can enjoy them cold or warm them slightly in a skillet for a different texture.
Teriyaki Chicken Rice Bowls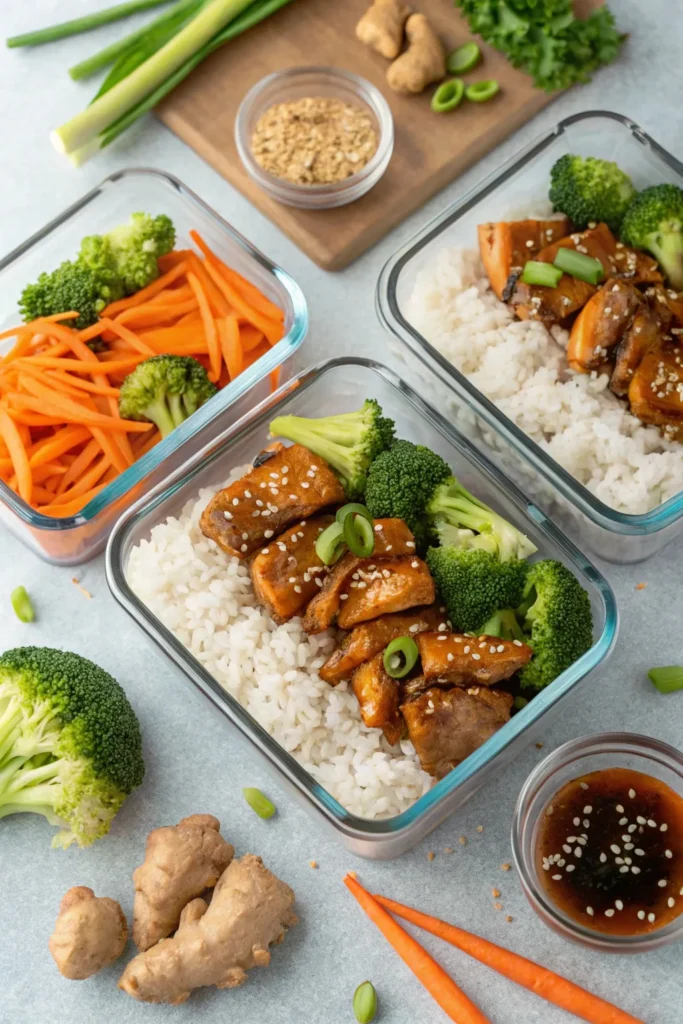
Teriyaki Chicken Rice Bowls are a delicious and satisfying meal prep option that can bring a taste of the Far East to your lunch routine. The tender chicken breasts are marinated in a sweet and savory teriyaki sauce, then grilled or sautéed to perfection. Served over a bed of fluffy rice and accompanied by vibrant vegetables, these rice bowls aren’t only flavorful but also packed with nutrients, making them a well-rounded meal that’s easy to prepare in advance.
This dish is highly customizable, allowing you to swap in your favorite vegetables or even substitute chicken for tofu or shrimp if you prefer. The beauty of meal prepping is that you can make a large batch and portion it out for the week, guaranteeing you have quick, homemade lunches ready to go. With just a little planning, you can enjoy the vibrant flavors of Teriyaki Chicken Rice Bowls while saving time and money.
Ingredients:
- 1 lb boneless, skinless chicken breasts
- 1/2 cup teriyaki sauce
- 2 cups cooked jasmine or brown rice
- 1 cup broccoli florets
- 1 cup sliced bell peppers (any color)
- 1/2 cup shredded carrots
- 2 tablespoons sesame oil
- 1 tablespoon olive oil
- 1 tablespoon sesame seeds (optional)
- Green onions for garnish (optional)
Cooking Instructions:
Begin by marinating the chicken breasts in teriyaki sauce for at least 30 minutes, or preferably overnight in the refrigerator for enhanced flavor.
In a large skillet, heat olive oil over medium-high heat and add the marinated chicken. Cook for about 6-7 minutes on each side until the chicken is cooked through and reaches an internal temperature of 165°F. Remove the chicken from the skillet and let it rest before slicing it into bite-sized pieces.
In the same skillet, add sesame oil and stir-fry the broccoli, bell peppers, and carrots for about 5 minutes, or until they’re tender-crisp.
Assemble the bowls by placing a serving of rice at the bottom, topped with the sliced chicken and stir-fried vegetables. Drizzle with additional teriyaki sauce if desired and garnish with sesame seeds and green onions.
Extra Tips:
When meal prepping, consider using a rice cooker to guarantee perfectly cooked rice every time.
If you want to save even more time, you can buy pre-cooked chicken or rotisserie chicken from the store. Feel free to add other veggies like snap peas or zucchini to the mix, and for a bit of heat, try adding some red pepper flakes.
These rice bowls can be stored in airtight containers in the fridge for up to four days, making them a convenient and tasty option for your meal prep needs.
Greek Pasta Salad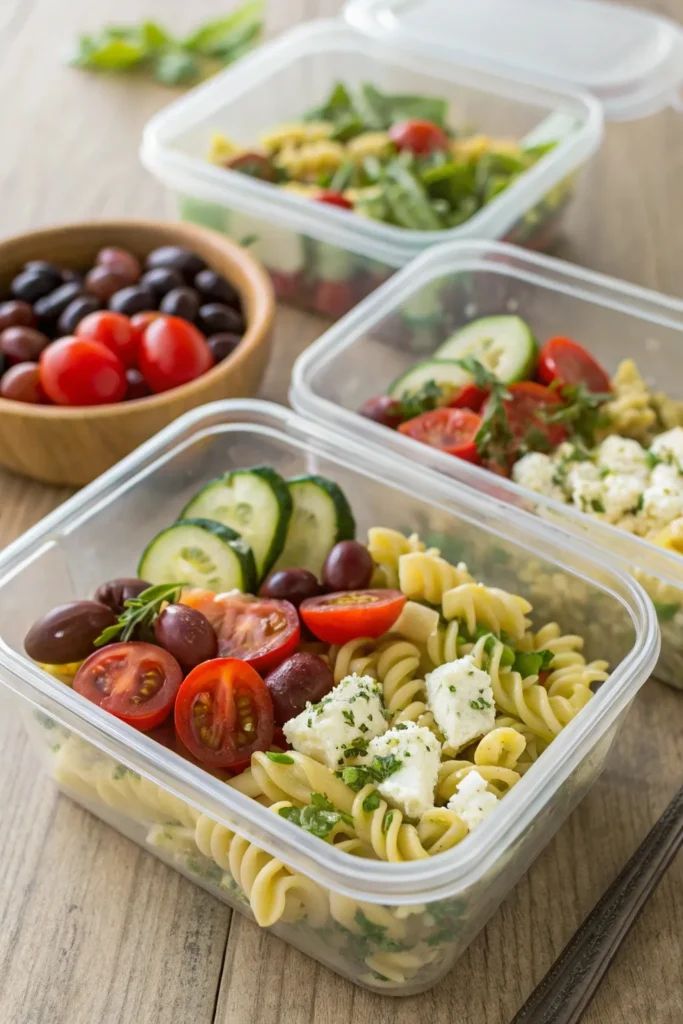
Greek Pasta Salad is a revitalizing and vibrant dish that’s perfect for meal prep lunches. This delightful salad combines the flavors of Mediterranean cuisine, offering a mix of textures and tastes that aren’t only satisfying but also healthy.
With its colorful ingredients, this pasta salad is a feast for the eyes and the palate, making it an ideal choice for work or school lunches.
The great thing about Greek Pasta Salad is its versatility. You can easily customize it based on your preferences or what you have on hand. Whether you prefer whole wheat pasta for added fiber or want to include more veggies like bell peppers or cucumbers, feel free to get creative.
This dish can be made in advance and stored in the fridge, allowing the flavors to meld together beautifully, making it even more delicious when you’re ready to enjoy it.
Ingredients:
- 8 oz. pasta (penne or fusilli)
- 1 cup cherry tomatoes, halved
- 1 cucumber, diced
- 1/2 red onion, finely chopped
- 1/2 cup Kalamata olives, pitted and sliced
- 1 cup feta cheese, crumbled
- 1/4 cup fresh parsley, chopped
- 1/4 cup olive oil
- 2 tablespoons red wine vinegar
- 1 teaspoon dried oregano
- Salt and pepper to taste
Cooking Instructions:
Cook the pasta according to package directions until al dente, then drain and rinse with cold water to stop the cooking process.
In a large bowl, combine the cooked pasta, cherry tomatoes, cucumber, red onion, olives, feta cheese, and parsley.
In a small bowl, whisk together olive oil, red wine vinegar, dried oregano, salt, and pepper. Pour the dressing over the pasta salad and toss gently to combine.
Refrigerate for at least 30 minutes before serving to allow the flavors to meld.
Extra Tips:
For the best flavor, let your Greek Pasta Salad sit in the refrigerator for a few hours or overnight before serving. This will allow the dressing to soak into the pasta and veggies, enhancing the overall taste.
Additionally, you can add some grilled chicken or chickpeas for extra protein, making it a more filling meal. Store in an airtight container in the fridge for up to four days for ideal freshness.
Lentil and Roasted Vegetable Bowl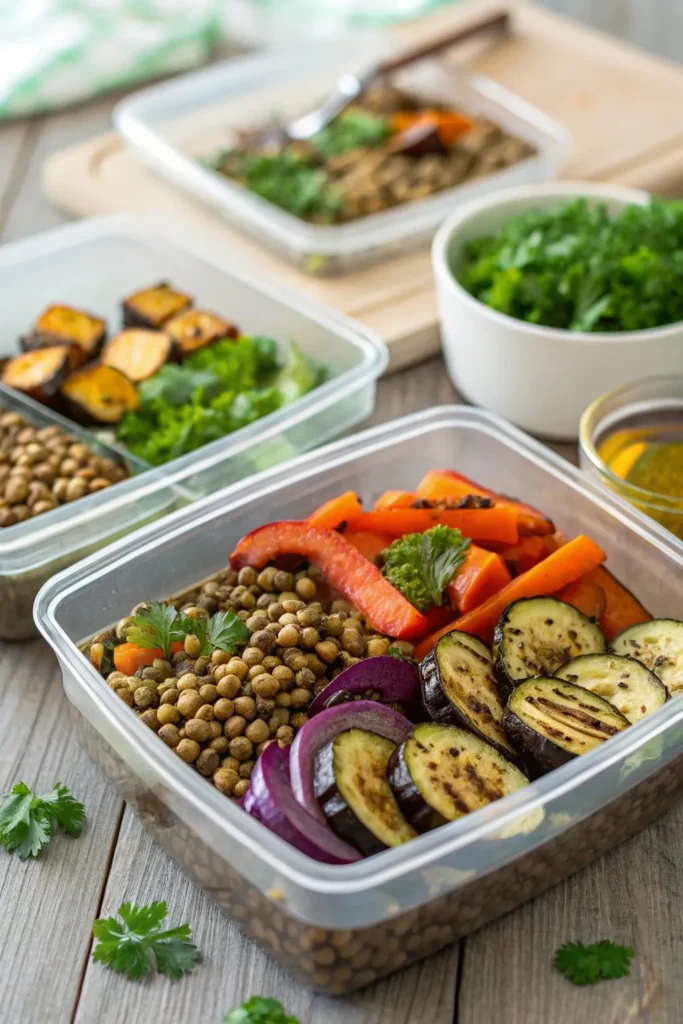
Lentil and roasted vegetable bowls are a nutritious and satisfying meal prep option that can easily fit into a busy lifestyle. Packed with protein, fiber, and an array of vitamins from the vegetables, this dish is perfect for lunch or dinner throughout the week. The combination of earthy lentils and sweet, caramelized roasted vegetables creates a delicious mix of flavors and textures that will keep you coming back for more.
To prepare this dish, you can customize the vegetables based on what you have on hand or what’s in season. This recipe is versatile, allowing you to use a variety of vegetables such as bell peppers, zucchini, carrots, or Brussels sprouts. The lentils serve as a hearty base, making this bowl filling and satisfying while being plant-based and healthy.
Ingredients:
- 1 cup green or brown lentils
- 2 cups vegetable broth or water
- 2 cups assorted vegetables (e.g., bell peppers, zucchini, carrots, and red onion)
- 2 tablespoons olive oil
- 1 teaspoon garlic powder
- 1 teaspoon smoked paprika
- Salt and pepper to taste
- Fresh parsley, for garnish (optional)
- Lemon wedges, for serving (optional)
To cook the lentil and roasted vegetable bowl, preheat your oven to 425°F (220°C). Rinse the lentils under cold water, then combine them with vegetable broth or water in a pot. Bring to a boil, reduce the heat, and simmer for about 20-25 minutes or until tender.
Meanwhile, chop your vegetables into bite-sized pieces and toss them with olive oil, garlic powder, smoked paprika, salt, and pepper. Spread the vegetables on a baking sheet and roast for 20-25 minutes, or until they’re golden and tender.
Once everything is cooked, layer the lentils and roasted vegetables in bowls, garnish with fresh parsley if desired, and serve with lemon wedges for a bright finish.
When prepping this dish, feel free to make it your own by adding your favorite spices or herbs. You can also mix in some cooked grains like quinoa or brown rice for added texture. This meal can be stored in airtight containers in the fridge for up to five days, making it a great option for meal prepping.
Consider doubling the recipe to have extra servings on hand for quick lunches throughout the week!
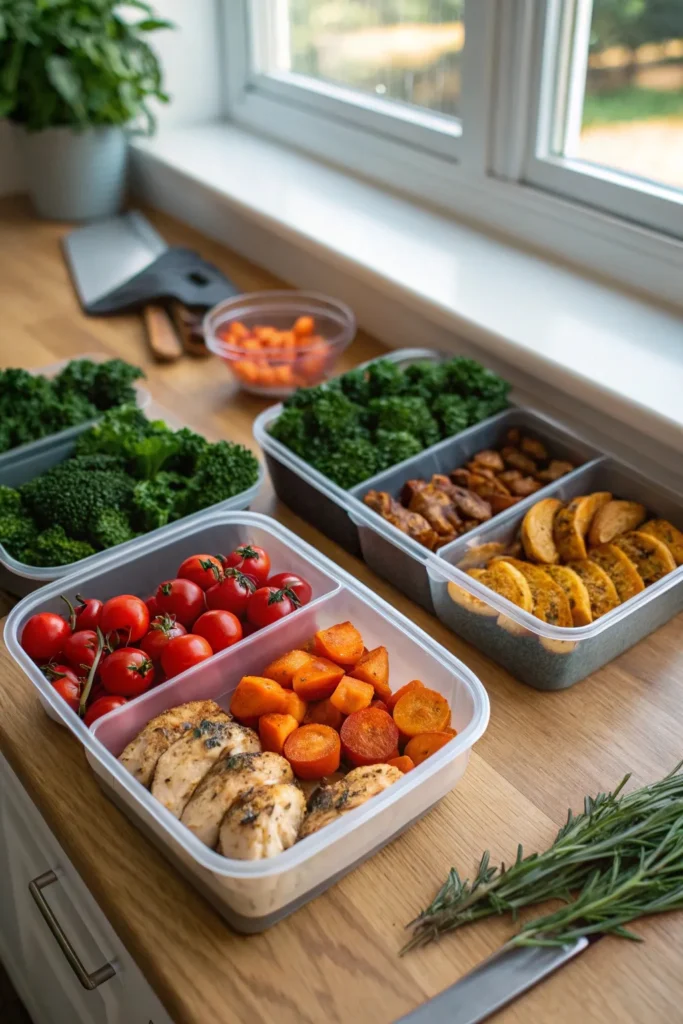
Turkey and Spinach Stuffed Peppers
Turkey and Spinach Stuffed Peppers are a delicious and nutritious option for meal prepping. These vibrant peppers are filled with a hearty mixture of ground turkey, fresh spinach, and aromatic spices, making them not only satisfying but also packed with protein and vitamins.
They can be prepared in advance and stored in the refrigerator or freezer, allowing for quick and easy lunches throughout the week.
This dish is incredibly versatile, allowing you to customize the filling to your liking. You can add ingredients such as quinoa, brown rice, or different vegetables to boost the nutritional value even further.
The stuffed peppers can be easily reheated, making them perfect for busy workdays or as a healthy option on the go.
Ingredients
- 4 large bell peppers (any color)
- 1 pound ground turkey
- 2 cups fresh spinach, chopped
- 1 cup cooked rice or quinoa
- 1 small onion, diced
- 2 cloves garlic, minced
- 1 teaspoon Italian seasoning
- 1/2 teaspoon salt
- 1/4 teaspoon black pepper
- 1 cup marinara sauce (plus extra for topping)
- 1/2 cup shredded mozzarella cheese (optional)
Cooking Instructions
Preheat your oven to 375°F (190°C). Start by cutting the tops off the bell peppers and removing the seeds and membranes.
In a large skillet, heat a drizzle of olive oil over medium heat and sauté the diced onion and minced garlic until fragrant.
Add the ground turkey, breaking it apart with a spatula, and cook until browned. Stir in the chopped spinach until wilted, followed by the cooked rice or quinoa, Italian seasoning, salt, pepper, and marinara sauce.
Mix thoroughly and fill each bell pepper with the turkey and spinach mixture. Place the stuffed peppers upright in a baking dish, spoon extra marinara sauce over the tops, and sprinkle with mozzarella cheese if desired.
Cover the dish with foil and bake for 25-30 minutes, then remove the foil and bake for an additional 10 minutes until the peppers are tender and the cheese is bubbly.
Extra Tips
For added flavor, try incorporating chopped tomatoes or olives into the filling.
If you prefer a spicier kick, consider adding crushed red pepper flakes or diced jalapeños.
To save time, you can prepare the stuffing ahead of time and refrigerate it until you’re ready to assemble the peppers.
These stuffed peppers also freeze well, so feel free to make a larger batch and store them for future meals!
Thai Peanut Noodle Salad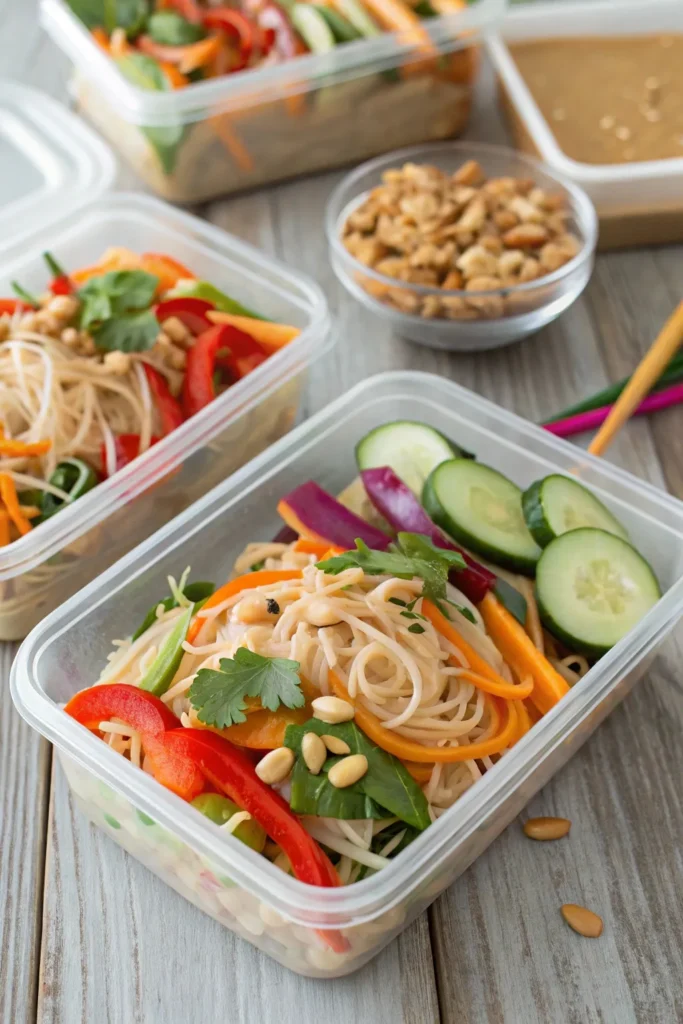
Thai Peanut Noodle Salad is a vibrant and flavorful dish that combines the rich tastes of Thai cuisine with the freshness of a salad. This meal is perfect for meal prep as it holds well in the fridge and can be easily customized to suit your taste preferences. With its combination of crunchy vegetables, tender noodles, and a creamy peanut sauce, this salad is both satisfying and nutritious, making it an ideal lunch option for busy weekdays.
The beauty of this dish lies in its versatility. You can add your favorite protein, such as grilled chicken, shrimp, or tofu, to make it even heartier. Additionally, the dressing can be adjusted to achieve the level of spice you desire. This Thai Peanut Noodle Salad not only packs a punch of flavor but also provides a delightful crunch and texture from the fresh vegetables and peanuts.
Ingredients:
- 8 oz rice noodles
- 1 cup shredded carrots
- 1 cup bell peppers, thinly sliced (red, yellow, or green)
- 1 cup cucumber, julienned
- 1 cup red cabbage, shredded
- 1/2 cup green onions, chopped
- 1/2 cup fresh cilantro, chopped
- 1/2 cup roasted peanuts, chopped
For the Peanut Sauce:
- 1/3 cup creamy peanut butter
- 2 tablespoons soy sauce
- 1 tablespoon honey or maple syrup
- 2 tablespoons rice vinegar
- 1 tablespoon sesame oil
- 1-2 teaspoons sriracha (optional, for heat)
- 1-2 tablespoons warm water (to thin the sauce)
To prepare the Thai Peanut Noodle Salad, begin by cooking the rice noodles according to the package instructions. Once cooked, drain and rinse them under cold water to stop the cooking process.
In a large bowl, combine the cooked noodles with the shredded carrots, bell peppers, cucumber, red cabbage, green onions, and cilantro. In a separate bowl, whisk together the peanut sauce ingredients until smooth, adjusting the consistency with warm water as needed.
Pour the peanut sauce over the noodle and vegetable mixture, tossing everything together until well-coated. Finally, top the salad with chopped roasted peanuts for added crunch.
When making this Thai Peanut Noodle Salad, feel free to experiment with different vegetables or proteins to suit your taste. This dish can be made ahead of time and stored in an airtight container in the refrigerator for up to four days.
If you’re meal prepping, consider keeping the peanut sauce separate until you’re ready to eat to maintain the freshness and texture of the salad. Enjoy this delicious and nutritious meal that will keep you energized throughout the day!
Black Bean and Corn Salsa
Black Bean and Corn Salsa is a vibrant and nutritious dish that can elevate any meal prep lunch. This salsa is packed with protein from the black beans and offers a delightful crunch from the corn, making it not only delicious but also satisfying. It can be enjoyed on its own with tortilla chips, as a topping for grilled meats, or even as a filling for tacos. The freshness of the ingredients shines through, making it a perfect companion for your meal prep rotation.
This recipe is incredibly easy to prepare, requiring minimal cooking and just a bit of chopping. You can whip it up in no time, and it stores well in the refrigerator for a few days, which means you can make a big batch to enjoy throughout the week. With its zesty flavor profile, this Black Bean and Corn Salsa is sure to become a favorite in your lunch lineup.
Ingredients:
- 1 can black beans, drained and rinsed
- 1 cup corn (frozen or fresh)
- 1 red bell pepper, diced
- 1 small red onion, finely chopped
- 1 jalapeño pepper, seeded and minced (optional)
- 1/4 cup fresh cilantro, chopped
- Juice of 2 limes
- Salt and pepper to taste
- 1/2 teaspoon cumin (optional)
In a large mixing bowl, combine the black beans, corn, red bell pepper, red onion, jalapeño (if using), and cilantro. Squeeze the lime juice over the mixture and add salt, pepper, and cumin (if using). Toss everything together until well combined, ensuring that the flavors meld beautifully.
Let the salsa sit for at least 15 minutes to allow the flavors to develop before serving.
When preparing Black Bean and Corn Salsa, feel free to customize the ingredients based on your preferences. You can add diced avocado for creaminess, substitute lime juice with lemon juice, or incorporate other vegetables like diced tomatoes or cucumbers.
This dish is versatile, so don’t hesitate to experiment with different herbs and spices to make it your own!
Caprese Mason Jar Salad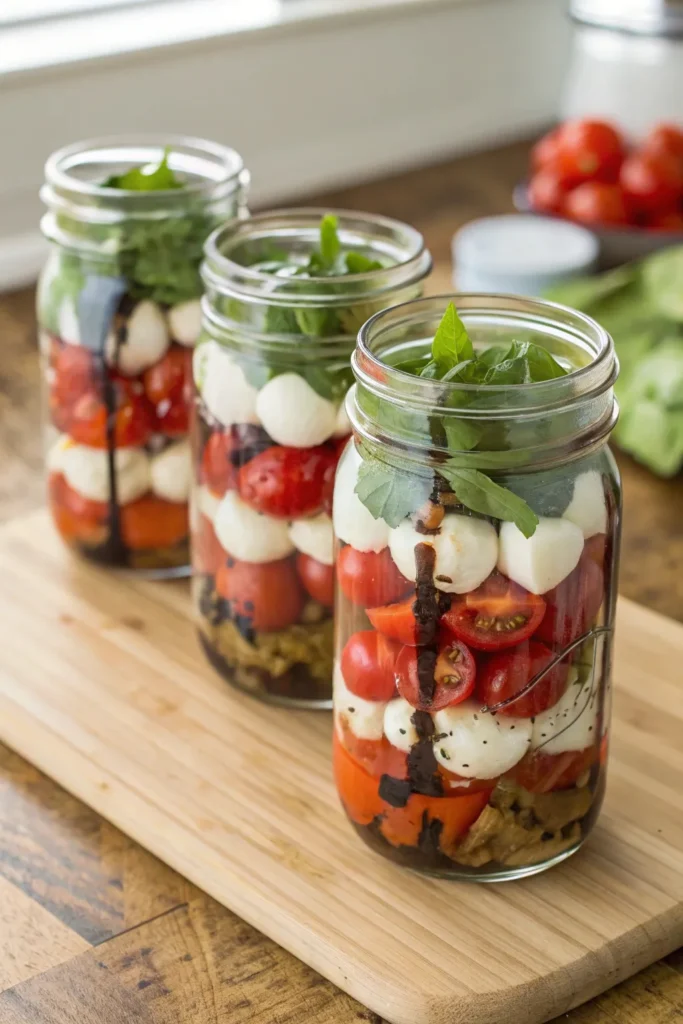
The Caprese Mason Jar Salad is a vibrant and invigorating meal prep option that combines the classic flavors of a Caprese salad with the convenience of a portable jar. This dish isn’t only visually appealing with its layers of fresh ingredients, but it also makes for a quick lunch or snack that can be easily transported to work, picnics, or wherever you may go.
The combination of juicy tomatoes, creamy mozzarella, and fragrant basil creates a satisfying and nutritious meal that can be enjoyed any time of the year. To make this salad even more delightful, you can add a drizzle of balsamic glaze or olive oil for added flavor.
The beauty of the Mason jar is that you can customize your salad according to your taste preferences. Feel free to adjust the quantities of each ingredient to suit your liking. This Caprese Mason Jar Salad can be prepared in advance and stored in the refrigerator for up to five days, making it a perfect choice for meal prepping.
Ingredients:
- 1 cup cherry tomatoes, halved
- 1 cup fresh mozzarella balls (bocconcini)
- ½ cup fresh basil leaves
- ¼ cup balsamic glaze or vinegar
- ¼ cup extra virgin olive oil
- Salt and pepper to taste
- 4 Mason jars (16 oz)
Instructions:
Begin by layering the ingredients in the Mason jars, starting with the balsamic glaze or vinegar at the bottom, followed by a layer of cherry tomatoes, then the mozzarella balls, and finally the fresh basil leaves on top.
Drizzle the olive oil over the layers and season with salt and pepper. Make sure to pack the ingredients tightly to keep them fresh, and secure the lid on each jar. Store the jars in the refrigerator until you’re ready to enjoy your salad.
Extra Tips:
For the best flavor, use high-quality extra virgin olive oil and a rich balsamic glaze. To prevent the basil from wilting, make sure it’s placed at the top of the jar, away from the moisture of the tomatoes and cheese.
You can also customize the salad by adding ingredients such as avocado, arugula, or even grilled chicken for added protein. When ready to eat, simply shake the jar to mix the ingredients or pour them into a bowl for a more traditional presentation.
Sweet Potato and Kale Frittata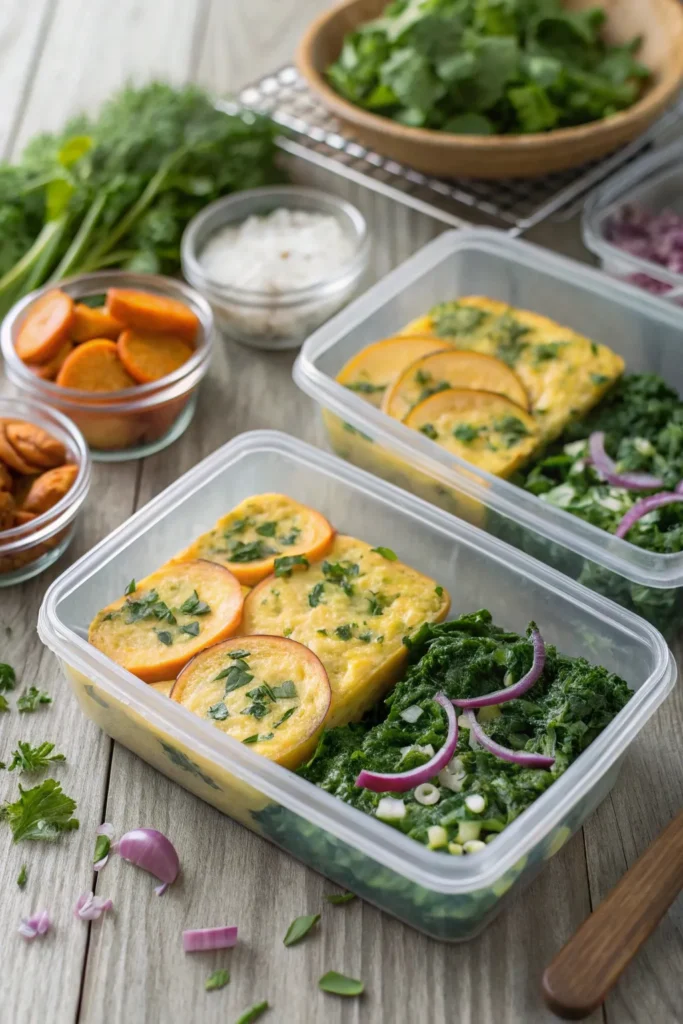
Sweet potato and kale frittata is a nutritious and delicious option for meal prep lunches. This dish not only packs a punch with its vibrant colors and flavors but is also rich in vitamins and minerals. Sweet potatoes provide a healthy source of carbohydrates, while kale adds a wealth of nutrients, including antioxidants, calcium, and iron. Together, they create a satisfying meal that can be enjoyed warm or cold.
Making a frittata is a versatile process; you can customize it with various vegetables, cheeses, or herbs according to your preference. The combination of eggs, sweet potatoes, and kale creates a fluffy and hearty dish that’s perfect for meal prepping. This frittata can be stored in the refrigerator for up to a week and makes for a quick and easy lunch option when you’re on the go.
Ingredients:
- 1 large sweet potato, peeled and diced
- 2 cups kale, stems removed and chopped
- 6 large eggs
- 1/2 cup milk (dairy or non-dairy)
- 1/2 cup shredded cheese (cheddar, feta, or your choice)
- 1 small onion, diced
- 2 cloves garlic, minced
- 2 tablespoons olive oil
- Salt and pepper to taste
- Optional: red pepper flakes for added spice
To cook the frittata, preheat the oven to 375°F (190°C). In a large skillet, heat the olive oil over medium heat and sauté the diced onion and garlic until soft and fragrant. Add the diced sweet potato and cook for about 10 minutes, or until tender.
Stir in the chopped kale and cook for an additional 2-3 minutes until wilted. In a bowl, whisk together the eggs, milk, cheese, salt, and pepper. Pour the egg mixture over the sweet potato and kale in the skillet, stirring gently to combine. Cook for about 2 minutes on the stovetop, then transfer the skillet to the preheated oven. Bake for 20-25 minutes, or until the frittata is set and golden on top.
Let it cool slightly before slicing into wedges. When cooking your sweet potato and kale frittata, feel free to experiment with different vegetables or herbs to suit your taste. For a creamier texture, consider adding a dollop of sour cream or Greek yogurt before serving.
Additionally, you can make the frittata ahead of time and store it in individual portions for easy grab-and-go lunches throughout the week. Just remember to let it cool completely before refrigerating to maintain its texture. Enjoy your healthy meal prep!


