
Like a well-composed symphony, gluten-free baking can harmonize flavors and textures effortlessly. You might think achieving that perfect chocolate chip cookie or moist banana bread is out of reach, but it doesn’t have to be. With these 15 foolproof recipes, you’ll find that creating delicious gluten-free treats is simpler than you imagined. Curious about which recipes will elevate your baking game?
Classic Gluten-Free Chocolate Chip Cookies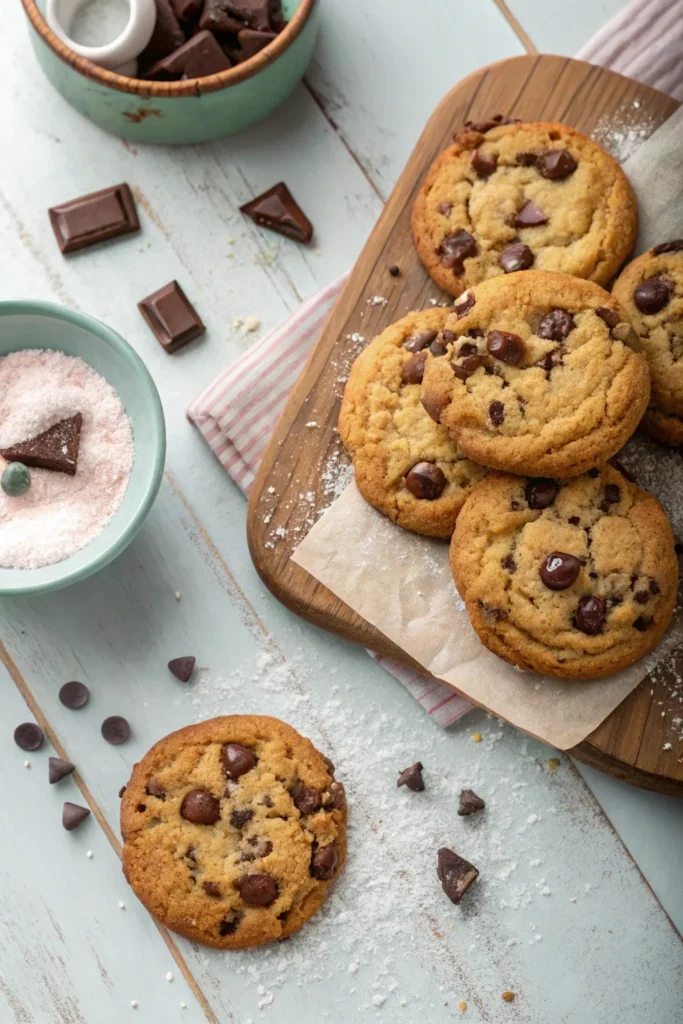
Classic Gluten-Free Chocolate Chip Cookies are a delightful treat that everyone can enjoy, regardless of dietary restrictions. These cookies are soft, chewy, and packed with delicious chocolate chips, making them a perfect snack or dessert. The combination of gluten-free flours guarantees that you won’t miss the traditional wheat flour, while the rich flavor of the chocolate chips keeps these cookies irresistible.
This recipe isn’t only simple but also quick to prepare, allowing you to whip up a batch in no time. Whether you’re baking for yourself, a family gathering, or a special occasion, these gluten-free chocolate chip cookies will surely please your taste buds and satisfy your sweet cravings.
Let’s plunge into the ingredients and get started!
Ingredients:
- 1 cup almond flour
- 1 cup gluten-free all-purpose flour
- 1/2 teaspoon baking soda
- 1/2 teaspoon salt
- 1/2 cup unsalted butter, softened
- 1/2 cup brown sugar
- 1/4 cup granulated sugar
- 1 teaspoon vanilla extract
- 1 large egg
- 1 cup semi-sweet chocolate chips
To prepare the cookies, preheat your oven to 350°F (175°C) and line a baking sheet with parchment paper. In a large mixing bowl, combine the almond flour, gluten-free all-purpose flour, baking soda, and salt.
In a separate bowl, cream together the butter, brown sugar, granulated sugar, and vanilla extract until light and fluffy. Add in the egg and mix until well combined. Gradually stir the dry ingredients into the wet mixture until just combined, then fold in the chocolate chips.
Scoop tablespoon-sized portions of dough onto the prepared baking sheet and bake for 10-12 minutes or until the edges are lightly golden. Allow the cookies to cool on the baking sheet for a few minutes before transferring them to a wire rack to cool completely.
When making these cookies, be certain to measure your gluten-free flours accurately for the best results. If you want to add a little extra flavor, consider incorporating a pinch of cinnamon or a handful of nuts.
For an even chewier texture, let the dough chill in the refrigerator for 30 minutes before baking. Enjoy your freshly baked gluten-free chocolate chip cookies with a glass of milk or your favorite dairy-free alternative!
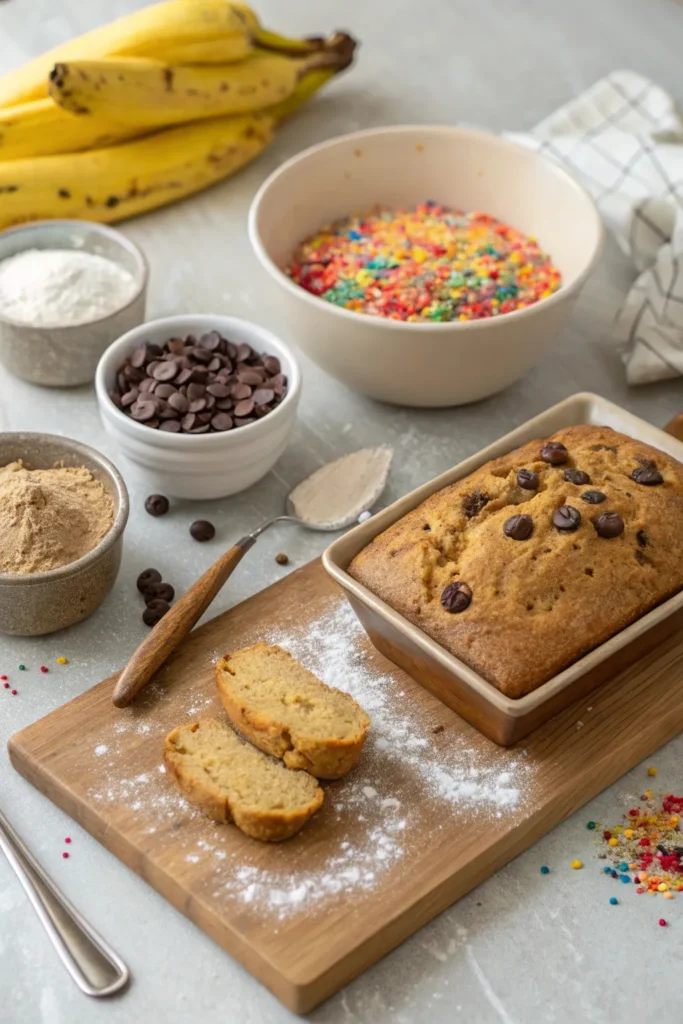
Moist Gluten-Free Banana Bread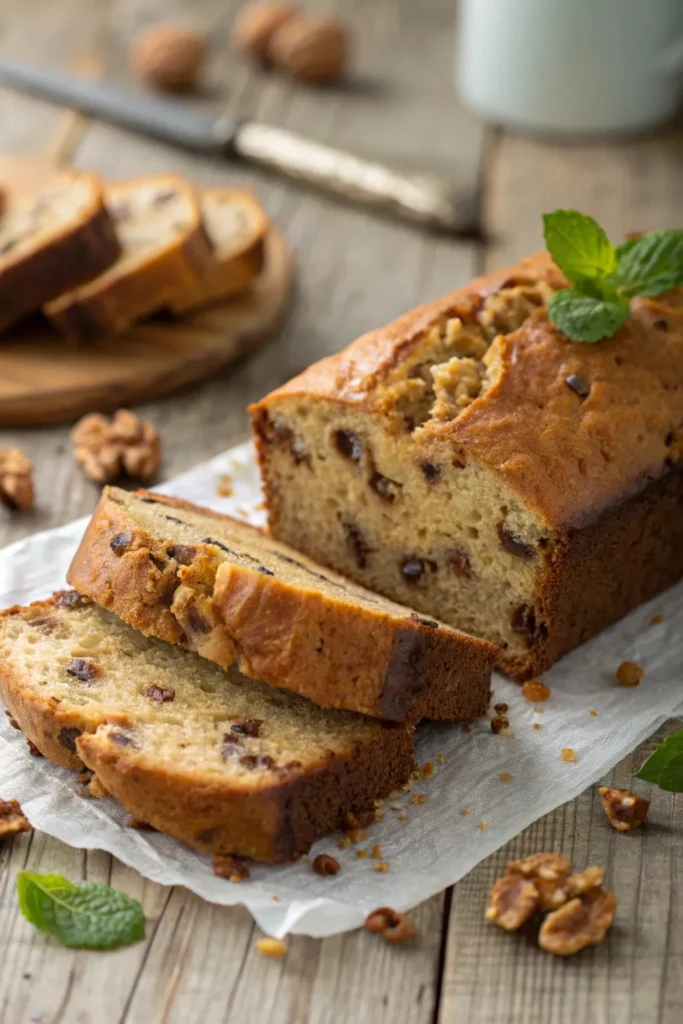
Moist gluten-free banana bread is a delightful treat that encapsulates the sweet, comforting flavors of ripe bananas and warm spices. Perfect for breakfast, a snack, or even dessert, this banana bread offers a soft, moist texture that rivals traditional versions. With the right blend of gluten-free flours and ingredients, you can achieve a delicious loaf that everyone will enjoy, regardless of dietary restrictions.
The key to attaining moisture and flavor in gluten-free baking lies in the combination of ingredients. Ripe bananas bring natural sweetness and moisture, while yogurt or applesauce adds richness without gluten. This recipe also incorporates a mix of gluten-free flours, guaranteeing a perfect rise and texture.
Whether you have overripe bananas sitting on your counter or just want to try something new, this moist gluten-free banana bread will quickly become a household favorite.
Ingredients:
- 3 ripe bananas, mashed
- 1/3 cup melted coconut oil
- 1/2 cup sugar (or coconut sugar)
- 1 large egg
- 1 teaspoon vanilla extract
- 1 teaspoon baking soda
- 1/4 teaspoon salt
- 1 teaspoon ground cinnamon
- 1 1/2 cups gluten-free all-purpose flour
- 1/2 cup chopped walnuts or chocolate chips (optional)
To prepare this moist gluten-free banana bread, preheat your oven to 350°F (175°C) and grease a 9×5-inch loaf pan. In a large mixing bowl, combine the mashed bananas with melted coconut oil, sugar, egg, and vanilla extract until well mixed.
In a separate bowl, whisk together the baking soda, salt, cinnamon, and gluten-free flour. Gradually add the dry ingredients to the banana mixture, stirring just until combined; be careful not to overmix. If desired, fold in chopped walnuts or chocolate chips.
Pour the batter into the prepared loaf pan and bake for 50-60 minutes or until a toothpick inserted into the center comes out clean. Let the banana bread cool in the pan for about 10 minutes before transferring it to a wire rack to cool completely.
For the best results, verify your bananas are very ripe with plenty of brown spots, as they provide the most flavor and sweetness. If you prefer a sweeter banana bread, feel free to increase the sugar slightly.
Additionally, storing the banana bread in an airtight container will help maintain its moisture for several days. You can also freeze slices for later enjoyment, making this recipe not only delicious but also convenient.
Easy Gluten-Free Vanilla Cupcakes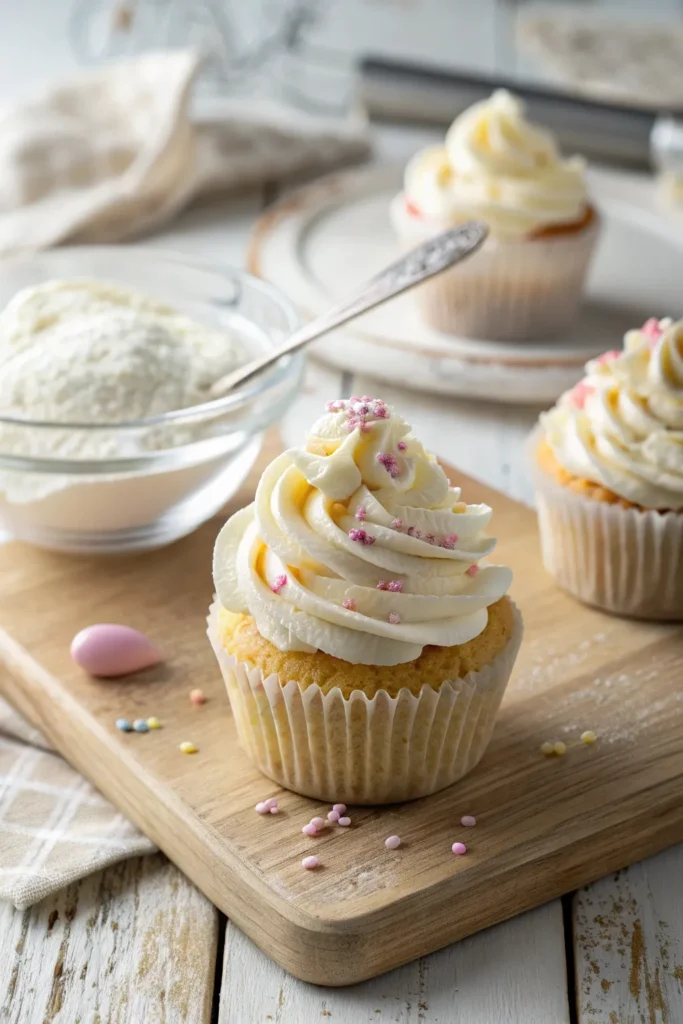
Gluten-free baking can be a delightful adventure, especially when it comes to creating sweet treats like vanilla cupcakes. These easy gluten-free vanilla cupcakes are perfect for any occasion, whether it be a birthday celebration, a family gathering, or just a simple dessert to enjoy at home.
With their light, fluffy texture and rich vanilla flavor, they’re bound to please everyone, even those who aren’t gluten-sensitive. Using gluten-free flour blends can yield excellent results, mimicking the texture of traditional cupcakes.
The beauty of this recipe lies in its simplicity, making it accessible for bakers of all skill levels. With just a few ingredients and straightforward steps, these cupcakes can be whipped up quickly, leaving you with a delightful treat that everyone can enjoy.
Ingredients:
- 1 ½ cups gluten-free all-purpose flour blend
- 1 cup granulated sugar
- ½ cup unsalted butter, softened
- 2 large eggs
- 1 cup milk (or dairy-free alternative)
- 2 teaspoons vanilla extract
- 1 teaspoon baking powder
- ½ teaspoon baking soda
- ¼ teaspoon salt
In a large mixing bowl, cream together the softened butter and sugar until light and fluffy. Then, add the eggs one at a time, mixing well after each addition. Stir in the vanilla extract.
In another bowl, combine the gluten-free flour, baking powder, baking soda, and salt. Gradually add the dry ingredients to the wet mixture, alternating with the milk, and mix until just combined.
Preheat your oven to 350°F (175°C), line a cupcake pan with liners, and fill each cup about two-thirds full with the batter. Bake for 18-20 minutes, or until a toothpick inserted in the center comes out clean. Allow the cupcakes to cool completely before frosting.
Extra Tips: Always check the gluten-free flour blend you’re using to verify it contains xanthan gum, which helps with the texture of the cupcakes. If your blend doesn’t include it, consider adding 1 teaspoon of xanthan gum to the dry ingredients.
Additionally, for a fun twist, you can experiment with different extracts, such as almond or lemon, to give your cupcakes a unique flavor profile. Don’t forget to store any leftover cupcakes in an airtight container to maintain their freshness!
Decadent Gluten-Free Brownies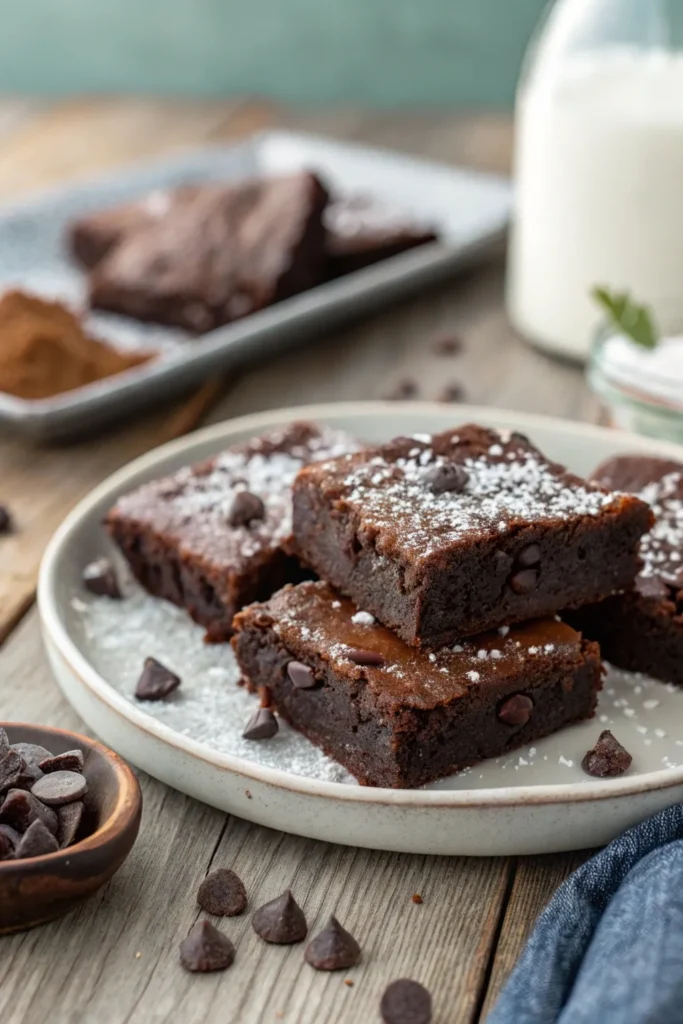
Decadent gluten-free brownies are a luscious treat that satisfies your chocolate cravings while adhering to dietary restrictions. These brownies are rich, fudgy, and incredibly easy to make, guaranteeing that everyone can enjoy a delicious dessert without the gluten. Whether you’re hosting a party, celebrating a special occasion, or simply treating yourself, these brownies are sure to impress.
To achieve that perfect brownie texture, it’s crucial to use high-quality cocoa powder and chocolate. The combination of melted chocolate and cocoa powder guarantees a deep chocolate flavor, while the addition of almond flour gives the brownies a moist and tender crumb. These brownies can be whipped up in just a short amount of time and are perfect for both novice and experienced bakers alike.
Ingredients:
- 1/2 cup (1 stick) unsalted butter
- 1 cup dark chocolate chips (gluten-free)
- 1 cup granulated sugar
- 2 large eggs
- 1 teaspoon vanilla extract
- 1/2 cup unsweetened cocoa powder
- 1/2 cup almond flour
- 1/4 teaspoon salt
- 1/4 teaspoon baking powder
To make the brownies, start by preheating your oven to 350°F (175°C) and lining an 8×8 inch baking pan with parchment paper. In a medium saucepan over low heat, melt the butter and dark chocolate chips, stirring until smooth.
Remove from heat and whisk in the sugar, followed by the eggs one at a time, mixing well after each addition. Stir in the vanilla extract. In a separate bowl, combine the cocoa powder, almond flour, salt, and baking powder, then gradually fold this dry mixture into the wet ingredients until just combined.
Pour the batter into the prepared pan and smooth the top. Bake for 20-25 minutes or until a toothpick inserted into the center comes out with a few moist crumbs. Let them cool completely in the pan before cutting into squares.
For best results, allow the brownies to cool completely before slicing; this will help them set and make cutting easier. Feel free to add mix-ins like nuts or chocolate chunks for extra texture. If you want an even richer taste, consider adding a pinch of espresso powder to enhance the chocolate flavor.
Store the brownies in an airtight container at room temperature for up to a week, or freeze them for longer storage. Enjoy your decadent gluten-free brownies!
Fluffy Gluten-Free Pancakes
Fluffy gluten-free pancakes are the perfect breakfast treat that everyone can enjoy, regardless of dietary restrictions. With a few simple ingredients, you can whip up a batch of light and airy pancakes that are just as delicious as traditional versions. The secret to achieving that fluffy texture lies in the right combination of gluten-free flours and the addition of baking powder, which gives the pancakes their rise.
These pancakes aren’t only easy to make but also versatile, allowing you to customize them with your favorite add-ins such as blueberries, chocolate chips, or nuts. Whether you’re serving them up for a special weekend brunch or a quick weekday breakfast, these gluten-free pancakes are sure to satisfy your cravings and keep you coming back for more.
Ingredients:
- 1 cup gluten-free all-purpose flour
- 2 tablespoons sugar
- 1 tablespoon baking powder
- 1/2 teaspoon salt
- 1 cup milk (dairy or non-dairy)
- 1 large egg
- 2 tablespoons melted butter or oil
- 1 teaspoon vanilla extract
To make the pancakes, start by whisking together the gluten-free flour, sugar, baking powder, and salt in a large mixing bowl. In a separate bowl, combine the milk, egg, melted butter, and vanilla extract.
Pour the wet ingredients into the dry ingredients and gently mix until just combined; be careful not to over-mix. Preheat a non-stick skillet or griddle over medium heat and lightly grease it.
Pour about 1/4 cup of batter onto the skillet for each pancake, cooking until bubbles form on the surface, then flip and cook until golden brown on the other side.
Extra Tips: For even fluffier pancakes, let the batter rest for about 5-10 minutes before cooking. This allows the baking powder to activate fully and creates a lighter texture.
Additionally, you can experiment with different gluten-free flours, such as almond or coconut flour, but be sure to adjust the liquid content accordingly, as these flours absorb moisture differently.
Serve your pancakes with maple syrup, fresh fruits, or your favorite toppings for a delightful breakfast experience!
Savory Gluten-Free Cornbread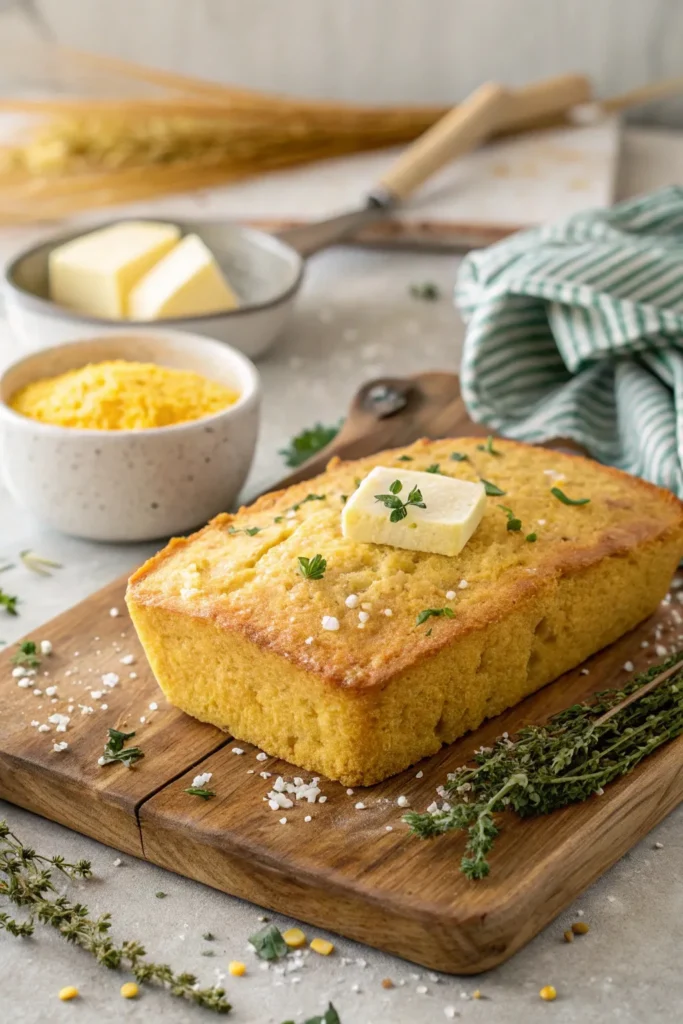
Savory gluten-free cornbread is a delightful twist on the classic recipe, perfect for those who enjoy a hearty, flavorful bread without the gluten. This cornbread isn’t only easy to make but also packed with savory ingredients that elevate its taste, making it an ideal accompaniment to soups, stews, or as a standalone snack.
By using gluten-free cornmeal and alternative flours, you can create a moist and fluffy texture that everyone will love. Adding ingredients like cheese, jalapeños, or herbs can take this cornbread to the next level. It’s versatile enough to suit your preferences, whether you like it spicy or prefer a more subtle flavor.
This recipe is perfect for gatherings, potlucks, or simply enjoying at home with family. With its golden crust and savory aroma, this gluten-free cornbread will surely impress your guests and keep them coming back for more.
Ingredients:
- 1 cup gluten-free cornmeal
- 1 cup gluten-free all-purpose flour
- 1 tablespoon baking powder
- 1 teaspoon salt
- 1/4 teaspoon black pepper
- 1/2 cup shredded cheese (cheddar or your choice)
- 1/4 cup chopped jalapeños (optional)
- 2 large eggs
- 1 cup milk (dairy or non-dairy)
- 1/4 cup vegetable oil
- 1 tablespoon honey (optional)
In a large mixing bowl, combine the gluten-free cornmeal, gluten-free flour, baking powder, salt, and black pepper. Stir in the shredded cheese and jalapeños if desired.
In a separate bowl, whisk together the eggs, milk, vegetable oil, and honey. Pour the wet ingredients into the dry mixture and stir until just combined. Preheat your oven to 400°F (200°C) and grease a 9-inch square baking pan.
Pour the batter into the prepared pan and smooth the top. Bake for about 20-25 minutes, or until the top is golden brown and a toothpick inserted in the center comes out clean.
When making savory gluten-free cornbread, feel free to experiment with different add-ins such as herbs, spices, or even cooked bacon for extra flavor. If you prefer a sweeter cornbread, you can adjust the amount of honey or add a bit of sugar.
Make certain to let the cornbread cool for a few minutes before slicing to guarantee it holds together nicely. Enjoy your cornbread warm or at room temperature, and store any leftovers in an airtight container for up to three days.
Chewy Gluten-Free Oatmeal Raisin Cookies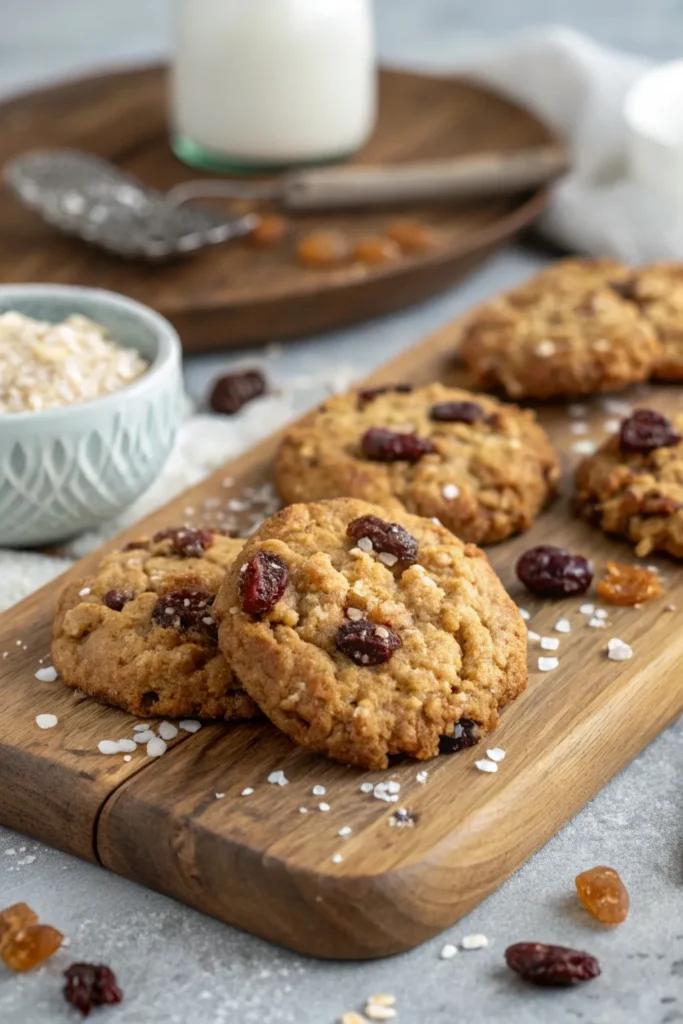
Chewy gluten-free oatmeal raisin cookies are a delightful treat that everyone can enjoy, regardless of dietary restrictions. These cookies aren’t only delicious but also packed with wholesome ingredients, making them a perfect snack or dessert. The chewy texture, combined with the sweetness of raisins and the heartiness of oats, creates a delightful flavor profile that’s hard to resist.
Making these cookies is straightforward, and they come together quickly, allowing you to satisfy your sweet tooth without much fuss. Plus, the use of gluten-free oats guarantees that those with gluten sensitivities can indulge without worry. So gather your ingredients, and let’s get baking!
Ingredients:
- 1 cup gluten-free rolled oats
- 1 cup almond flour
- 1/2 teaspoon baking soda
- 1/2 teaspoon salt
- 1 teaspoon ground cinnamon
- 1/2 cup coconut oil, melted
- 1/2 cup brown sugar, packed
- 1/4 cup honey or maple syrup
- 1 teaspoon vanilla extract
- 1 cup raisins
In a large mixing bowl, combine the gluten-free rolled oats, almond flour, baking soda, salt, and ground cinnamon.
In a separate bowl, whisk together the melted coconut oil, brown sugar, honey or maple syrup, and vanilla extract until well combined.
Gradually add the wet ingredients to the dry mixture, stirring until just combined. Fold in the raisins and ascertain they’re evenly distributed throughout the cookie dough.
Preheat your oven to 350°F (175°C) and line a baking sheet with parchment paper.
Scoop tablespoon-sized portions of dough onto the prepared baking sheet, spacing them about two inches apart.
Bake for 12-15 minutes, or until the edges are lightly golden. Allow the cookies to cool on the baking sheet for a few minutes before transferring them to a wire rack to cool completely.
For best results, make certain to use certified gluten-free oats to avoid any cross-contamination.
If you prefer a more decadent cookie, consider adding chopped nuts or dark chocolate chips to the dough.
These cookies can be stored in an airtight container for up to a week, but they’re best enjoyed fresh out of the oven when they’re still warm and chewy!
Rich Gluten-Free Chocolate Cake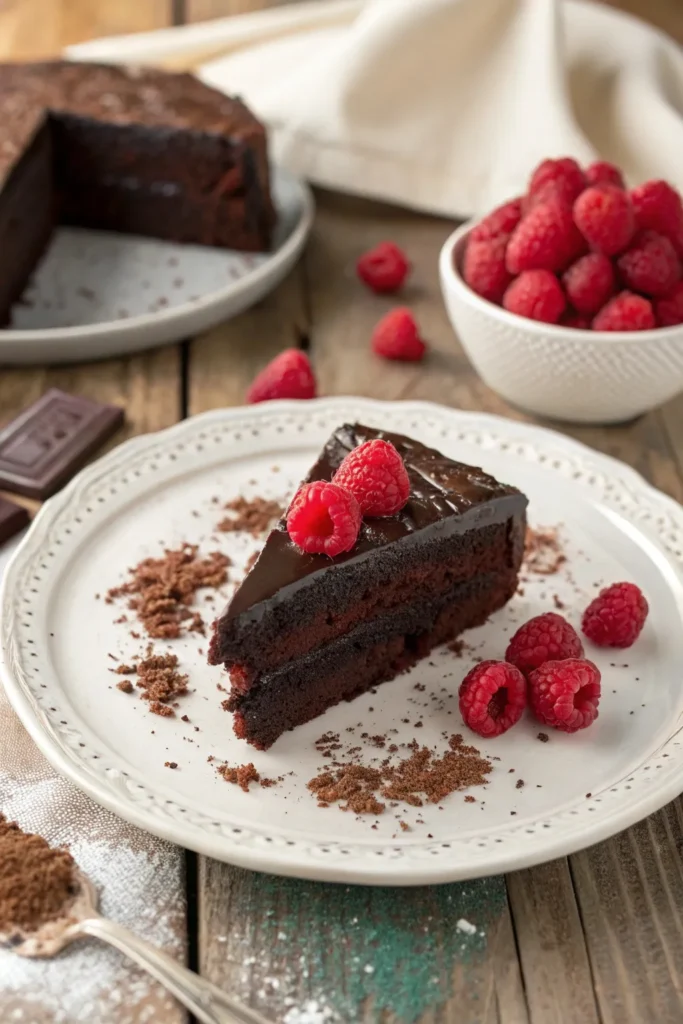
Gluten-free baking can be a delightful experience, especially when it comes to creating rich and indulgent desserts like a gluten-free chocolate cake. This cake isn’t only incredibly moist and decadent but also easy to make, guaranteeing that everyone can enjoy a slice without worrying about gluten. The rich cocoa flavor combined with the right blend of gluten-free flours makes this cake a true crowd-pleaser.
When baking gluten-free, it’s crucial to use a combination of flours to achieve the best texture and flavor. In this recipe, we’ll be using almond flour and gluten-free all-purpose flour, which together create a tender crumb and a rich chocolate flavor. With simple ingredients and straightforward instructions, you’ll have a delicious gluten-free chocolate cake ready to impress your family and friends.
Ingredients:
- 1 cup almond flour
- 1 cup gluten-free all-purpose flour
- 1 cup unsweetened cocoa powder
- 1 ½ cups granulated sugar
- 1 tsp baking powder
- 1 tsp baking soda
- ½ tsp salt
- 4 large eggs
- 1 cup whole milk (or dairy-free alternative)
- ½ cup vegetable oil
- 2 tsp vanilla extract
- 1 cup boiling water
Instructions:
Preheat your oven to 350°F (175°C) and grease two 9-inch round cake pans.
In a large mixing bowl, combine the almond flour, gluten-free all-purpose flour, cocoa powder, sugar, baking powder, baking soda, and salt.
In another bowl, whisk together the eggs, milk, oil, and vanilla extract until well combined.
Gradually add the wet ingredients to the dry mixture, stirring until just combined.
Finally, carefully mix in the boiling water until the batter is smooth.
Divide the batter evenly between the prepared pans and bake for 30-35 minutes, or until a toothpick inserted in the center comes out clean.
Let the cakes cool in the pans for 10 minutes before transferring them to a wire rack to cool completely.
Extra Tips:
For an even richer flavor, consider adding a tablespoon of instant coffee to the boiling water before mixing it into the batter; this will enhance the chocolate taste.
You can also substitute the vegetable oil with melted coconut oil for a subtle coconut flavor.
If you’d like to add a layer of frosting, a simple chocolate ganache or whipped cream works beautifully.
Always verify that your ingredients, particularly baking powder and vanilla extract, are gluten-free to avoid cross-contamination.
Enjoy your baking!
Zesty Gluten-Free Lemon Bars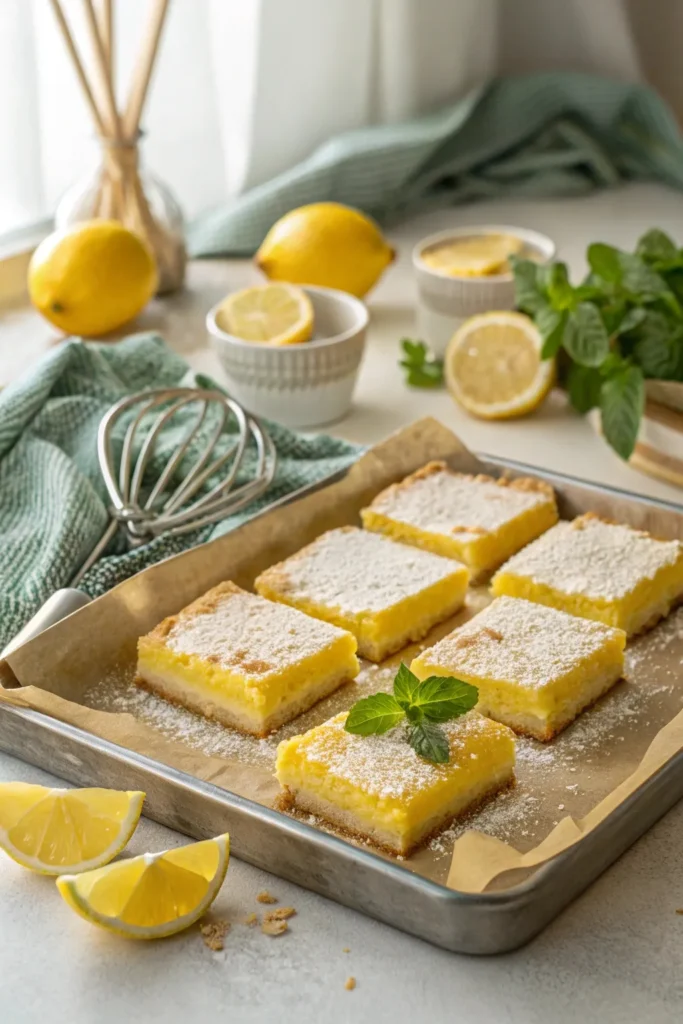
Zesty gluten-free lemon bars are a delightful treat that combines the invigorating tartness of lemons with a sweet, buttery crust. Perfect for any occasion, these bars aren’t only gluten-free but also incredibly easy to make. They offer a burst of sunshine with every bite, making them a favorite among dessert lovers.
Whether you’re hosting a gathering, celebrating a special occasion, or simply indulging in a sweet snack, these lemon bars are sure to impress.
To make these zesty lemon bars, you’ll need a few simple ingredients that come together to create a delicious balance of flavors. The buttery crust provides a sturdy base, while the luscious lemon filling brings a bright and tangy taste that will awaken your senses.
Serve them chilled for the best flavor experience, and watch as they disappear from the dessert table in no time.
Ingredients:
- 1 cup gluten-free all-purpose flour
- 1/2 cup powdered sugar
- 1/2 cup unsalted butter, softened
- 2 large eggs
- 1 cup granulated sugar
- 1/4 cup fresh lemon juice
- Zest of 1 lemon
- 1/2 teaspoon baking powder
- Pinch of salt
To prepare the zesty lemon bars, preheat your oven to 350°F (175°C) and line an 8×8-inch baking dish with parchment paper for easy removal.
In a mixing bowl, combine the gluten-free flour, powdered sugar, and softened butter to form a crumbly crust. Press this mixture into the bottom of the prepared baking dish and bake for about 15 minutes until lightly golden.
While the crust is baking, whisk together the eggs, granulated sugar, lemon juice, lemon zest, baking powder, and salt in a separate bowl. Once the crust is ready, pour the lemon filling over it and bake for an additional 20-25 minutes, or until the filling is set.
Allow to cool, then slice into bars and dust with extra powdered sugar if desired.
For the best results, let your lemon bars chill in the refrigerator for at least an hour before serving; this helps to enhance the flavors and makes slicing easier.
Additionally, feel free to experiment with different citrus fruits, such as lime or orange, for a unique twist on this classic dessert. Always use fresh lemon juice for the brightest flavor, and consider adding a touch of vanilla extract to the filling for an extra layer of taste.
Scrumptious Gluten-Free Pumpkin Muffins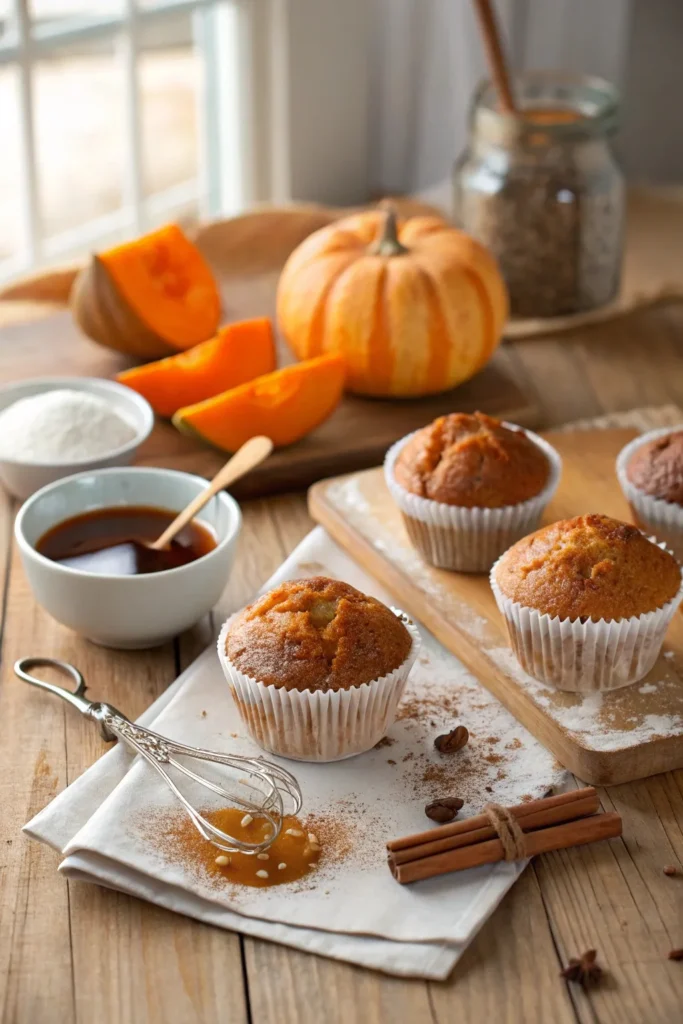
Fall is the perfect season to enjoy the warm, comforting flavors of pumpkin, and these scrumptious gluten-free pumpkin muffins are a delightful way to celebrate autumn. With a moist texture and a hint of spice, these muffins aren’t only gluten-free but also packed with nutritious ingredients that make them a great option for breakfast or a snack.
Whether you’re hosting a brunch or simply indulging yourself, these muffins will surely impress. This recipe is incredibly easy to follow and requires minimal preparation time. Using gluten-free flour, pumpkin puree, and a blend of warm spices, these muffins will fill your kitchen with a cozy aroma that will have everyone asking for seconds.
Perfectly sweetened with maple syrup or honey, they strike the right balance between healthy and indulgent. Get ready to savor every bite and perhaps even share a few with friends and family!
Ingredients:
- 1 ¾ cups gluten-free all-purpose flour
- 1 teaspoon baking soda
- 1 teaspoon baking powder
- 1 teaspoon ground cinnamon
- ½ teaspoon ground nutmeg
- ½ teaspoon ground ginger
- ¼ teaspoon salt
- ½ cup maple syrup or honey
- 1 cup pumpkin puree
- 2 large eggs
- ½ cup coconut oil, melted
- 1 teaspoon vanilla extract
- Optional: ½ cup chopped walnuts or chocolate chips
Instructions:
Preheat your oven to 350°F (175°C) and line a muffin tin with paper liners or grease it well.
In a large bowl, whisk together the gluten-free flour, baking soda, baking powder, cinnamon, nutmeg, ginger, and salt. In a separate bowl, combine the maple syrup, pumpkin puree, eggs, melted coconut oil, and vanilla extract, mixing until well blended.
Gradually add the wet ingredients to the dry ingredients, stirring just until combined. If desired, fold in the walnuts or chocolate chips. Pour the batter evenly into the prepared muffin tin and bake for 18 to 20 minutes, or until a toothpick inserted into the center comes out clean.
Allow the muffins to cool in the pan for a few minutes before transferring to a wire rack to cool completely.
Extra Tips:
For an extra burst of flavor, consider adding a teaspoon of pumpkin spice or a tablespoon of fresh orange zest to the batter.
If you prefer a sweeter muffin, feel free to adjust the amount of maple syrup or honey to suit your taste. These muffins also freeze well, so you can make a double batch and save some for later. Just be sure to wrap them tightly in plastic wrap or a freezer bag to maintain freshness.
Enjoy your baking!
Tender Gluten-Free Biscuits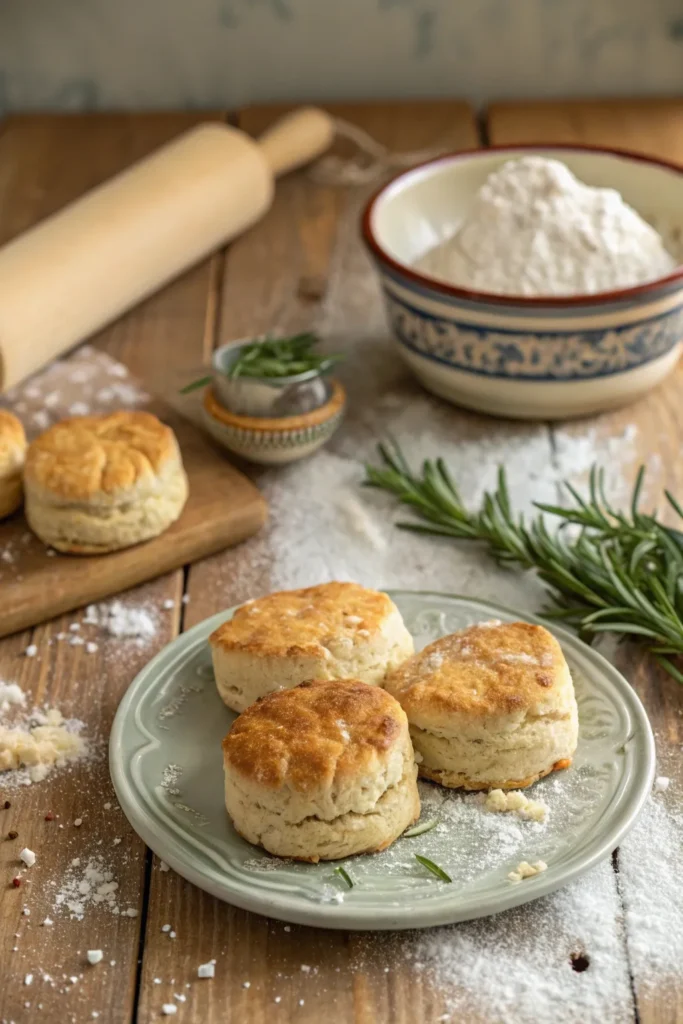
Making tender gluten-free biscuits is a delightful way to enjoy a classic comfort food without the gluten. These biscuits are perfect for breakfast or as a side for your favorite meal. They’ve a flaky texture and buttery flavor that will leave everyone asking for seconds. Using a combination of gluten-free flours and a few pantry staples, you can whip up a batch of these biscuits in no time.
To guarantee that your gluten-free biscuits turn out perfectly, it’s important to handle the dough gently and avoid overmixing, which can lead to a denser texture. The inclusion of baking powder will help provide the lift needed for that light and airy biscuit, while cold butter adds richness. Serve them warm with butter, jam, or your favorite spread for a delightful treat.
Ingredients:
- 2 cups gluten-free all-purpose flour blend
- 1 tablespoon baking powder
- 1/2 teaspoon salt
- 1/4 cup cold butter, cubed
- 3/4 cup milk (dairy or non-dairy)
- 1 tablespoon honey or sugar (optional)
To make the biscuits, preheat your oven to 425°F (220°C) and line a baking sheet with parchment paper. In a large mixing bowl, whisk together the gluten-free flour, baking powder, and salt. Cut in the cold butter using a pastry cutter or your fingers until the mixture resembles coarse crumbs.
Pour in the milk and honey (if using) and stir gently until just combined. Turn the dough out onto a lightly floured surface and knead gently a few times before patting it into a 1-inch thick round. Cut out biscuits with a biscuit cutter and place them on the prepared baking sheet. Bake for 12-15 minutes or until golden brown.
For best results, make sure your ingredients are cold, especially the butter, as this will help create a flaky texture. You can also experiment with different gluten-free flour blends to find the one that works best for your taste. Additionally, if you want to add some flavor, consider mixing in herbs like rosemary or thyme, or even cheese for a savory twist. Enjoy your tender gluten-free biscuits fresh out of the oven!
Delightful Gluten-Free Snickerdoodles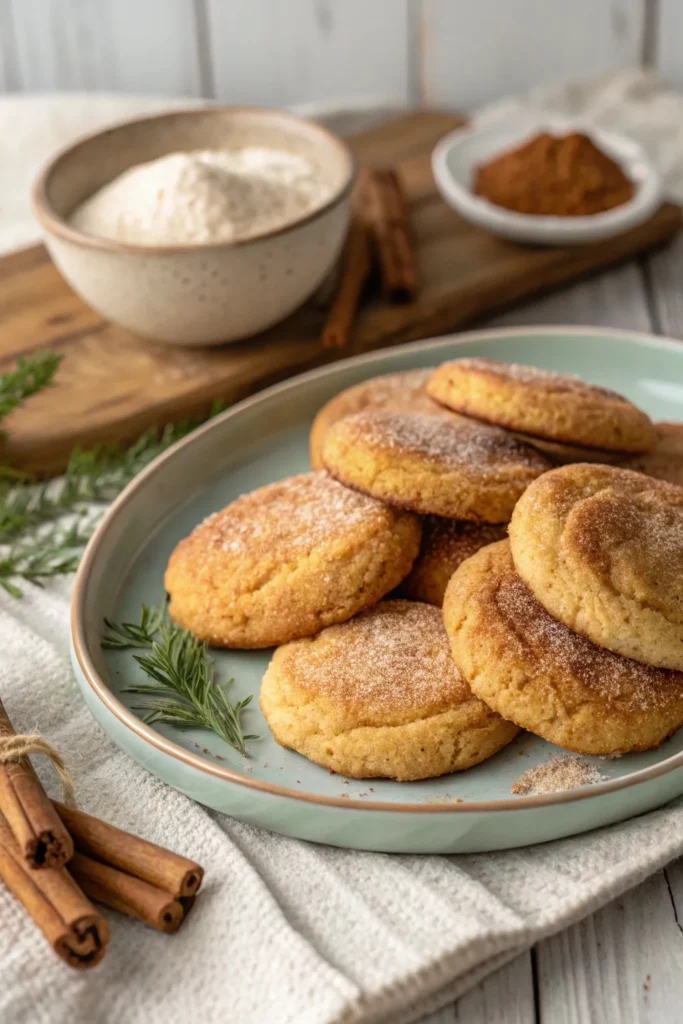
Gluten-free snickerdoodles are a delightful twist on the classic cookie, offering the same soft, chewy texture and cinnamon-sugar coating without the gluten. Perfect for those with dietary restrictions or anyone looking to try something new, these cookies are incredibly easy to make and will satisfy your sweet cravings.
With their warm, comforting flavors and inviting aroma, they’re sure to be a hit at any gathering or as a special treat for yourself. This recipe uses a blend of gluten-free flours to achieve the perfect consistency while maintaining that signature snickerdoodle taste. The addition of cream of tartar gives these cookies their characteristic tang and helps them rise beautifully while baking.
Once you bite into a freshly baked snickerdoodle, you’ll find that they’re just as delicious as their traditional counterparts.
Ingredients:
- 1 ½ cups gluten-free all-purpose flour
- 1 teaspoon baking powder
- 1 teaspoon cream of tartar
- ½ teaspoon baking soda
- ¼ teaspoon salt
- ½ cup unsalted butter, softened
- 1 cup granulated sugar
- 1 large egg
- 1 teaspoon vanilla extract
- 3 tablespoons granulated sugar (for rolling)
- 1 tablespoon ground cinnamon (for rolling)
Instructions:
Preheat your oven to 350°F (175°C) and line a baking sheet with parchment paper. In a medium bowl, whisk together the gluten-free flour, baking powder, cream of tartar, baking soda, and salt.
In a large bowl, beat the softened butter and sugar together until light and fluffy. Add the egg and vanilla extract, mixing until well combined. Gradually incorporate the dry ingredients into the wet mixture until a dough forms.
In a small bowl, combine the sugar and cinnamon for rolling. Scoop tablespoons of dough, roll them into balls, and then roll each ball in the cinnamon-sugar mixture before placing them on the prepared baking sheet. Bake for 10-12 minutes or until the edges are lightly golden.
Extra Tips:
To guarantee your snickerdoodles are perfectly chewy, avoid overbaking them; they should look slightly underbaked when you take them out of the oven. Allow them to cool on the baking sheet for a few minutes before transferring them to a wire rack to cool completely.
For added flavor, consider substituting half of the butter with coconut oil or adding a pinch of nutmeg to the cinnamon-sugar mix. Enjoy your delightful gluten-free snickerdoodles with a glass of milk or your favorite non-dairy alternative!
Luscious Gluten-Free Cheesecake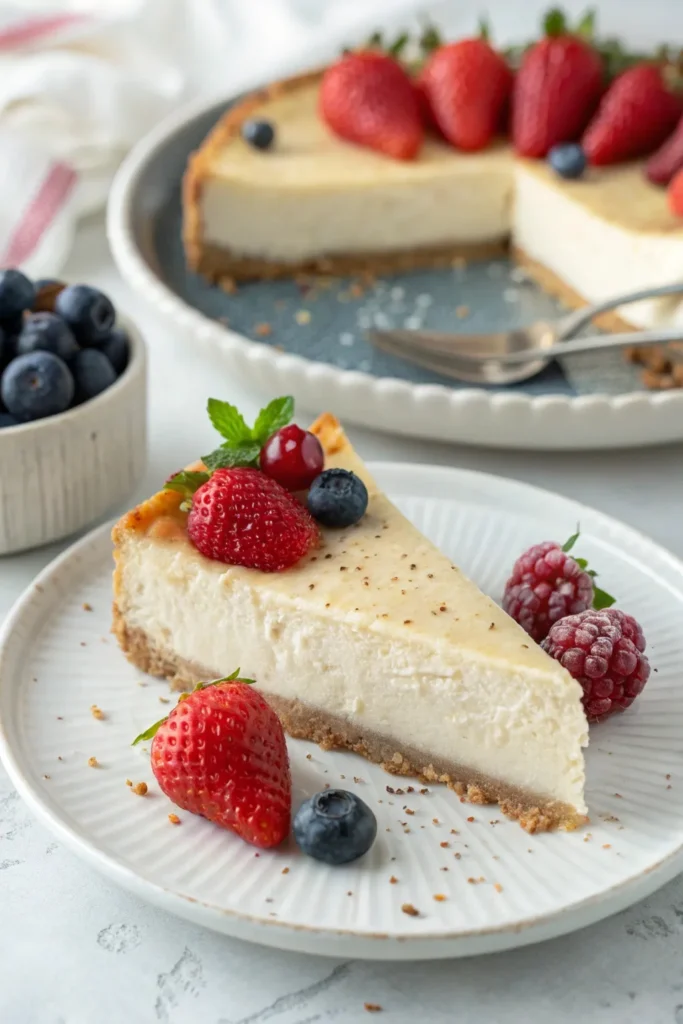
Indulging in a luscious gluten-free cheesecake is a delightful experience that allows those with gluten sensitivities to enjoy a classic dessert without compromise. This recipe combines a creamy filling with a buttery crust, ensuring that every bite is rich and satisfying. The key to achieving that perfect texture lies in using high-quality cream cheese and a few simple substitutions to create a crust that holds together beautifully while remaining gluten-free.
As you prepare to make this cheesecake, consider the flavor profiles you’d like to incorporate. You can keep it classic with vanilla or add a twist by including lemon zest, chocolate, or even fresh berries. This cheesecake is perfect for any occasion, whether it’s a holiday gathering, a special celebration, or simply a treat to enjoy at home. Gather your ingredients and let’s get started on this delicious journey.
Ingredients:
- 2 cups gluten-free graham cracker crumbs
- 1/2 cup unsalted butter, melted
- 1/4 cup granulated sugar
- 4 (8-ounce) packages cream cheese, softened
- 1 cup granulated sugar
- 1 teaspoon vanilla extract
- 4 large eggs
- 1 cup sour cream
- 1/4 cup all-purpose gluten-free flour (or cornstarch)
To make the luscious gluten-free cheesecake, preheat your oven to 325°F (163°C). In a mixing bowl, combine the gluten-free graham cracker crumbs, melted butter, and 1/4 cup sugar until well mixed. Press this mixture into the bottom of a 9-inch springform pan to form the crust.
In a separate bowl, beat the softened cream cheese until smooth, then gradually add in 1 cup of sugar and the vanilla extract. Mix in the eggs one at a time, ensuring each is fully incorporated before adding the next. Finally, add the sour cream and flour, mixing until smooth. Pour the filling over the crust and bake for approximately 55-60 minutes, or until the edges are set and the center slightly jiggles.
Turn off the oven and leave the cheesecake inside for an additional hour, then remove and let it cool to room temperature before refrigerating for at least 4 hours before serving.
When making your gluten-free cheesecake, consider using a water bath during baking to help regulate the temperature and create a creamier texture. Additionally, let the cheesecake cool gradually to prevent cracking. If you want to add a fruity topping, fresh berries or a fruit compote can elevate this dessert even further.
Fruity Gluten-Free Berry Crumble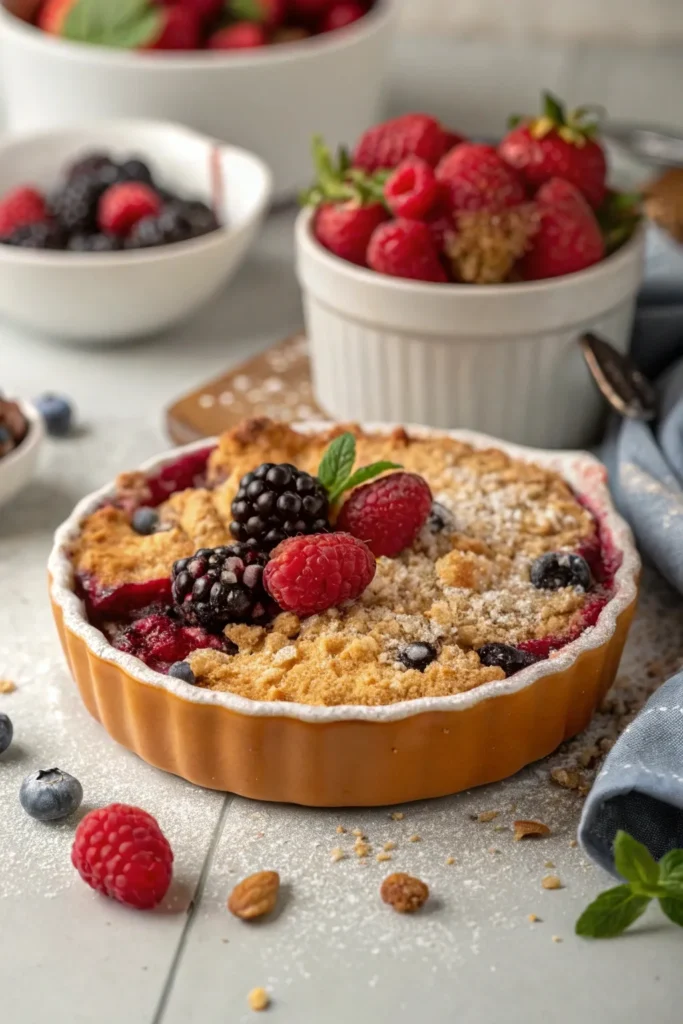
Fruity Gluten-Free Berry Crumble is a delightful dessert that showcases the vibrant flavors of fresh berries enveloped in a warm, crumbly topping. This dish is perfect for any occasion, whether you’re hosting a gathering or simply satisfying your sweet tooth. The combination of juicy berries and a crunchy topping creates a heavenly experience that everyone can enjoy, especially those following a gluten-free diet.
Using a mix of your favorite berries, this crumble isn’t only delicious but also versatile. You can use strawberries, blueberries, raspberries, or blackberries, depending on what you have on hand or what’s in season. The crumble topping is made with gluten-free oats and almond flour, offering a nutty flavor that perfectly complements the sweetness of the fruit.
Serve it warm with a scoop of vanilla ice cream or a dollop of whipped cream for an indulgent treat.
Ingredients:
- 2 cups mixed berries (strawberries, blueberries, raspberries, and/or blackberries)
- 1/4 cup granulated sugar
- 1 tablespoon lemon juice
- 1/2 teaspoon vanilla extract
- 1 cup gluten-free oats
- 1/2 cup almond flour
- 1/4 cup brown sugar
- 1/4 teaspoon salt
- 1/2 teaspoon cinnamon
- 1/4 cup coconut oil, melted
In a mixing bowl, combine the berries, granulated sugar, lemon juice, and vanilla extract, then gently stir to coat the berries evenly.
In another bowl, mix the gluten-free oats, almond flour, brown sugar, salt, and cinnamon. Pour in the melted coconut oil and mix until the topping resembles coarse crumbs.
Spread the berry mixture evenly in a baking dish, top with the crumble mixture, and bake at 350°F (175°C) for 25-30 minutes, or until the top is golden brown and the berries are bubbly.
For a delicious twist, try adding a teaspoon of almond extract to the berry mixture for added depth of flavor, or experiment with different nut flours like coconut or hazelnut for the crumble topping.
Additionally, feel free to adjust the sweetness by adding more or less sugar based on your taste preferences and the ripeness of your berries.
Enjoy your gluten-free berry crumble warm, and store any leftovers in the refrigerator for up to three days!
Indulgent Gluten-Free Peanut Butter Cookies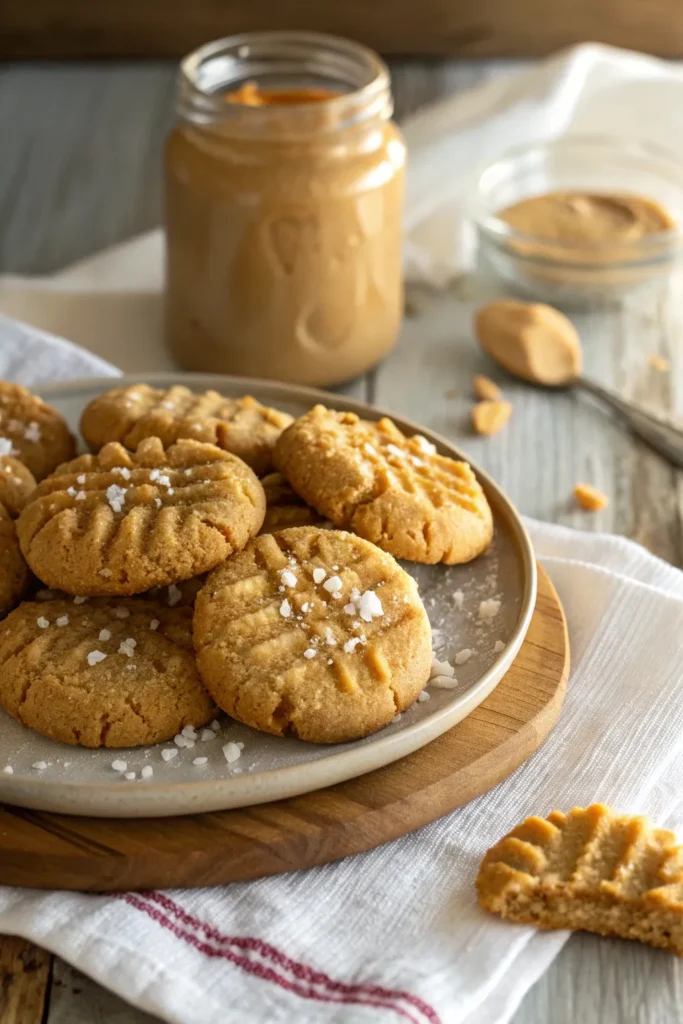
Indulgent gluten-free peanut butter cookies are a delightful treat that satisfies your sweet tooth without the worry of gluten. These cookies are rich, chewy, and packed with the irresistible flavor of peanut butter, making them a favorite for both gluten-free and non-gluten-free eaters alike.
The best part is that they come together quickly and easily, requiring minimal ingredients that you may already have in your pantry. These cookies are perfect for any occasion, whether it’s a cozy night in, a gathering with friends, or a special celebration.
The combination of creamy peanut butter and a hint of sweetness creates a melt-in-your-mouth experience that you won’t want to miss. So, grab your mixing bowl and get ready to whip up a batch of these indulgent gluten-free peanut butter cookies!
Ingredients:
- 1 cup creamy peanut butter
- 1 cup brown sugar
- 1 large egg
- 1 teaspoon vanilla extract
- 1 teaspoon baking soda
- ½ teaspoon salt
- Optional: chocolate chips or chopped nuts
Instructions:
Preheat your oven to 350°F (175°C) and line a baking sheet with parchment paper. In a mixing bowl, combine the peanut butter, brown sugar, egg, vanilla extract, baking soda, and salt.
Mix well until the ingredients are fully incorporated and a dough forms. If desired, fold in chocolate chips or chopped nuts for an extra touch. Scoop tablespoon-sized portions of dough onto the prepared baking sheet, spacing them about 2 inches apart.
Gently flatten each cookie with the back of a fork, creating a crisscross pattern, and bake for 10-12 minutes or until the edges are golden. Allow the cookies to cool on the baking sheet for a few minutes before transferring them to a wire rack to cool completely.
Extra Tips:
For a more intense peanut butter flavor, try using crunchy peanut butter instead of creamy. You can also experiment with adding a pinch of cinnamon or a dash of sea salt on top of the cookies before baking for an extra burst of flavor.
These cookies are best enjoyed fresh, but you can store them in an airtight container at room temperature for up to a week. If you want to freeze them, simply place the baked cookies in a freezer-safe bag for up to three months and thaw them at room temperature when you’re ready to enjoy!


