
When it comes to breakfast, finding gluten-free options that are both tasty and filling can be a challenge. You want something that fuels your day without sacrificing flavor. Whether you’re in the mood for something sweet or savory, there are plenty of delicious choices to explore. From hearty bowls to easy make-ahead meals, you’ll discover satisfying ideas that keep your mornings stress-free and enjoyable. Let’s uncover these delightful options together.
Quinoa Breakfast Bowl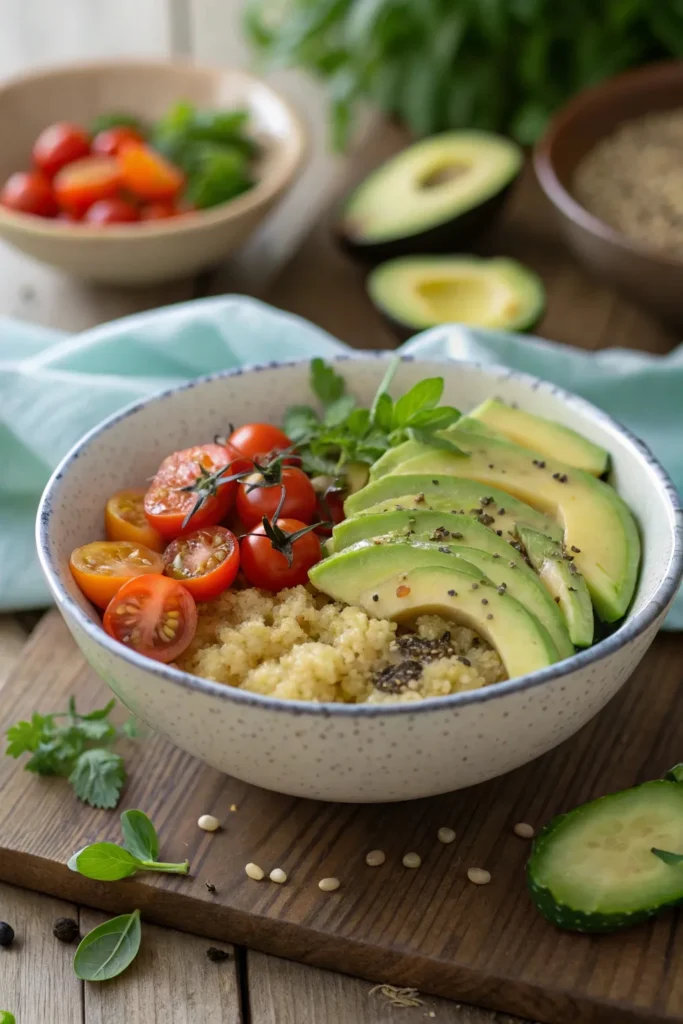
Quinoa breakfast bowls are a nutritious and versatile way to start your day, particularly for those following a gluten-free diet. Quinoa, often referred to as a superfood, isn’t only gluten-free but also packed with protein, fiber, and essential nutrients.
This breakfast bowl can be easily customized with your favorite fruits, nuts, and seeds, making it a delicious choice for anyone looking to fuel their morning with wholesome ingredients.
To prepare a quinoa breakfast bowl, you’ll first need to cook the quinoa. It’s simple to make and can be done in advance, allowing you to assemble your breakfast bowl in just a few minutes. This recipe showcases the delightful combination of quinoa, fresh fruits, and a drizzle of honey or maple syrup for sweetness, offering a delightful balance of flavors and textures.
Let’s explore the ingredients and the cooking instructions!
Ingredients:
- 1 cup quinoa
- 2 cups water or almond milk
- 1/2 teaspoon salt
- 1 cup fresh fruit (e.g., berries, banana, apple)
- 1/4 cup nuts or seeds (e.g., almonds, walnuts, chia seeds)
- 1 tablespoon honey or maple syrup (optional)
- 1/2 teaspoon cinnamon (optional)
- Yogurt (optional)
Cooking Instructions:
Rinse the quinoa under cold water to remove any bitterness, then combine it with water or almond milk and salt in a medium saucepan.
Bring the mixture to a boil, then reduce the heat to low, cover, and simmer for about 15 minutes or until the liquid is absorbed. Once cooked, fluff the quinoa with a fork and let it cool slightly before transferring it to a bowl.
Top with fresh fruit, nuts or seeds, and a drizzle of honey or maple syrup, and sprinkle with cinnamon if desired.
Extra Tips:
For added flavor and nutrition, consider toasting the quinoa in a dry skillet for a few minutes before cooking it, as this enhances its nutty flavor.
You can also prepare a larger batch of quinoa ahead of time and store it in the refrigerator for up to five days, making it easy to assemble quick breakfast bowls throughout the week.
Feel free to experiment with different toppings such as nut butter, coconut flakes, or even a dollop of yogurt to create your perfect breakfast bowl!
Banana Oatmeal Pancakes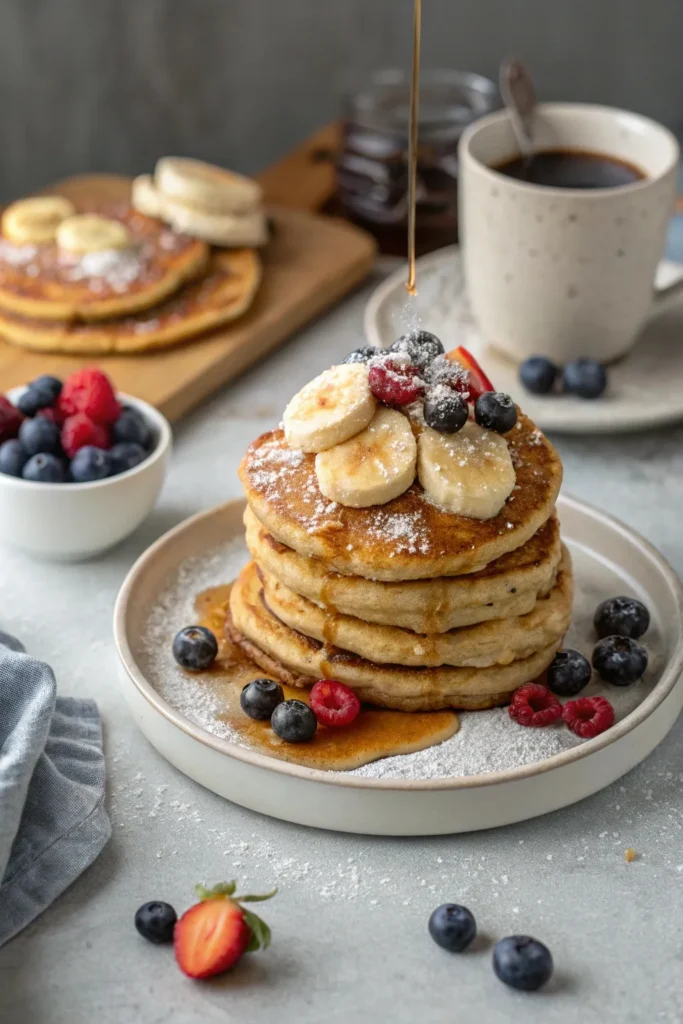
Banana oatmeal pancakes are a delicious and healthy way to start your day. They’re naturally gluten-free, making them an excellent option for those with dietary restrictions. The combination of ripe bananas and rolled oats creates a fluffy texture, while adding a hint of sweetness that everyone will love.
These pancakes aren’t only easy to make but also provide a nutritious boost to your breakfast. Incorporating oats into your pancake mix adds fiber and essential nutrients, making these pancakes a wholesome choice compared to traditional recipes.
Additionally, they’re incredibly versatile; you can customize them by adding your favorite toppings such as fresh fruits, nut butter, or a drizzle of maple syrup. Whether enjoyed on a lazy weekend morning or as a quick weekday breakfast, these banana oatmeal pancakes are sure to become a family favorite.
Ingredients:
- 1 cup rolled oats
- 2 ripe bananas
- 2 eggs
- 1/2 cup milk (dairy or non-dairy)
- 1 teaspoon baking powder
- 1 teaspoon vanilla extract
- A pinch of salt
- Optional toppings: sliced bananas, berries, maple syrup, nut butter
Cooking Instructions:
In a blender, combine the rolled oats, ripe bananas, eggs, milk, baking powder, vanilla extract, and a pinch of salt. Blend until the mixture is smooth and well combined.
Preheat a non-stick skillet or griddle over medium heat and lightly grease it with cooking spray or oil. Pour approximately 1/4 cup of the batter onto the skillet for each pancake and cook until bubbles form on the surface, then flip and cook for an additional 1-2 minutes until golden brown.
Extra Tips:
For added flavor and nutrition, consider mixing in some cinnamon or a handful of chopped nuts into the batter. If the batter seems too thick, you can thin it out by adding a bit more milk until the desired consistency is reached.
To keep pancakes warm while you cook the rest, place them in a preheated oven at low temperature. These pancakes can also be made in advance and frozen for a quick breakfast option throughout the week!
Chia Seed Pudding
Chia seed pudding is a versatile and nutritious breakfast option that isn’t only gluten-free but also packed with health benefits. Chia seeds are rich in omega-3 fatty acids, fiber, and protein, making them a fantastic choice for starting your day on a healthy note.
This pudding is incredibly easy to prepare and can be customized with various flavors, fruits, and toppings to suit your palate. To make chia seed pudding, all you need is a few simple ingredients and some patience as the seeds absorb liquid and expand. The pudding can be made the night before, allowing the flavors to meld and making it a convenient grab-and-go breakfast for busy mornings.
Whether you enjoy it plain, with a splash of vanilla, or topped with fresh fruit and nuts, chia seed pudding is sure to satisfy your morning hunger.
Ingredients:
- 1/4 cup chia seeds
- 1 cup almond milk (or any other non-dairy milk)
- 1 tablespoon maple syrup (or honey)
- 1/2 teaspoon vanilla extract
- Fresh fruit (such as berries or banana slices) for topping
- Nuts or seeds for garnish (optional)
Instructions:
In a medium bowl, combine the chia seeds, almond milk, maple syrup, and vanilla extract. Whisk the mixture well to guarantee the chia seeds are evenly distributed.
Let it sit for about 5 minutes, then whisk again to break up any clumps that may have formed. Cover the bowl and refrigerate for at least 2 hours, or overnight, until the pudding has thickened to your desired consistency.
Serve chilled, topped with fresh fruit and nuts if desired.
Extra Tips:
For a creamier pudding, try blending the almond milk with the other ingredients before adding the chia seeds. You can also experiment with different types of milk, such as coconut or oat milk, for varied flavors.
Additionally, feel free to add spices like cinnamon or cocoa powder for an extra flavor boost, and remember that chia seed pudding can be stored in the fridge for up to five days, making it a great make-ahead option for busy weeks!
Avocado Toast on Gluten-Free Bread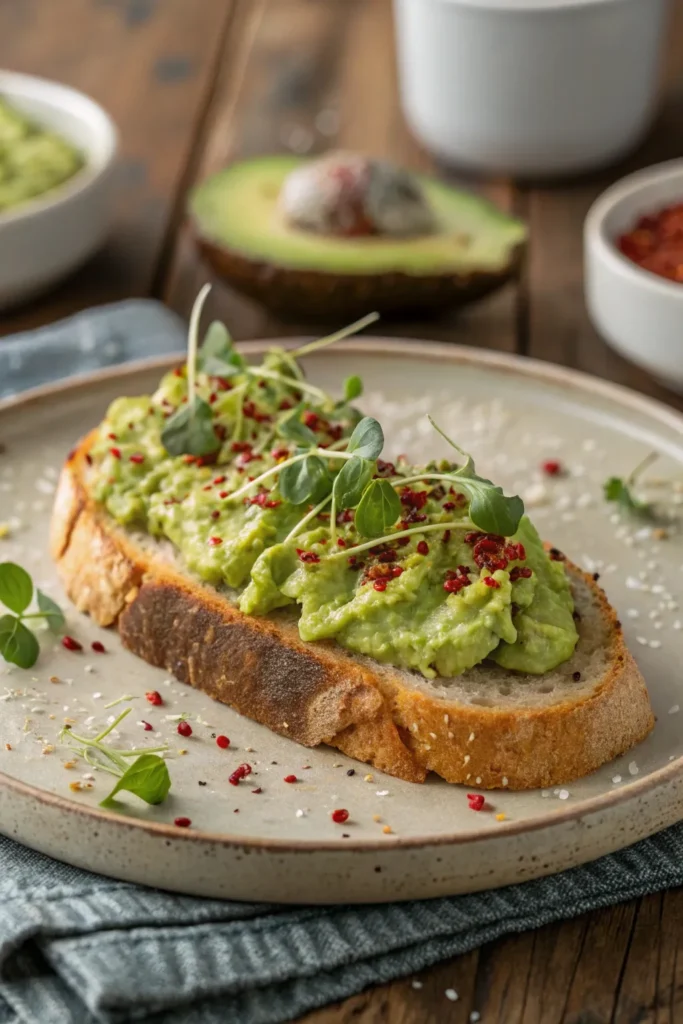
Avocado toast has become a breakfast staple for many, and for those adhering to a gluten-free diet, it can be easily adapted to fit your needs using gluten-free bread. This delightful dish isn’t only simple to prepare but also packed with nutrients and flavor.
The creamy texture of ripe avocados combined with the crunch of toasted bread makes for a satisfying and wholesome meal that can be enjoyed any time of day.
To elevate your gluten-free avocado toast, you can add various toppings such as cherry tomatoes, radishes, or a sprinkle of seeds for added crunch and nutrition. Seasoning your avocado with a pinch of salt, pepper, and a squeeze of lemon juice not only enhances the flavor but also prevents the avocado from browning.
Whether you’re in a rush or looking to enjoy a leisurely breakfast, avocado toast on gluten-free bread is a versatile and delicious option.
Ingredients:
- 2 slices of gluten-free bread
- 1 ripe avocado
- Salt, to taste
- Black pepper, to taste
- Lemon juice, to taste
- Optional toppings (cherry tomatoes, radishes, seeds, or microgreens)
Instructions:
Begin by toasting the gluten-free bread slices until they reach your desired level of crispiness.
While the bread is toasting, cut the ripe avocado in half, remove the pit, and scoop the flesh into a bowl. Mash the avocado with a fork, adding a pinch of salt, pepper, and a squeeze of lemon juice to taste.
Once the bread is toasted, spread the mashed avocado generously on each slice. Add any optional toppings you desire and serve immediately.
Extra Tips:
For the best flavor, choose ripe avocados that yield slightly to gentle pressure when squeezed.
You can also experiment with different types of gluten-free bread, such as those made from almond flour or oat flour, to find your favorite texture and taste.
If you want to make your avocado toast even more filling, consider adding a poached egg on top for added protein!
Sweet Potato Hash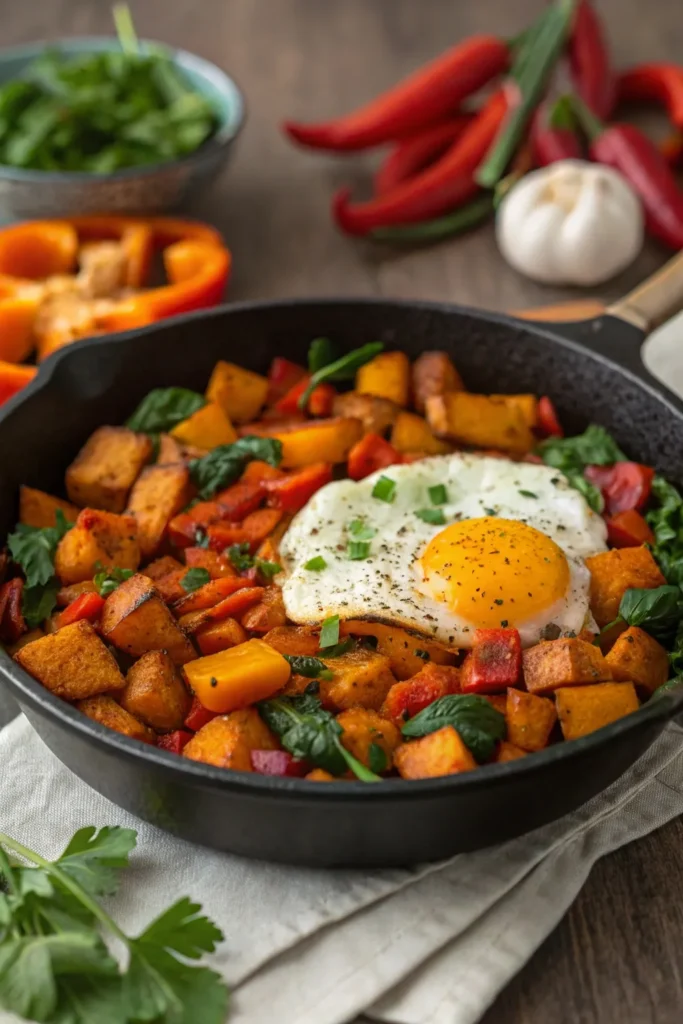
Sweet Potato Hash is a delicious, hearty dish that’s perfect for breakfast or brunch. Packed with nutrients and flavor, this gluten-free recipe brings together the natural sweetness of sweet potatoes with savory ingredients, making it a satisfying way to start your day.
Whether you’re cooking for yourself or entertaining guests, this dish is versatile and easy to customize to your taste preferences. To make this Sweet Potato Hash, you can add your choice of proteins and vegetables, such as bell peppers, onions, or even kale, to enhance the flavor and nutritional value.
The combination of roasted sweet potatoes with other fresh ingredients creates a colorful and appealing plate. Plus, it’s a fantastic way to use up any leftover vegetables you may have in your fridge!
Ingredients
- 2 large sweet potatoes, peeled and diced
- 1 red bell pepper, diced
- 1 small onion, diced
- 2 cloves garlic, minced
- 1 teaspoon paprika
- 1 teaspoon cumin
- Salt and pepper to taste
- 2 tablespoons olive oil
- Fresh parsley for garnish (optional)
- Eggs (optional, for topping)
Cooking Instructions
In a large skillet, heat the olive oil over medium heat. Add the diced sweet potatoes and cook for about 10-15 minutes, stirring occasionally, until they start to soften.
Then, add the diced onion, bell pepper, and garlic. Season with paprika, cumin, salt, and pepper. Continue to cook for another 10 minutes or until the sweet potatoes are tender and slightly crispy, stirring occasionally.
If desired, cook some eggs in a separate pan to top the hash before serving. Garnish with fresh parsley.
Extra Tips
For added flavor, consider incorporating spices like chili powder or smoked paprika. You can also experiment with different vegetables based on what you have on hand.
To make it a complete meal, serve your Sweet Potato Hash with poached or fried eggs on top, and don’t forget to adjust the cooking time based on your desired level of crispiness. Enjoy this dish warm, and feel free to prepare it in larger batches for leftovers throughout the week!
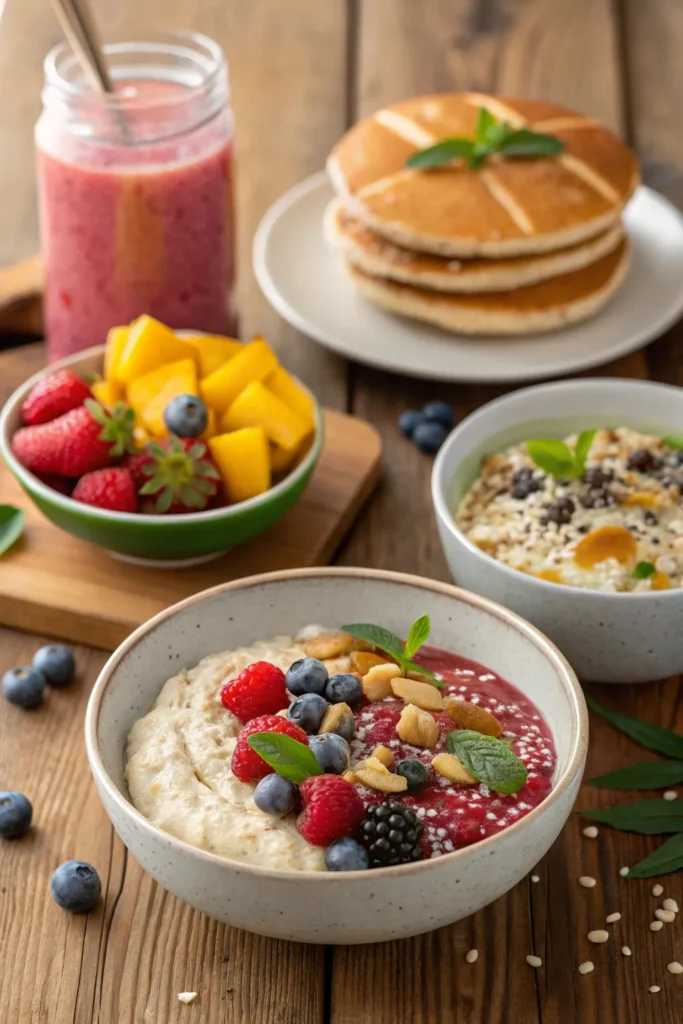
Smoothie Bowl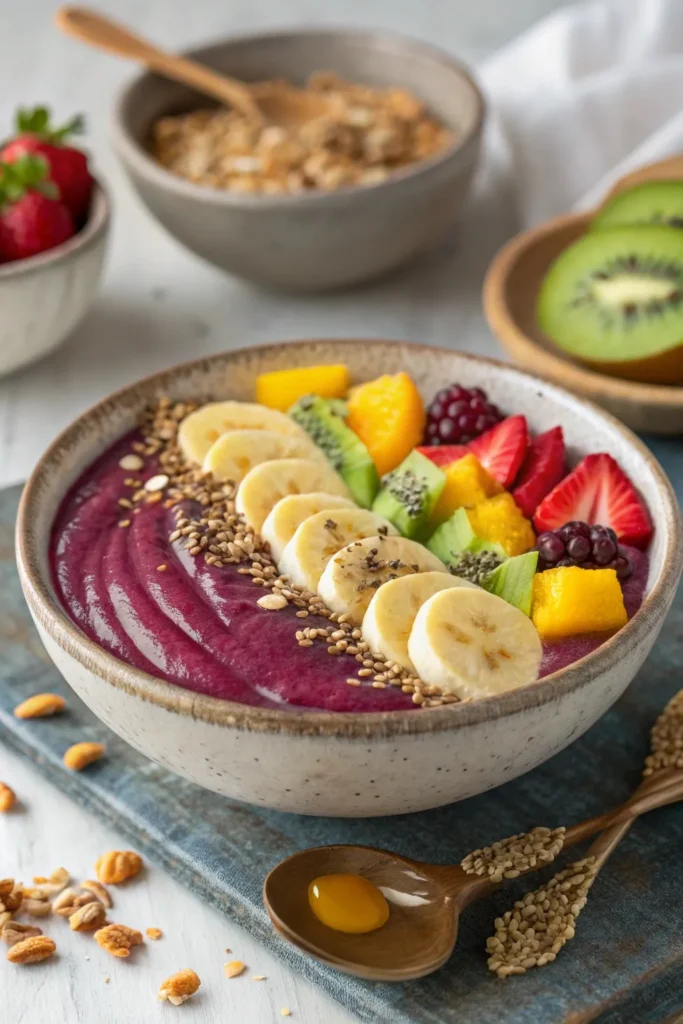
Smoothie bowls are a delightful and nutritious way to kick-start your day, especially for those adhering to a gluten-free lifestyle. They offer a great opportunity to get creative with flavors and textures while packing in a host of vitamins and minerals.
By blending your favorite fruits with a base of yogurt or milk, and then topping it with granola, seeds, and fresh fruit, you can customize your smoothie bowl to suit your taste preferences and dietary needs.
This vibrant and invigorating dish not only provides a burst of flavor but also a satisfying meal that will keep you energized throughout the morning. The addition of toppings allows for a delightful crunch against the creamy base, making every spoonful a delightful experience.
Whether you’re in a rush or have a little more time to spend in the kitchen, a smoothie bowl can be prepared in just a few minutes.
Ingredients:
- 1 frozen banana
- 1 cup frozen mixed berries
- ½ cup spinach or kale (optional)
- ½ cup almond milk (or any preferred milk)
- ½ cup yogurt (dairy-free if needed)
- Toppings: sliced fresh fruit, granola, chia seeds, shredded coconut, nuts, or seeds
Cooking Instructions:
In a blender, combine the frozen banana, frozen mixed berries, spinach or kale (if using), almond milk, and yogurt.
Blend until smooth and creamy, adding more almond milk if necessary to reach your desired consistency.
Pour the smoothie into a bowl and artfully arrange your favorite toppings on top.
Extra Tips:
When making your smoothie bowl, feel free to experiment with different fruits and toppings to keep things interesting.
You can also adjust the thickness by adding more or less liquid based on your preferences.
For an extra protein boost, consider adding a scoop of gluten-free protein powder or nut butter into the blend.
Enjoy your creation with a spoon and savor every bite!
Egg and Veggie Muffins
Egg and veggie muffins are a fantastic gluten-free breakfast option that can be prepared ahead of time, making them perfect for busy mornings. Packed with protein and vitamins, these muffins can be easily customized with your favorite vegetables and seasonings.
They aren’t only healthy but also incredibly versatile, allowing you to experiment with different flavors and textures. Simply bake a batch at the beginning of the week and enjoy a nutritious breakfast on the go.
These muffins are a great way to use up leftover vegetables, and they can even be made with eggs from free-range chickens for an extra boost of flavor. Whether you’re looking for a quick breakfast to fuel your day or a wholesome snack to enjoy, these egg and veggie muffins are sure to satisfy your cravings while keeping you on track with your gluten-free lifestyle.
Ingredients:
- 6 large eggs
- 1 cup diced bell peppers (any color)
- 1 cup chopped spinach or kale
- 1/2 cup diced onions
- 1/2 cup shredded cheese (optional)
- Salt and pepper to taste
- 1 teaspoon garlic powder
- 1 teaspoon onion powder
- Cooking spray or olive oil for greasing the muffin tin
Instructions:
Preheat your oven to 350°F (175°C) and grease a muffin tin with cooking spray or olive oil. In a large mixing bowl, whisk together the eggs, salt, pepper, garlic powder, and onion powder until well combined.
Fold in the diced bell peppers, chopped spinach, diced onions, and shredded cheese if using. Pour the egg mixture evenly into the muffin tin, filling each cup about three-quarters full. Bake for 18-20 minutes, or until the muffins are set and lightly golden on top. Allow to cool for a few minutes before removing them from the tin.
Extra Tips:
Feel free to get creative with your veggie muffins by adding ingredients like diced tomatoes, mushrooms, or even cooked bacon for extra flavor.
You can also make these muffins ahead of time and store them in an airtight container in the refrigerator for up to a week. Reheat them in the microwave for a quick breakfast, or freeze them for longer storage. Just remember to adjust the baking time if you decide to use a silicone muffin pan or a different-sized tin!
Coconut Yogurt Parfait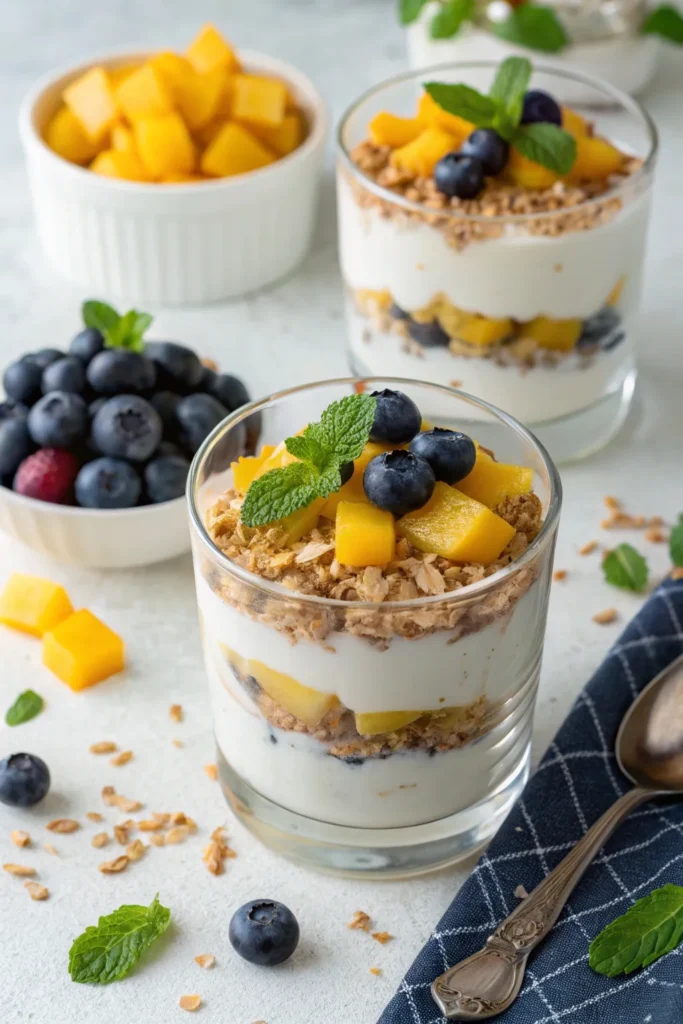
Coconut yogurt parfaits are a delightful and nutritious way to kickstart your day, especially for those following a gluten-free diet. This simple yet satisfying breakfast isn’t only flavorful but also customizable, allowing you to incorporate your favorite fruits and toppings.
The creamy texture of coconut yogurt pairs beautifully with the crunch of granola and the natural sweetness of fresh fruits, making it a perfect treat for any morning.
To prepare a coconut yogurt parfait, you’ll need just a few wholesome ingredients. This recipe is quick and easy, ideal for busy mornings or leisurely weekends. Layering the ingredients beautifully in a glass not only enhances the visual appeal but also allows for a delightful combination of flavors with every bite.
Whether you’re enjoying it alone or serving guests, this parfait is sure to impress!
Ingredients:
- 1 cup coconut yogurt
- 1 cup gluten-free granola
- 1 cup mixed berries (strawberries, blueberries, raspberries)
- 1 tablespoon honey or maple syrup (optional)
- 2 tablespoons shredded coconut (unsweetened)
- Fresh mint leaves for garnish (optional)
Instructions:
In a glass or bowl, start by adding a layer of coconut yogurt as the base. Then, layer in the gluten-free granola followed by a generous layer of mixed berries.
Repeat the layers until the glass is filled, finishing with a layer of berries on top. If desired, drizzle honey or maple syrup over the top and sprinkle with shredded coconut. Garnish with fresh mint leaves for an added touch of freshness.
Extra Tips:
Feel free to switch up the fruits based on what’s in season or your personal preferences. You can also make this parfait ahead of time by prepping the ingredients and storing them separately in the fridge, then assembling them just before serving for maximum freshness.
For added protein, consider mixing in a scoop of your favorite nut butter or adding some chia seeds to the yogurt layer. Enjoy your delicious and healthy coconut yogurt parfait!
Gluten-Free Granola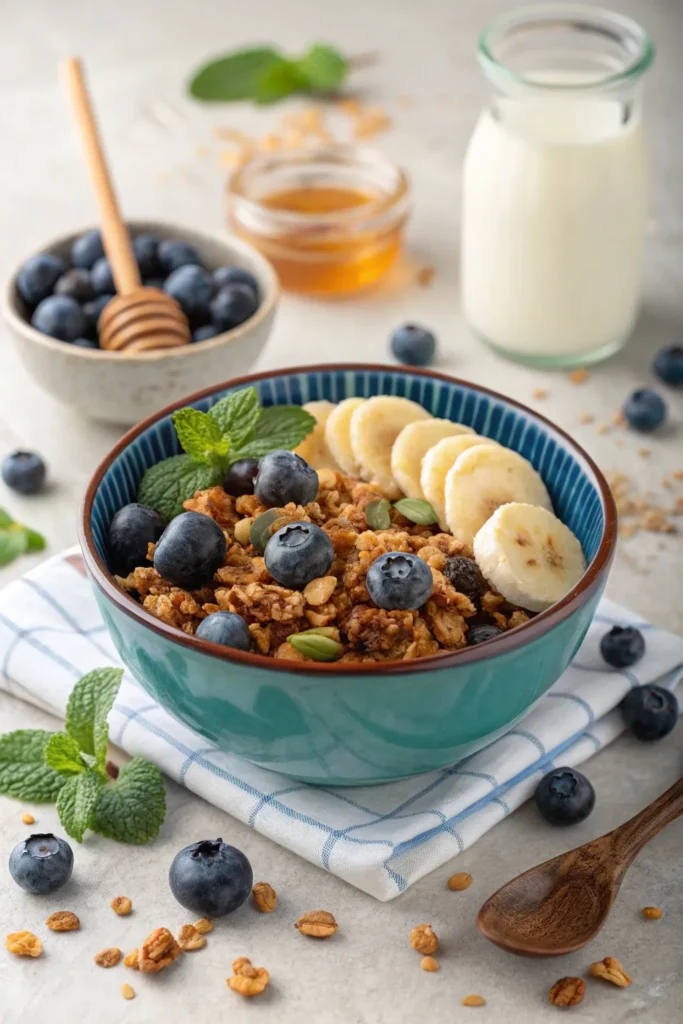
Making your own gluten-free granola isn’t only simple, but it also allows you to control the ingredients and flavors, guaranteeing a delicious and nutritious breakfast. This homemade granola is perfect for topping yogurt, adding to smoothies, or simply enjoying it by the handful.
With a blend of oats, nuts, seeds, and natural sweeteners, you can customize the recipe to match your taste preferences and dietary needs. In addition to being gluten-free, this granola recipe is versatile. You can incorporate your favorite dried fruits, spices, or even chocolate chips for a sweeter treat.
Preparing your granola in batches guarantees you have a healthy breakfast option ready for busy mornings. Enjoy the process of creating your own signature blend, and relish the delightful aroma that wafts through your kitchen as it bakes.
Ingredients
- 3 cups gluten-free rolled oats
- 1 cup mixed nuts (such as almonds, walnuts, or pecans), chopped
- 1/2 cup seeds (such as pumpkin or sunflower seeds)
- 1/2 cup honey or maple syrup
- 1/4 cup coconut oil, melted
- 1 teaspoon vanilla extract
- 1/2 teaspoon cinnamon
- 1/4 teaspoon salt
- 1 cup dried fruit (such as cranberries, raisins, or apricots), added after baking
Cooking Instructions
Preheat your oven to 325°F (165°C). In a large mixing bowl, combine the gluten-free rolled oats, chopped nuts, and seeds.
In a separate bowl, whisk together the honey or maple syrup, melted coconut oil, vanilla extract, cinnamon, and salt. Pour the wet mixture over the dry ingredients and stir until everything is evenly coated.
Spread the mixture onto a lined baking sheet in an even layer and bake for 20-25 minutes, stirring halfway through, until golden brown. Once baked, let it cool completely before adding the dried fruit.
Extra Tips
When making granola, feel free to experiment with different nuts, seeds, and spices to suit your taste.
Store the finished granola in an airtight container at room temperature for up to two weeks. For added crunch, consider baking it a little longer, but be careful not to let it burn.
Finally, you can also make larger batches and freeze portions for a quick grab-and-go breakfast option later on.
Almond Flour Waffles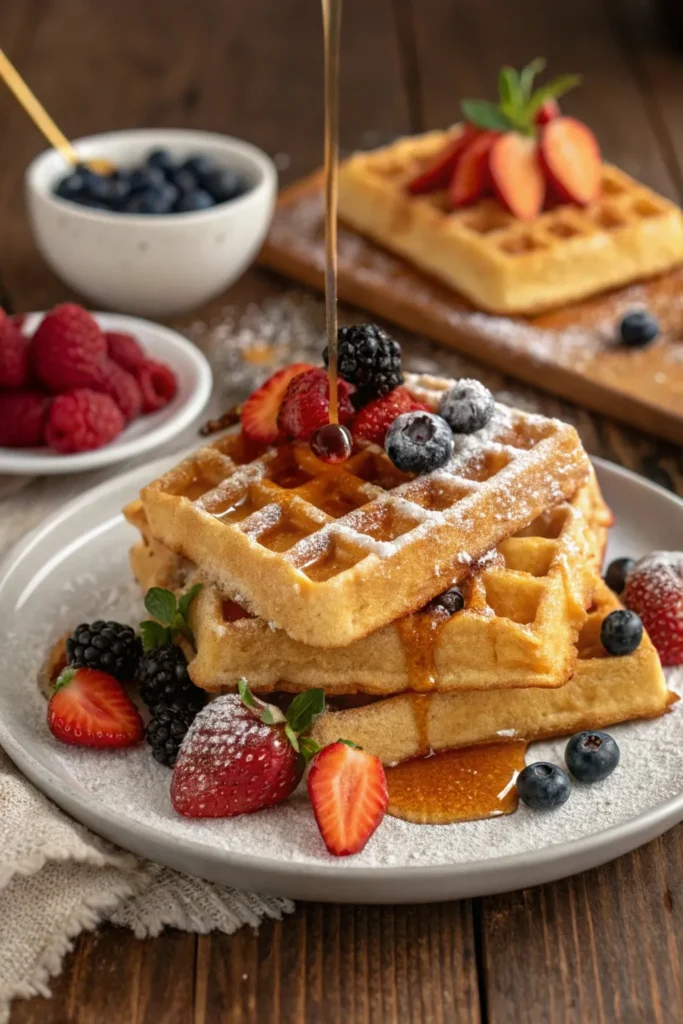
Almond flour waffles are a delicious and nutritious alternative to traditional waffles, making them an excellent choice for those following a gluten-free diet. The use of almond flour not only provides a nutty flavor but also adds healthy fats and protein, ensuring that you’re starting your day with a wholesome meal.
These waffles are easy to make and can be enjoyed plain, topped with fresh fruits, or drizzled with maple syrup for a touch of sweetness.
These waffles are versatile and can be customized to fit your taste preferences. Adding ingredients such as vanilla extract, cinnamon, or even chocolate chips can elevate their flavor profile. They’re perfect for breakfast, brunch, or even as a snack, and can be made in bulk and frozen for later use, making them a convenient option for busy mornings.
Ingredients:
- 2 cups almond flour
- 2 large eggs
- 1/4 cup unsweetened almond milk (or any milk of choice)
- 2 tablespoons melted coconut oil or butter
- 1 tablespoon honey or maple syrup (optional)
- 1 teaspoon baking powder
- 1/2 teaspoon vanilla extract
- 1/4 teaspoon salt
To make the almond flour waffles, start by preheating your waffle iron according to the manufacturer’s instructions. In a mixing bowl, whisk together the almond flour, baking powder, and salt.
In a separate bowl, combine the eggs, almond milk, melted coconut oil, honey or maple syrup (if using), and vanilla extract. Pour the wet ingredients into the dry ingredients and mix until just combined.
Lightly grease the waffle iron with oil or non-stick spray, then pour the batter into the preheated waffle iron, close the lid, and cook until golden brown and crispy, usually about 3-5 minutes depending on your waffle iron.
When making almond flour waffles, be mindful of the batter consistency; it should be thick but pourable. If you find the batter too thick, you can add a bit more almond milk to reach your desired consistency.
Additionally, let the waffles cool for a moment before serving, as they tend to crisp up even more upon sitting. Enjoy them fresh, or store leftovers in an airtight container in the refrigerator for up to three days, or freeze them for longer storage, reheating them in a toaster for a quick breakfast option.


