
When it comes to maintaining a healthy diet, finding recipes that fit your needs can be challenging. You’ve got options, whether you’re vegan, gluten-free, or looking to cut carbs. Each dish on this list is crafted to be both nutritious and flavorful, helping you meet your health goals effortlessly. Curious about how a simple quinoa salad or a creamy avocado pesto can transform your meals? Let’s explore these enticing recipes together.
Quinoa and Black Bean Salad
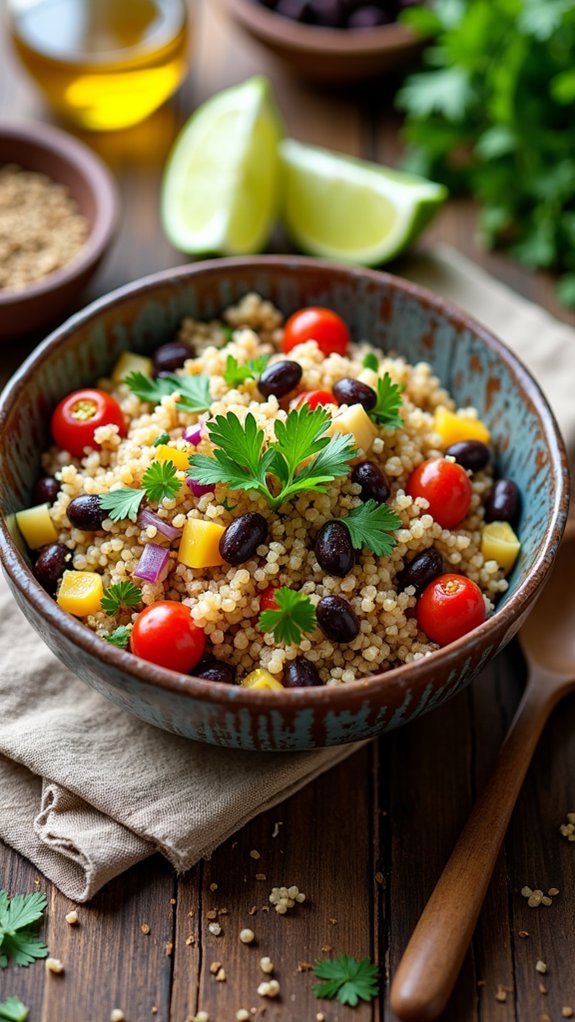
Quinoa and black bean salad is a vibrant, nutritious dish that’s perfect for any meal. Packed with protein, fiber, and essential nutrients, this salad isn’t only delicious but also incredibly satisfying.
It’s a versatile recipe that can be enjoyed on its own, served as a side dish, or even used as a filling for tacos or wraps. Plus, it’s easy to make and can be prepared in advance, making it a great option for meal prep.
This salad is great for various diet plans, whether you’re vegan, gluten-free, or just looking to incorporate more wholesome ingredients into your diet. The combination of quinoa and black beans provides a hearty base, while the fresh vegetables and zesty dressing add a burst of flavor.
With its colorful presentation and invigorating taste, this dish is sure to become a favorite in your meal rotation.
Ingredients:
- 1 cup quinoa
- 2 cups water or vegetable broth
- 1 can (15 oz) black beans, rinsed and drained
- 1 cup cherry tomatoes, halved
- 1 bell pepper, diced (any color)
- 1/2 red onion, finely chopped
- 1/4 cup fresh cilantro, chopped
- Juice of 1 lime
- 3 tablespoons olive oil
- 1 teaspoon cumin
- Salt and pepper to taste
Cooking Instructions:
Rinse the quinoa under cold water and then combine it with the water or vegetable broth in a saucepan. Bring to a boil, reduce the heat, and let it simmer for about 15 minutes or until the quinoa is fluffy and the liquid is absorbed.
Remove from heat and let it cool. In a large bowl, combine the cooked quinoa, black beans, cherry tomatoes, bell pepper, red onion, and cilantro. In a separate bowl, whisk together the lime juice, olive oil, cumin, salt, and pepper, then pour the dressing over the salad and toss gently to combine.
Extra Tips:
For added flavor, consider marinating the black beans in lime juice and spices for a few hours before mixing them into the salad.
You can also customize this recipe by adding other ingredients such as avocado, corn, or jalapeños for an extra kick. This salad keeps well in the fridge for up to three days, making it an excellent choice for meal prep or leftovers. Enjoy it chilled or at room temperature!
Zucchini Noodles With Avocado Pesto

Zucchini noodles, also known as “zoodles,” are a fantastic low-carb alternative to traditional pasta, making them perfect for various diet plans. They’re light, invigorating, and can be easily paired with a variety of sauces and toppings.
In this recipe, we’ll create a creamy avocado pesto that not only adds flavor but also provides healthy fats, making this dish both nutritious and satisfying.
The preparation of zucchini noodles is incredibly simple and quick. Using a spiralizer, you can create long, noodle-like strands from fresh zucchini. This dish isn’t only colorful and appealing but also packed with vitamins and minerals.
The avocado pesto, made with fresh basil and garlic, complements the zoodles beautifully, giving them a rich and vibrant taste that will leave you wanting more.
Ingredients:
- 2 medium zucchinis
- 1 ripe avocado
- 1 cup fresh basil leaves
- 2 cloves garlic
- 2 tablespoons lemon juice
- 2 tablespoons olive oil
- Salt and pepper to taste
- Optional: cherry tomatoes and pine nuts for garnish
Cooking Instructions:
Begin by spiralizing the zucchinis to create noodles and set them aside.
In a food processor, combine the ripe avocado, fresh basil, garlic, lemon juice, and olive oil, blending until smooth and creamy.
Season the pesto with salt and pepper to taste. Toss the zucchini noodles with the avocado pesto until evenly coated, and then serve immediately, garnished with cherry tomatoes and pine nuts if desired.
Extra Tips:
For the best texture, avoid overcooking the zucchini noodles; they should remain slightly firm.
If you prefer a warm dish, lightly sauté the zoodles in a non-stick pan for just 1-2 minutes before adding the pesto.
You can also customize the pesto by adding nuts, such as walnuts or almonds, for added crunch, or spice it up with a pinch of red pepper flakes for some heat.
Enjoy this healthy dish as a main course or a side!
Cauliflower Fried Rice
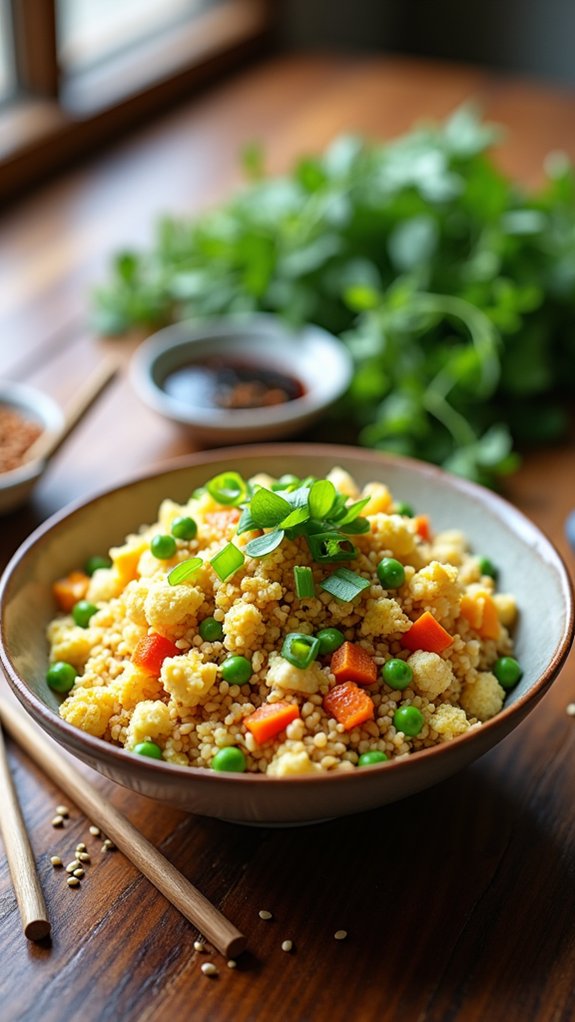
Cauliflower Fried Rice is a delicious and healthy alternative to traditional fried rice, perfect for those following low-carb, gluten-free, or paleo diets. This dish takes advantage of the versatility of cauliflower, which is finely chopped to create a rice-like texture.
With the addition of colorful vegetables and savory seasonings, this recipe isn’t only nutritious but also bursting with flavor, making it an ideal side dish or main course.
Making Cauliflower Fried Rice is quick and easy, allowing you to whip up a satisfying meal in no time. You can customize it by adding your favorite proteins, such as chicken, shrimp, or tofu, and incorporating seasonal vegetables to suit your taste.
Whether you’re meal prepping for the week or hosting a dinner party, this recipe is sure to impress and keep everyone coming back for more.
Ingredients:
- 1 medium head of cauliflower
- 2 tablespoons of olive oil
- 2 cloves of garlic, minced
- 1 small onion, diced
- 1 cup of frozen peas and carrots
- 2 eggs, lightly beaten
- 3 tablespoons of soy sauce or tamari (for gluten-free)
- 1 teaspoon of sesame oil
- Salt and pepper to taste
- Green onions, chopped (for garnish)
Cooking Instructions:
Start by removing the leaves and stem from the cauliflower, then cut it into florets and pulse in a food processor until it resembles rice.
In a large skillet or wok, heat the olive oil over medium heat and sauté the garlic and onion until fragrant and translucent. Add the frozen peas and carrots, cooking until they’re warmed through.
Push the veggies to one side of the skillet, pour in the beaten eggs, and scramble until cooked. Stir in the cauliflower rice, soy sauce, and sesame oil, mixing everything together until heated through.
Season with salt and pepper to taste, and garnish with chopped green onions before serving.
Extra Tips:
For an even more flavorful dish, consider adding some ginger or a splash of rice vinegar while cooking.
Make sure not to overcook the cauliflower rice, as it can become mushy; you want it to retain a slight crunch. Feel free to experiment with different vegetables like bell peppers or broccoli, and don’t hesitate to incorporate leftover proteins to make this dish your own!
Chickpea and Spinach Stew
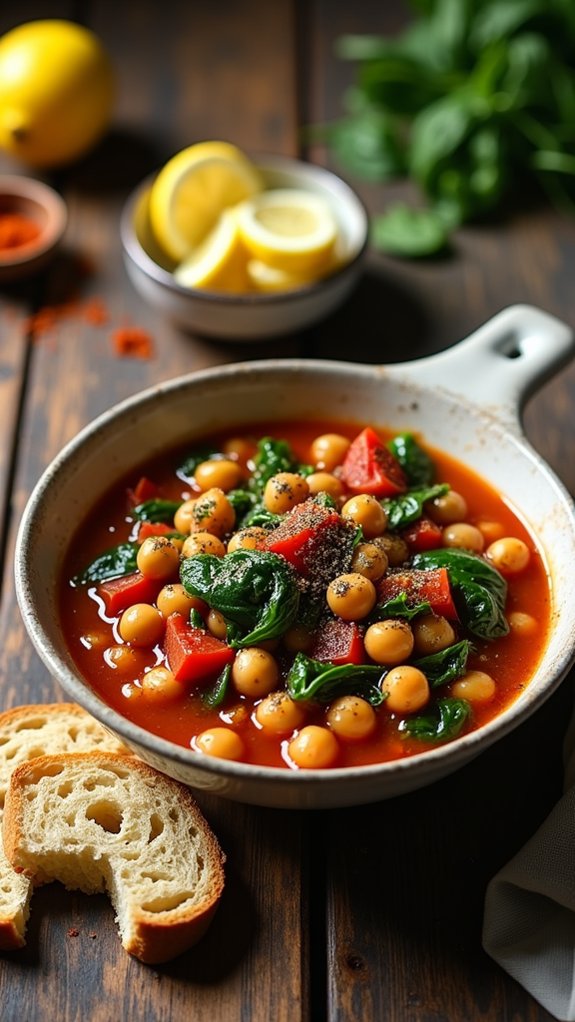
Chickpea and Spinach Stew is a hearty and nutritious dish that brings together the earthy flavors of chickpeas and the vibrant greens of spinach. This stew isn’t only delicious but also packed with protein, fiber, and essential vitamins, making it a perfect meal for anyone looking to incorporate more plant-based options into their diet.
Its simplicity and flexibility allow for easy customization, so you can add your favorite spices or additional vegetables to suit your taste. This comforting dish can be enjoyed on its own or served with a side of crusty bread or over a bed of rice for a complete meal.
It’s perfect for meal prep, as it stores well in the refrigerator and can be easily reheated for quick lunches or dinners throughout the week. Whether you’re following a vegetarian, vegan, or gluten-free diet, this Chickpea and Spinach Stew is sure to please everyone at the table.
Ingredients:
- 1 can chickpeas, drained and rinsed
- 4 cups fresh spinach, chopped
- 1 medium onion, diced
- 2 cloves garlic, minced
- 1 can diced tomatoes
- 2 cups vegetable broth
- 1 teaspoon cumin
- 1 teaspoon paprika
- 1 tablespoon olive oil
- Salt and pepper to taste
- Fresh lemon juice (optional for serving)
Cooking Instructions:
In a large pot, heat the olive oil over medium heat and add the diced onion, cooking until translucent. Stir in the minced garlic, cumin, and paprika, and cook for an additional minute until fragrant.
Add the diced tomatoes, vegetable broth, and chickpeas, bringing the mixture to a gentle simmer. Once simmering, stir in the chopped spinach and cook for about 5-7 minutes until the spinach wilts and the stew thickens slightly. Season with salt and pepper to taste, and finish with a squeeze of fresh lemon juice if desired.
Extra Tips:
Feel free to customize your Chickpea and Spinach Stew by adding other vegetables such as carrots, bell peppers, or zucchini for added flavor and nutrition.
For a creamier texture, you can blend a portion of the stew before adding the spinach. This dish also freezes well, so consider making a double batch to enjoy on busy days.
Baked Lemon Garlic Salmon
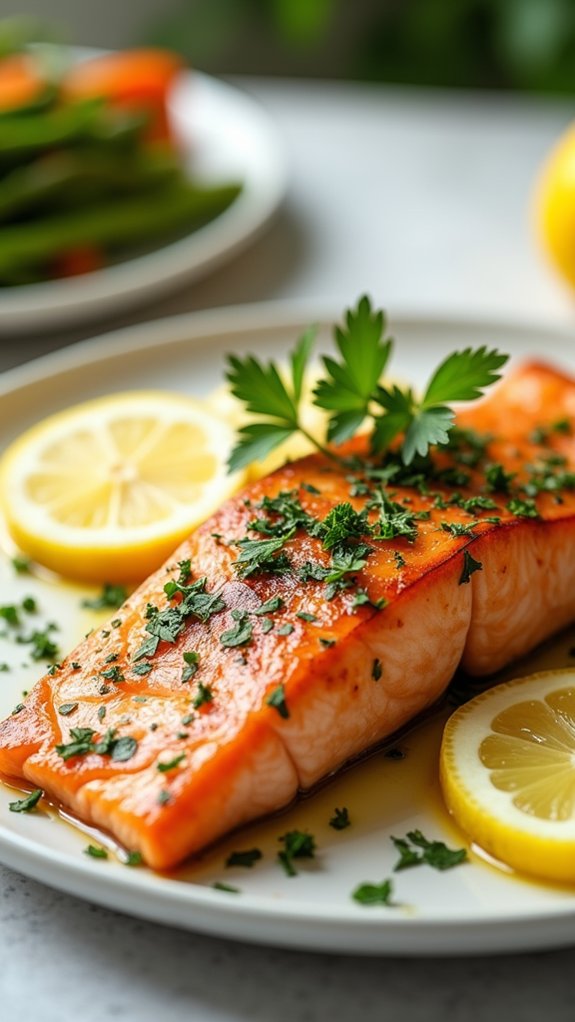
Baked Lemon Garlic Salmon is a delightful and healthy dish that’s perfect for any weeknight dinner or special occasion. This recipe showcases the natural flavors of the salmon, enhanced by the zesty brightness of fresh lemon and the savory essence of garlic. Not only is it delicious, but it’s also quick and easy to prepare, making it a great option for busy individuals or families looking to enjoy a nutritious meal without spending hours in the kitchen.
The combination of lemon and garlic not only adds flavor but also provides numerous health benefits. Salmon is an excellent source of omega-3 fatty acids, which are known for their heart-healthy properties. By baking the salmon, you preserve its natural moisture and tenderness while keeping the dish low in calories. Serve this vibrant dish with a side of steamed vegetables or a fresh salad for a complete and satisfying meal.
Ingredients:
- 4 salmon fillets
- 2 tablespoons olive oil
- 3 cloves garlic, minced
- Juice of 1 lemon
- Zest of 1 lemon
- Salt and pepper, to taste
- Fresh parsley, chopped (for garnish)
- Lemon slices (for garnish)
Cooking Instructions:
Preheat your oven to 375°F (190°C) and line a baking sheet with parchment paper. In a small bowl, whisk together the olive oil, minced garlic, lemon juice, lemon zest, salt, and pepper.
Place the salmon fillets on the prepared baking sheet, skin-side down, and brush the lemon garlic mixture generously over the fillets. Bake in the preheated oven for about 15-20 minutes, or until the salmon is cooked through and flakes easily with a fork. Garnish with fresh parsley and lemon slices before serving.
Extra Tips:
For an added layer of flavor, consider marinating the salmon in the lemon garlic mixture for 30 minutes prior to baking. This will allow the flavors to penetrate the fish even more deeply.
Additionally, feel free to customize this recipe by adding your favorite herbs or spices, such as dill or paprika, to enhance the taste further. To guarantee perfectly cooked salmon, keep an eye on the cooking time as it can vary based on the thickness of the fillets.
Sweet Potato and Kale Hash
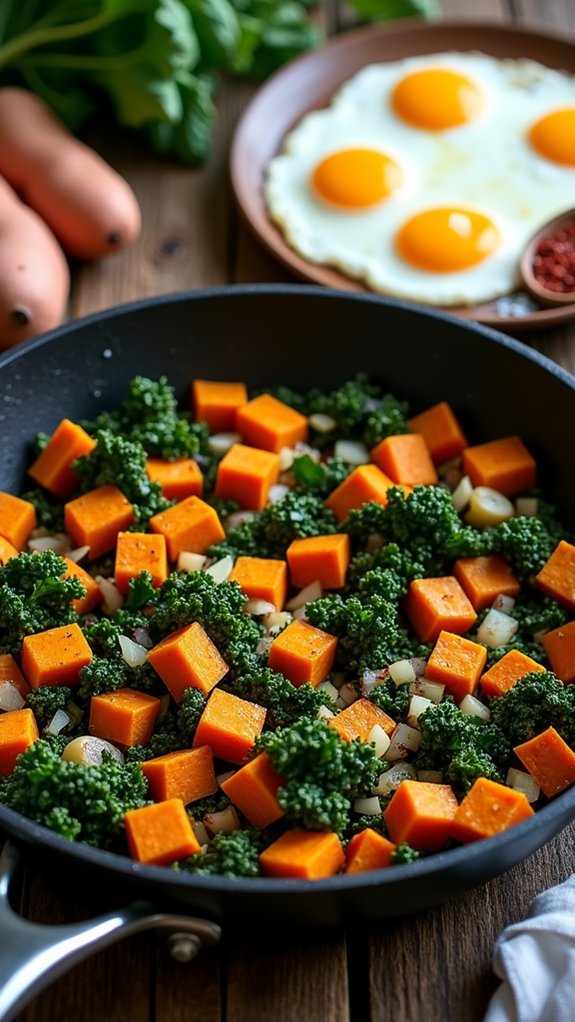
Sweet Potato and Kale Hash is a delightful and nutritious dish that perfectly blends the earthy sweetness of sweet potatoes with the robust flavor of kale. This vibrant hash not only makes for a hearty breakfast but also serves as a wonderful side dish for lunch or dinner. Packed with vitamins and minerals, it’s a perfect option for those following various diet plans, including vegan and gluten-free diets.
To prepare this dish, you’ll need to gather fresh ingredients that provide a burst of flavor and nutrition. The combination of sweet potatoes and kale offers a satisfying texture, while the addition of onions and garlic elevates the taste profile, making it a crowd-pleaser.
Whether you’re meal prepping for the week or cooking for a special occasion, Sweet Potato and Kale Hash is sure to impress.
Ingredients:
- 2 medium sweet potatoes, peeled and diced
- 1 bunch of kale, stems removed and chopped
- 1 medium onion, diced
- 2 cloves garlic, minced
- 2 tablespoons olive oil
- Salt and pepper, to taste
- Optional: red pepper flakes for heat
- Optional: fried or poached eggs for serving
Cooking Instructions:
In a large skillet, heat the olive oil over medium heat and add the diced sweet potatoes. Cook for about 10-15 minutes, stirring occasionally, until they’re tender and slightly crispy.
Then, add the diced onion and minced garlic, cooking for an additional 2-3 minutes until the onion is translucent. Stir in the chopped kale and cook until wilted, about 3-5 minutes. Season with salt, pepper, and red pepper flakes if desired.
Extra Tips:
For added flavor, consider roasting the sweet potatoes in the oven with a little olive oil, salt, and pepper before adding them to the skillet. This can enhance their sweetness and texture.
Additionally, feel free to customize the dish by adding other vegetables like bell peppers or mushrooms, or even incorporating your choice of protein, such as black beans or cooked sausage, for a more filling meal. Enjoy your healthy and delicious Sweet Potato and Kale Hash!
Greek Yogurt Parfait With Berries
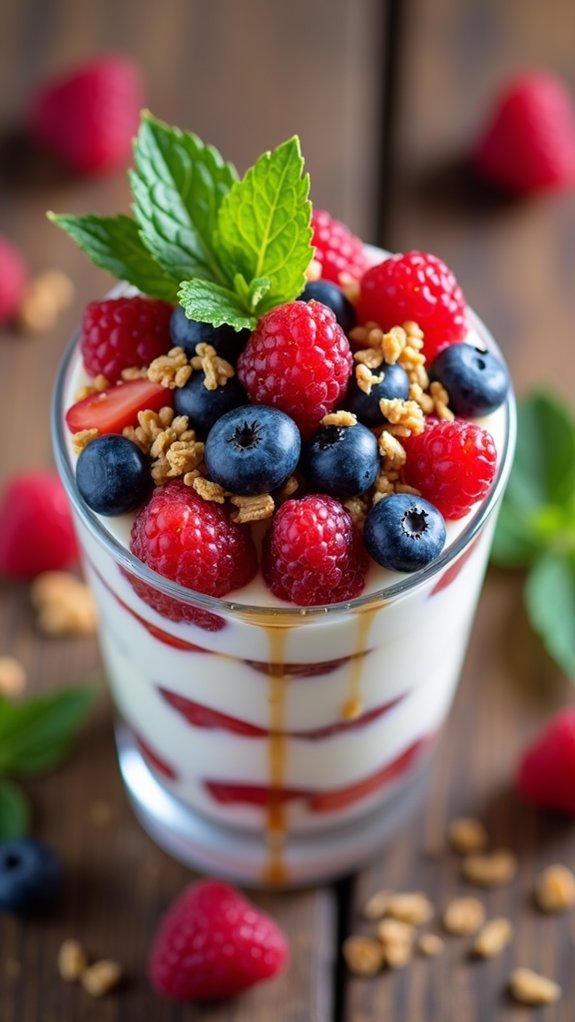
Greek Yogurt Parfait with Berries is a delicious and nutritious dish that can be enjoyed for breakfast, a snack, or even dessert. This parfait isn’t only visually appealing with its vibrant layers of color but also packed with protein, antioxidants, and essential vitamins.
Combining the creamy texture of Greek yogurt with the natural sweetness of fresh berries creates a delightful balance that will satisfy your taste buds while keeping you energized throughout the day.
Making a Greek Yogurt Parfait is incredibly simple and quick, making it the perfect option for those busy mornings or a healthy treat during the day. You can customize the recipe with your favorite fruits, nuts, and granola, allowing for endless variations to suit your dietary preferences.
Whether you’re following a low-carb, vegetarian, or gluten-free diet, this parfait can easily be adapted to fit your needs.
Ingredients:
- 2 cups Greek yogurt (plain or flavored)
- 1 cup mixed berries (strawberries, blueberries, raspberries, blackberries)
- 1/2 cup granola
- 2 tablespoons honey or maple syrup (optional)
- Fresh mint leaves for garnish (optional)
Cooking Instructions:
In a glass or bowl, layer Greek yogurt, followed by a layer of mixed berries and a sprinkle of granola.
Repeat the layers until all ingredients are used, finishing with a layer of berries on top. Drizzle honey or maple syrup over the top if desired and garnish with fresh mint leaves for an added touch of freshness.
Extra Tips:
To enhance the flavor, consider adding a splash of vanilla extract to the Greek yogurt.
You can also experiment with different fruits according to the season or your personal preferences. For added crunch, try incorporating nuts or seeds into the layers.
Prepare the parfait in advance for a quick grab-and-go breakfast by storing it in a mason jar; just keep the granola separate until you’re ready to eat to maintain its crunchiness.
Almond Flour Pancakes

Almond flour pancakes are a delightful, gluten-free alternative to traditional pancakes that are both nutritious and satisfying. Made primarily from almond flour, these pancakes aren’t only low in carbs but also packed with healthy fats and protein, making them a great choice for anyone following a low-carb or ketogenic diet.
The nutty flavor of almond flour adds a delicious twist to your breakfast, and they can easily be customized with your favorite toppings, such as fresh berries, honey, or a dollop of Greek yogurt.
These pancakes are simple to prepare and perfect for a quick breakfast or brunch. With just a few ingredients, you can whip up a batch in no time. They’re light and fluffy, and the best part is that they can be made in large quantities and stored for later use.
Serve them with maple syrup, nut butter, or fruit for a sweet treat that doesn’t compromise your healthy eating goals.
Ingredients:
- 1 cup almond flour
- 2 large eggs
- 1/4 cup unsweetened almond milk (or any preferred milk)
- 1 tablespoon coconut oil (melted) or butter
- 1 teaspoon baking powder
- 1/2 teaspoon vanilla extract
- A pinch of salt
Cooking Instructions: In a mixing bowl, combine the almond flour, baking powder, and salt. In a separate bowl, whisk together the eggs, almond milk, melted coconut oil, and vanilla extract.
Gradually add the wet ingredients to the dry ingredients, stirring until just combined. Heat a non-stick skillet over medium heat and pour about 1/4 cup of batter for each pancake. Cook for 2-3 minutes on each side, or until golden brown.
Extra Tips: For extra flavor, consider adding spices like cinnamon or nutmeg to the batter. If your batter seems too thick, feel free to add a bit more almond milk until it reaches your desired consistency.
To keep pancakes warm, place them on a baking sheet in a low oven while you cook the rest. Enjoy experimenting with different toppings and mix-ins, such as chocolate chips or chopped nuts, to make your pancakes uniquely yours!
Spicy Lentil Tacos
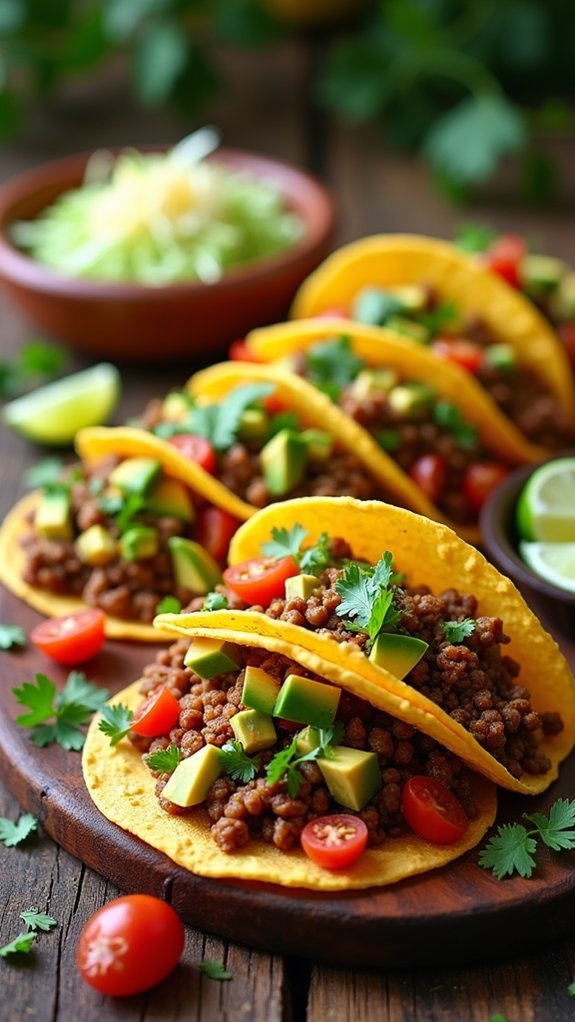
Spicy lentil tacos are a delicious and nutritious alternative to traditional meat tacos. Packed with protein and fiber, lentils are an excellent choice for anyone looking to incorporate more plant-based meals into their diet. The spices used in this recipe add a delightful kick, making these tacos both flavorful and satisfying. Perfect for a weeknight dinner or a fun gathering with friends, these spicy lentil tacos will surely please everyone at the table.
To enhance the dish, you can customize the toppings to your liking. Fresh avocado, cilantro, and a squeeze of lime juice can elevate the flavors, while ingredients like diced tomatoes, shredded lettuce, or cheese can add extra texture. This recipe is versatile and can easily be adjusted to suit various dietary preferences, making it a great addition to any meal plan.
Ingredients:
- 1 cup dried green or brown lentils
- 2 tablespoons olive oil
- 1 small onion, diced
- 3 cloves garlic, minced
- 1 teaspoon ground cumin
- 1 teaspoon smoked paprika
- 1/2 teaspoon chili powder
- 1/4 teaspoon cayenne pepper (adjust to taste)
- Salt and pepper to taste
- 2 cups vegetable broth or water
- 8 small corn or flour tortillas
- Optional toppings: diced avocado, chopped cilantro, lime wedges, diced tomatoes, shredded lettuce, cheese
In a large skillet, heat the olive oil over medium heat. Add the diced onion and sauté until softened, about 5 minutes. Stir in the minced garlic and cook for another minute until fragrant.
Add the lentils, cumin, smoked paprika, chili powder, cayenne pepper, salt, and pepper, and mix well. Pour in the vegetable broth or water, bring to a boil, then reduce the heat and simmer for about 25-30 minutes, or until the lentils are tender.
Once cooked, mash some of the lentils with a fork for a creamier texture if desired. Warm the tortillas in a separate pan or microwave, and then fill each tortilla with the spicy lentil mixture, adding your favorite toppings before serving.
For the best flavor, allow the lentil mixture to sit for a few minutes after cooking to let the spices meld together. If you’re making this dish ahead of time, the lentils can be stored in the refrigerator for up to 4 days and reheated when ready to serve.
This recipe can also be doubled for larger gatherings, and the lentil filling freezes well for future meals. Enjoy your spicy lentil tacos!
Coconut Curry Vegetable Soup

Coconut Curry Vegetable Soup is a delightful dish that combines the creaminess of coconut milk with the rich flavors of curry and a medley of fresh vegetables. This soup isn’t only comforting but also nourishing, making it a perfect meal for any day of the week.
Whether you’re following a plant-based diet, gluten-free regimen, or just looking to incorporate more vegetables into your meals, this soup is a versatile option that can cater to various dietary preferences.
The beauty of this recipe lies in its adaptability. You can customize it with your favorite vegetables, add protein like tofu or chickpeas, or even adjust the spice level to suit your taste. The aromatic spices and creamy coconut base create a wonderfully satisfying flavor profile that will leave you wanting more.
Serve it as a main dish or a side and enjoy its warmth and richness.
Ingredients:
- 1 tablespoon coconut oil
- 1 onion, diced
- 3 cloves garlic, minced
- 1 tablespoon fresh ginger, grated
- 2 carrots, sliced
- 1 bell pepper, chopped
- 1 zucchini, diced
- 1 can (14 oz) coconut milk
- 4 cups vegetable broth
- 2 tablespoons curry powder
- 1 teaspoon turmeric
- Salt and pepper to taste
- Fresh cilantro for garnish (optional)
In a large pot, heat the coconut oil over medium heat and sauté the diced onion, garlic, and ginger until fragrant and the onion is translucent.
Add the carrots, bell pepper, and zucchini, cooking for a few more minutes. Stir in the curry powder and turmeric, allowing the spices to toast briefly, then pour in the coconut milk and vegetable broth.
Bring the mixture to a simmer and let it cook for about 15-20 minutes or until the vegetables are tender. Season with salt and pepper to taste, and garnish with fresh cilantro before serving.
For the best results, make sure to use fresh vegetables and adjust the spices according to your preference. You can also add a splash of lime juice for an extra zing or serve it with crusty bread for a complete meal.
This soup can be stored in the refrigerator for up to three days, and it also freezes well for future meals. Enjoy experimenting with different vegetables and spices to make this recipe your own!
Grilled Chicken With Mango Salsa
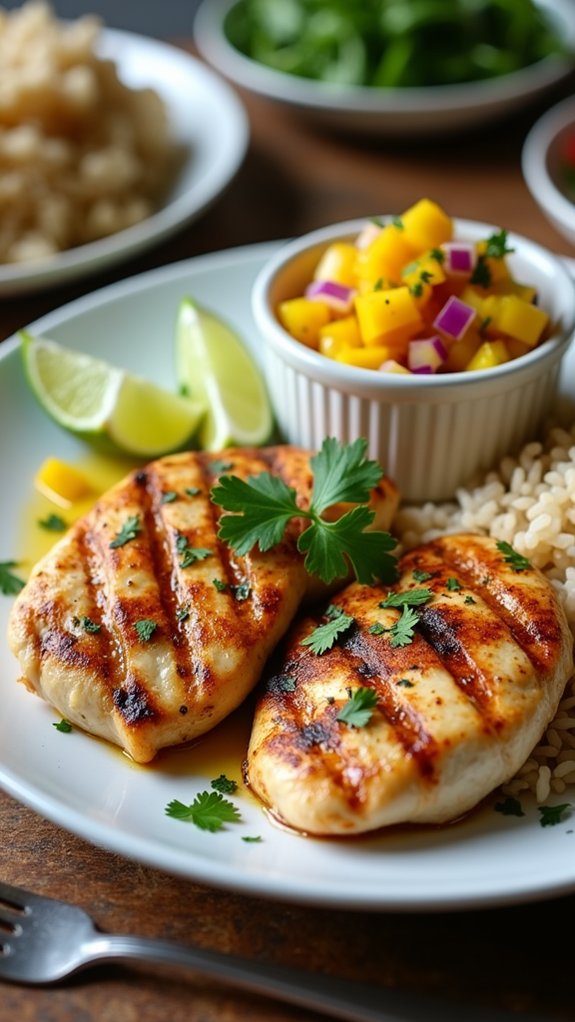
Grilled chicken with mango salsa is a delightful dish that brings together the smoky flavor of grilled chicken and the invigorating sweetness of mango salsa. This recipe is perfect for summer barbecues or a light weeknight dinner.
The vibrant colors and flavors of the dish not only make it appealing to the eye but also create a burst of flavor with every bite. It’s a healthy option that’s easy to prepare, making it suitable for various diet plans, including low-carb and gluten-free diets.
To make this dish even more enjoyable, pair it with a side of brown rice or a fresh salad. The contrast of the juicy grilled chicken against the zesty mango salsa will leave your taste buds dancing. Whether you’re serving it for a family meal or impressing guests, this recipe is sure to become a favorite.
Ingredients:
- 4 boneless, skinless chicken breasts
- 2 tablespoons olive oil
- 1 teaspoon garlic powder
- 1 teaspoon paprika
- Salt and pepper to taste
- 1 ripe mango, diced
- 1 small red onion, finely chopped
- 1 jalapeño, minced (optional)
- Juice of 1 lime
- Fresh cilantro, chopped (for garnish)
Cooking Instructions:
Begin by marinating the chicken breasts in a mixture of olive oil, garlic powder, paprika, salt, and pepper for at least 30 minutes.
While the chicken is marinating, prepare the mango salsa by combining the diced mango, red onion, jalapeño, lime juice, and cilantro in a bowl. Mix well and set aside.
Preheat your grill to medium-high heat and grill the chicken for about 6-7 minutes on each side or until the internal temperature reaches 165°F. Serve the grilled chicken topped with the mango salsa.
Extra Tips:
For an added depth of flavor, consider marinating the chicken overnight. You can also customize the salsa by adding other ingredients such as diced bell peppers or avocado for a creamier texture.
If you prefer, this dish can be cooked on a stovetop grill pan or baked in the oven at 375°F for about 25-30 minutes, ensuring it remains juicy and tender. Enjoy your grilled chicken with mango salsa with your favorite sides for a complete meal!
Roasted Vegetable Buddha Bowl

A Roasted Vegetable Buddha Bowl is a colorful and nutritious meal that’s perfect for any diet plan. This dish combines a variety of roasted vegetables, grains, and proteins, creating a balanced and satisfying meal. The beauty of a Buddha bowl is its versatility; you can mix and match your favorite ingredients based on what you have on hand or what’s in season.
To prepare your Roasted Vegetable Buddha Bowl, you’ll want to start with fresh, vibrant vegetables that will be roasted to enhance their natural flavors. Pair these with a base of grains like quinoa or brown rice, and feel free to add a protein source such as chickpeas or tofu for extra sustenance. The final touch can be a drizzle of your favorite dressing or sauce to tie all the flavors together.
Ingredients:
- 1 cup quinoa or brown rice
- 2 cups broccoli florets
- 1 red bell pepper, chopped
- 1 medium zucchini, sliced
- 1 medium sweet potato, diced
- 1 cup cherry tomatoes, halved
- 1 can chickpeas, drained and rinsed
- 2 tablespoons olive oil
- 1 teaspoon garlic powder
- 1 teaspoon paprika
- Salt and pepper to taste
- Fresh greens (spinach or arugula)
- Optional toppings: avocado slices, sesame seeds, or tahini dressing
To cook the Roasted Vegetable Buddha Bowl, preheat your oven to 425°F (220°C). On a large baking sheet, toss the broccoli, bell pepper, zucchini, sweet potato, cherry tomatoes, and chickpeas with olive oil, garlic powder, paprika, salt, and pepper.
Spread them out in a single layer and roast for about 25-30 minutes, or until the vegetables are tender and slightly caramelized. Meanwhile, cook the quinoa or brown rice according to package instructions.
Once everything is cooked, assemble your bowl by placing a scoop of grains at the bottom, topping it with the roasted vegetables, and fresh greens. Drizzle with your choice of dressing and enjoy!
When preparing your Roasted Vegetable Buddha Bowl, feel free to customize the ingredients based on your preferences or dietary restrictions. You can add other vegetables, such as carrots or Brussels sprouts, and switch up the proteins by using tempeh or edamame.
Additionally, experimenting with different dressings can elevate the flavor profile; try a zesty lemon-tahini sauce or a spicy sriracha-lime blend for a delightful kick.
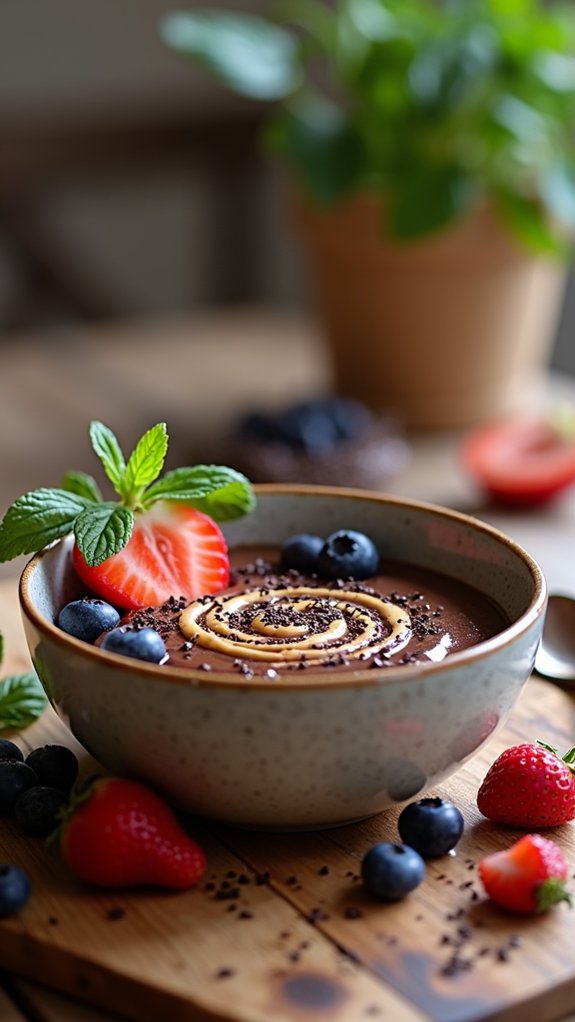
Dark Chocolate Chia Seed Pudding
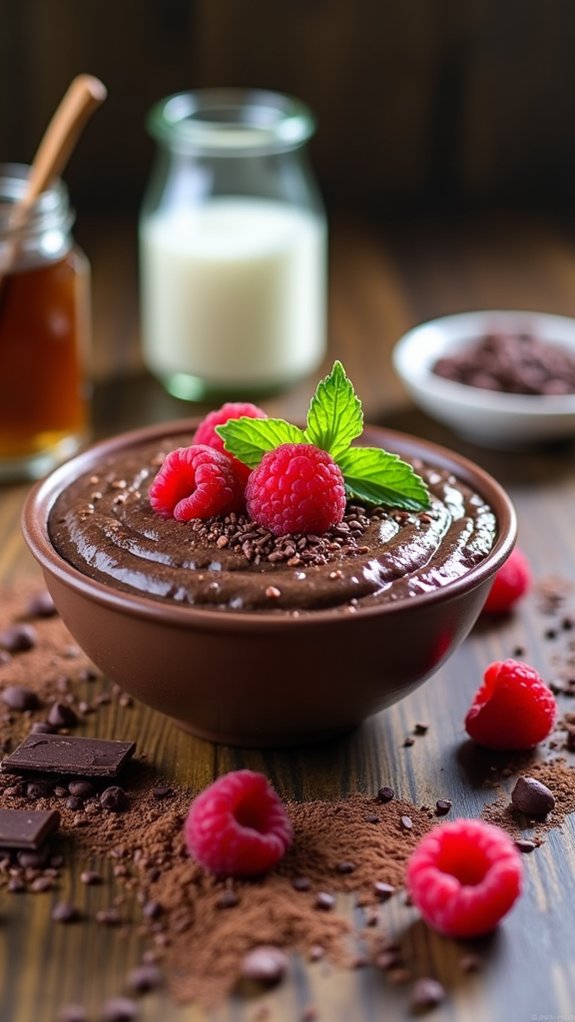
Dark Chocolate Chia Seed Pudding is a delicious and nutritious treat that caters to various dietary preferences, including vegan and gluten-free diets. This simple yet indulgent dessert is packed with omega-3 fatty acids, fiber, and antioxidants, making it a guilt-free option for satisfying your sweet tooth.
The combination of creamy chia seeds and rich dark chocolate creates a delightful texture and flavor that will leave you wanting more.
Making Dark Chocolate Chia Seed Pudding isn’t only easy but also incredibly versatile. You can customize it with your favorite toppings, such as fresh fruits, nuts, or a drizzle of nut butter, to enhance its taste and nutrition.
This pudding can be prepared in advance, making it a convenient option for busy mornings or a quick dessert after dinner. Let’s explore the recipe!
Ingredients:
- 1/4 cup chia seeds
- 2 cups almond milk (or any plant-based milk)
- 1/4 cup unsweetened cocoa powder
- 1/4 cup maple syrup or agave nectar
- 1 teaspoon vanilla extract
- A pinch of salt
- Dark chocolate shavings or nibs for topping (optional)
Cooking Instructions:
In a mixing bowl, whisk together the chia seeds, almond milk, cocoa powder, maple syrup, vanilla extract, and salt until well combined. Make sure there are no clumps of cocoa powder.
Allow the mixture to sit for about 5-10 minutes, and then give it another good stir to break up any clumps. Cover the bowl and refrigerate for at least 2 hours or overnight until the pudding thickens to your desired consistency.
Serve chilled and top with dark chocolate shavings or your favorite toppings.
Extra Tips:
To enhance the flavor, consider adding a dash of cinnamon or a splash of espresso to the pudding mixture before refrigerating.
If you prefer a sweeter pudding, adjust the amount of sweetener according to your taste. For a creamier texture, blend the mixture in a blender after it has thickened, and enjoy the silky smooth pudding.


