
When it comes to celebrating special moments, choosing the right cake can make all the difference. From the timeless appeal of a Vanilla Birthday Cake to the unique twist of a Lemon Blueberry Bundt Cake, there's something for everyone. Each recipe offers easy instructions and tips to guarantee a successful bake. Curious about which cake will steal the spotlight at your next event? Let's explore the delightful options that await you.
Classic Vanilla Birthday Cake
A classic vanilla birthday cake is the epitome of celebration, making it the perfect centerpiece for any birthday party. This cake is soft, fluffy, and bursting with rich vanilla flavor, sure to please both kids and adults alike.
Whether you're decorating it with colorful frosting, sprinkles, or fresh fruit, this cake will certainly be a hit at your gathering.
Making a vanilla birthday cake from scratch is easier than you might think. With just a few basic ingredients and a little bit of time, you can create a delicious cake that rivals any bakery's creation. This recipe yields a delightful two-layer cake that can be customized with your favorite frosting, making it a versatile option for any birthday celebration.
Ingredients:
- 2 ½ cups all-purpose flour
- 2 ½ tsp baking powder
- ½ tsp salt
- 1 cup unsalted butter, softened
- 2 cups granulated sugar
- 4 large eggs
- 1 tbsp pure vanilla extract
- 1 cup whole milk
Instructions:
Preheat your oven to 350°F (175°C) and grease two 9-inch round cake pans.
In a medium bowl, whisk together the flour, baking powder, and salt. In a large mixing bowl, cream the softened butter and sugar together until light and fluffy.
Add the eggs one at a time, mixing well after each addition, followed by the vanilla extract. Gradually add the dry ingredients to the butter mixture, alternating with the milk, and mix until just combined.
Divide the batter evenly between the prepared pans and bake for 25-30 minutes or until a toothpick inserted into the center comes out clean.
Let the cakes cool in the pans for 10 minutes before transferring them to wire racks to cool completely.
Extra Tips:
For an extra moist cake, consider adding a splash of buttermilk instead of regular milk.
Additionally, make sure all your ingredients are at room temperature before starting, as this helps to create a smoother batter.
When frosting, allow the cakes to cool completely to prevent the frosting from melting.
You can also layer flavors by adding fruit preserves between the layers or experimenting with different frosting types, such as cream cheese or chocolate ganache.
Enjoy your baking!
Decadent Chocolate Layer Cake
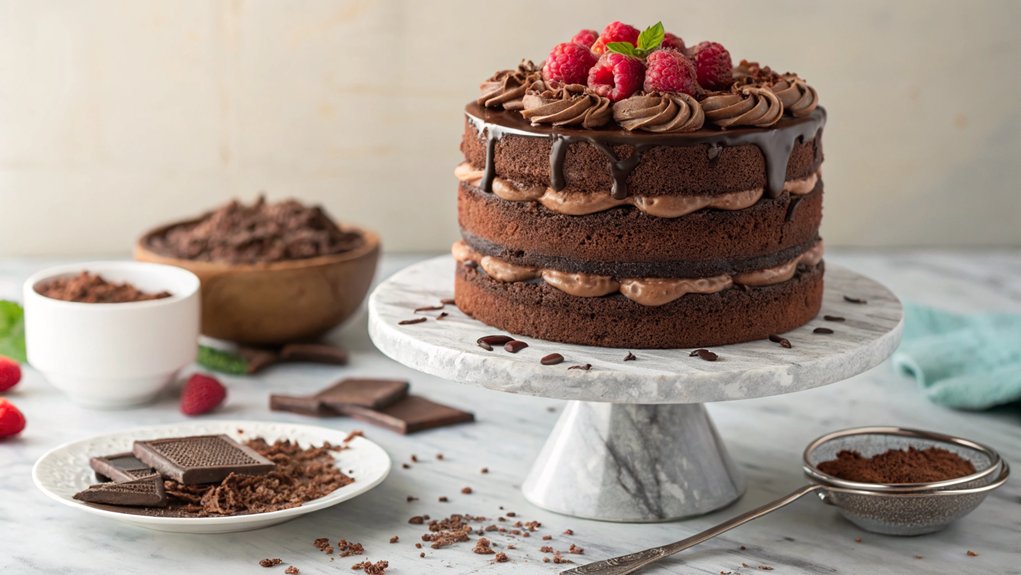
Decadent chocolate layer cake is the ultimate dessert for chocolate lovers and a showstopper for any celebration. This rich and moist cake features layers of velvety chocolate sponge, complemented by a luscious chocolate ganache and fluffy chocolate buttercream.
Whether it's a birthday party, anniversary, or just a special treat, this cake is sure to impress everyone at the table with its indulgent flavor and stunning presentation.
To make this cake even more exciting, feel free to customize it with your favorite fillings or toppings. Fresh berries, caramel sauce, or even a drizzle of espresso can add a delightful twist to the classic chocolate flavor.
Gather your friends and family around as you create this masterpiece, and watch their eyes light up with each delicious bite.
Ingredients:
- 2 cups all-purpose flour
- 2 cups granulated sugar
- ¾ cup unsweetened cocoa powder
- 1 ½ teaspoons baking powder
- 1 ½ teaspoons baking soda
- 1 teaspoon salt
- 2 large eggs
- 1 cup whole milk
- ½ cup vegetable oil
- 2 teaspoons vanilla extract
- 1 cup boiling water
- 1 cup heavy cream (for ganache)
- 8 oz semi-sweet chocolate (for ganache)
- 1 cup unsalted butter (for buttercream)
- 4 cups powdered sugar (for buttercream)
- ½ cup unsweetened cocoa powder (for buttercream)
- 2 teaspoons vanilla extract (for buttercream)
To prepare the decadent chocolate layer cake, preheat your oven to 350°F (175°C) and grease and flour two 9-inch round cake pans.
In a large mixing bowl, combine the flour, sugar, cocoa powder, baking powder, baking soda, and salt. In another bowl, whisk together the eggs, milk, vegetable oil, and vanilla extract, then mix it into the dry ingredients until combined.
Gradually stir in the boiling water until the batter is smooth. Divide the batter evenly between the prepared pans and bake for 30-35 minutes or until a toothpick inserted into the center comes out clean.
Allow the cakes to cool in the pans for 10 minutes before transferring them to a wire rack to cool completely.
For extra tips, make sure your ingredients are at room temperature for better mixing and a more uniform batter.
If you want a more intense chocolate flavor, use high-quality cocoa powder and chocolate for the ganache and buttercream. Additionally, you can refrigerate the cake for a bit before serving to help the layers set and make cutting easier.
Enjoy your baking adventure and the delicious results!
Red Velvet Cake With Cream Cheese Frosting
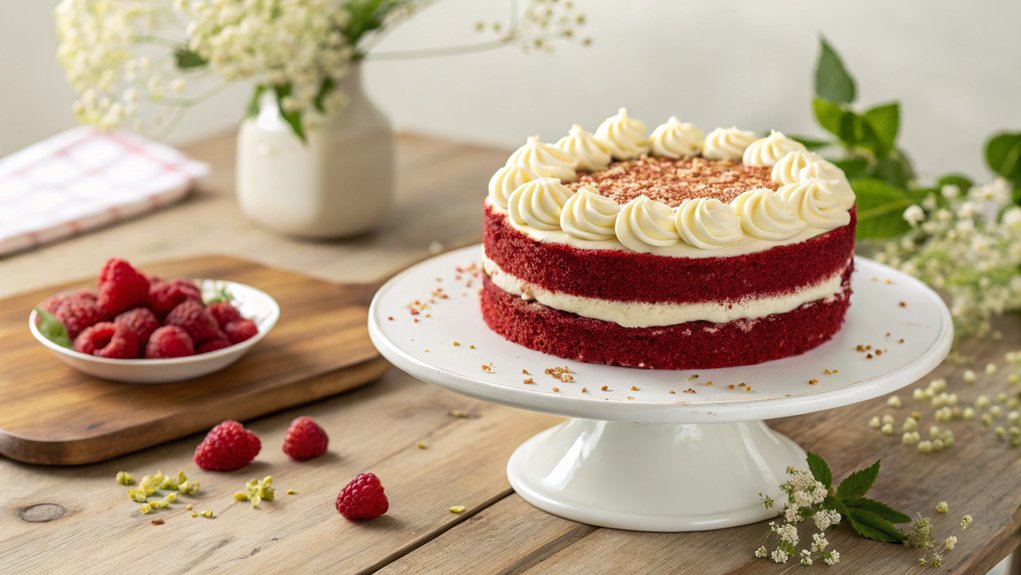
Red velvet cake is a classic dessert that stands out with its vibrant red color and delicate chocolate flavor. Often associated with special occasions, this cake is perfect for birthdays, anniversaries, or any celebration that calls for something a little extra special.
The cake's unique taste pairs beautifully with the rich, tangy cream cheese frosting, making it a favorite among cake lovers.
The origins of red velvet cake can be traced back to the early 20th century, with its popularity surging during the 1980s thanks to a certain restaurant in New York. Today, this cake is a staple at many gatherings and is often adorned with decorative elements that enhance its visual appeal.
Whether you're baking it for a loved one or simply indulging yourself, a slice of red velvet cake is sure to delight.
Ingredients:
- 2 ½ cups all-purpose flour
- 1 ½ cups granulated sugar
- 1 teaspoon baking soda
- 1 teaspoon salt
- 1 teaspoon cocoa powder
- 1 ½ cups vegetable oil
- 1 cup buttermilk, room temperature
- 2 large eggs, room temperature
- 2 tablespoons red food coloring
- 1 teaspoon vanilla extract
- 1 teaspoon white vinegar
Cooking Instructions:
Preheat your oven to 350°F (175°C) and grease two 9-inch round cake pans.
In a large mixing bowl, sift together the flour, sugar, baking soda, salt, and cocoa powder.
In another bowl, whisk together the oil, buttermilk, eggs, food coloring, vanilla extract, and vinegar until well combined.
Gradually add the wet ingredients to the dry ingredients, mixing until just combined.
Pour the batter evenly into the prepared cake pans and bake for 25-30 minutes, or until a toothpick inserted into the center comes out clean.
Allow the cakes to cool in the pans for 10 minutes before transferring them to wire racks to cool completely.
Extra Tips:
For the cream cheese frosting, use full-fat cream cheese for a rich and creamy texture.
Make sure both the cream cheese and butter are at room temperature before mixing to achieve a smooth consistency.
You can also add a splash of lemon juice or a pinch of salt to the frosting for a balanced flavor.
To elevate the presentation, consider adding sprinkles, crushed nuts, or fresh berries on top of the frosted cake.
Enjoy your baking adventure!
Lemon Blueberry Bundt Cake
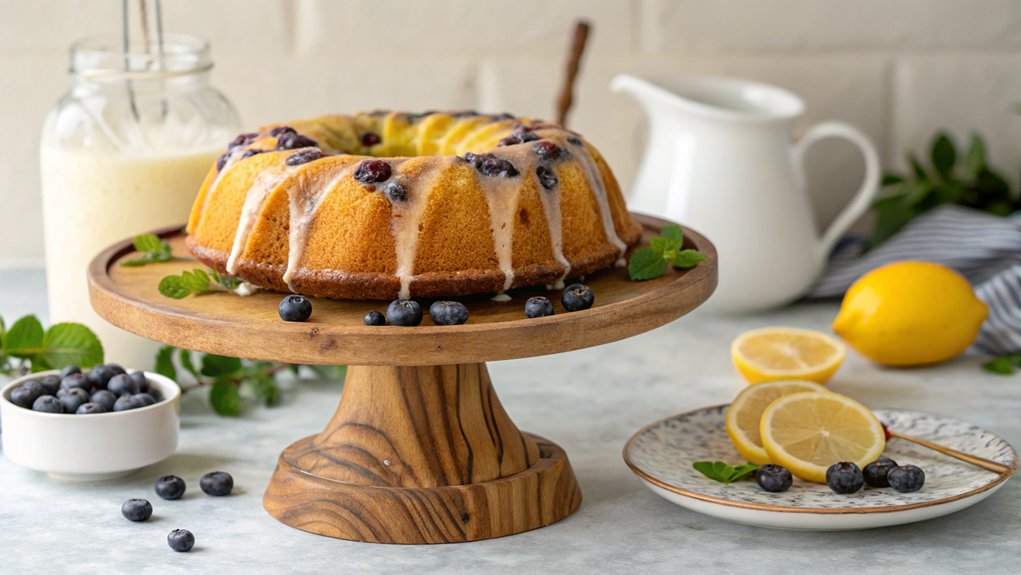
Lemon Blueberry Bundt Cake is a delightful dessert that perfectly balances the tangy brightness of lemon with the sweet, juicy bursts of fresh blueberries. This cake isn't only visually stunning with its beautiful shape and vibrant colors but is also incredibly moist and flavorful, making it an ideal treat for any celebration, from birthdays to summer gatherings.
The addition of a lemon glaze drizzled over the top elevates this cake even further, leaving your guests enthusiastic for seconds. To make this cake even more special, you can use fresh blueberries when they're in season for the best flavor. If fresh berries aren't available, frozen blueberries work just as well.
This cake can be served on its own or with a dollop of whipped cream for an extra touch of indulgence. Whether you're an experienced baker or a novice in the kitchen, this Lemon Blueberry Bundt Cake recipe is sure to impress.
Ingredients:
- 2 cups all-purpose flour
- 1 ½ teaspoons baking powder
- ½ teaspoon baking soda
- ½ teaspoon salt
- ¾ cup unsalted butter, softened
- 1 ½ cups granulated sugar
- 3 large eggs
- 1 tablespoon lemon zest
- 1 teaspoon vanilla extract
- 1 cup buttermilk
- 1 ½ cups fresh or frozen blueberries
- 1 cup powdered sugar (for glaze)
- 2 tablespoons lemon juice (for glaze)
Instructions:
Preheat your oven to 350°F (175°C) and grease a 10-cup Bundt pan. In a bowl, whisk together the flour, baking powder, baking soda, and salt. In a separate large bowl, cream the softened butter and granulated sugar until light and fluffy.
Add the eggs, one at a time, mixing well after each addition. Stir in the lemon zest and vanilla extract. Gradually add the dry ingredients to the wet mixture, alternating with the buttermilk until just combined. Gently fold in the blueberries, then pour the batter into the prepared Bundt pan.
Bake for 50-60 minutes, or until a toothpick inserted in the center comes out clean. Allow the cake to cool in the pan for 10 minutes before inverting onto a wire rack to cool completely. To make the glaze, whisk together the powdered sugar and lemon juice until smooth, then drizzle over the cooled cake.
Extra Tips:
When incorporating blueberries into your batter, toss them in a little flour before adding them to the mix; this helps prevent them from sinking to the bottom. For a more intense lemon flavor, consider adding a bit more lemon zest or using lemon extract.
If using frozen blueberries, don't thaw them before mixing into the batter to avoid discoloration. Finally, make sure to allow the cake to cool completely before glazing, as a warm cake can cause the glaze to melt and run off. Enjoy your delicious Lemon Blueberry Bundt Cake!
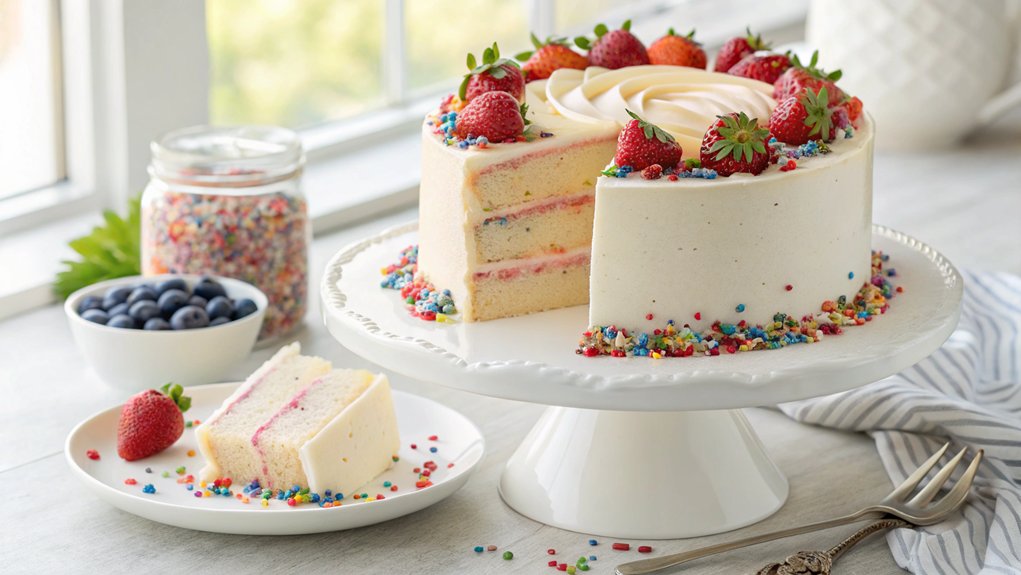
Funfetti Cake for Celebrations
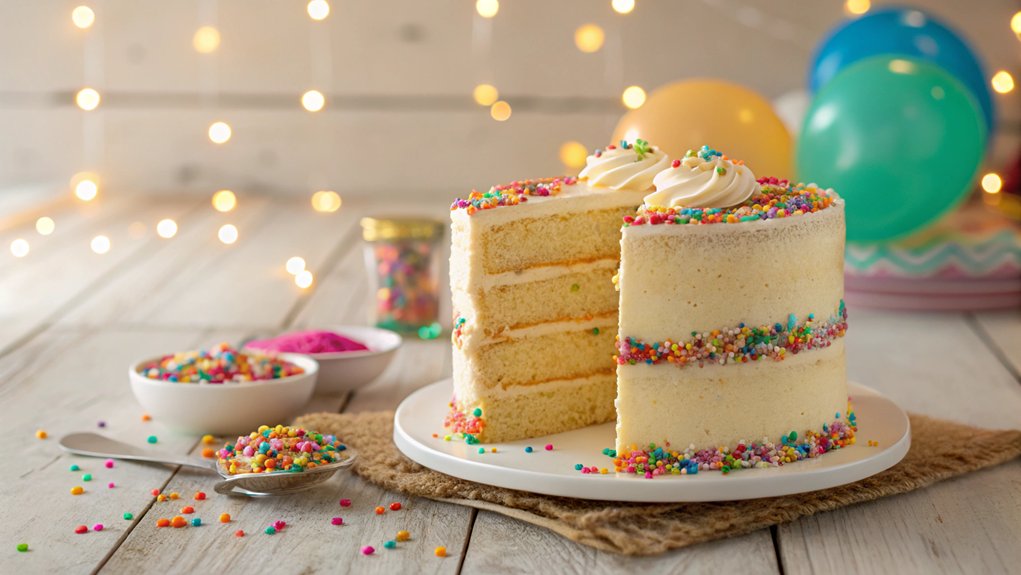
Funfetti cake is the perfect way to add a splash of color and joy to any celebration! This delightful dessert is a classic vanilla cake infused with colorful sprinkles, making it a crowd-pleaser for birthdays, anniversaries, or just a casual get-together. The vibrant sprinkles not only enhance the cake's appearance but also add a fun texture that everyone will love.
Making a funfetti cake is easier than you might think, and the result is a light, fluffy cake that's sure to bring smiles to all. Whether you choose to frost it with a creamy vanilla buttercream or serve it plain with a dusting of powdered sugar, this cake is a fantastic centerpiece for any festive occasion. Let's explore the recipe!
Ingredients:
- 2 ¾ cups all-purpose flour
- 2 ½ tsp baking powder
- ½ tsp salt
- 1 cup unsalted butter, softened
- 2 cups granulated sugar
- 4 large eggs
- 1 tbsp vanilla extract
- 1 cup whole milk
- 1 cup rainbow sprinkles (plus extra for topping)
Instructions:
Preheat your oven to 350°F (175°C) and grease and flour three 8-inch round cake pans. In a medium bowl, whisk together the flour, baking powder, and salt; set aside.
In a large mixing bowl, cream the softened butter and sugar together until light and fluffy. Add the eggs one at a time, mixing well after each addition, then stir in the vanilla extract.
Gradually add the dry ingredients to the wet mixture alternately with the milk, starting and ending with the dry ingredients. Gently fold in the rainbow sprinkles.
Divide the batter evenly among the prepared pans and bake for 25-30 minutes, or until a toothpick inserted in the center comes out clean. Let the cakes cool in the pans for 10 minutes before transferring them to a wire rack to cool completely.
Extra Tips:
For an extra festive touch, you can use themed sprinkles that match your celebration's color scheme!
Additionally, make sure your butter is at room temperature for better creaming with the sugar, and consider using buttermilk instead of whole milk for a richer flavor and moist texture.
If you want to make this cake ahead of time, you can wrap the cooled layers tightly in plastic wrap and freeze them for up to a month, then frost them fresh when you're ready to serve.
Moist Carrot Cake With Cream Cheese Icing
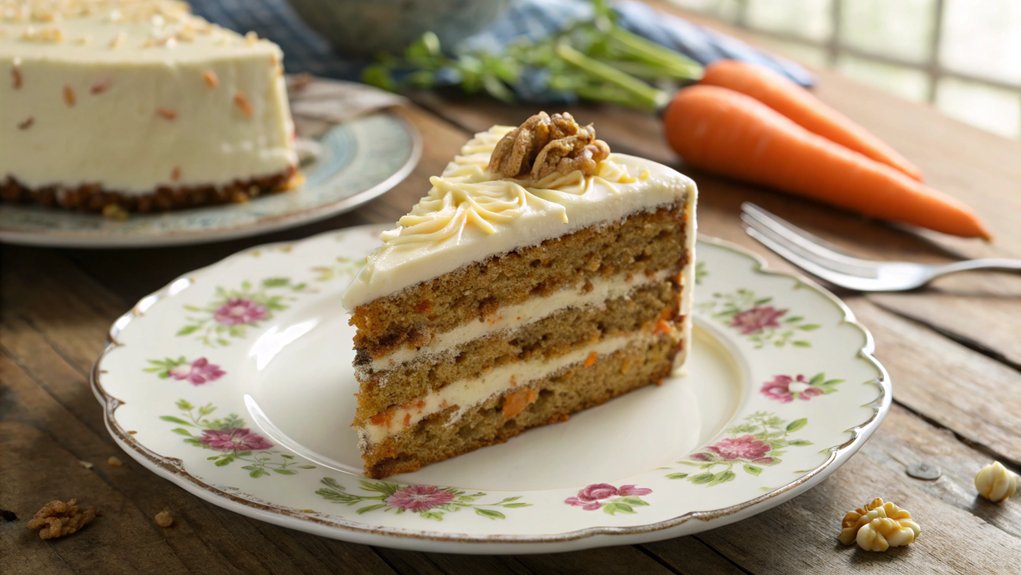
Carrot cake is a timeless classic that brings warmth and comfort to any gathering. Its moist texture and rich flavor, combined with the creamy tanginess of cream cheese icing, make it a favorite for celebrations ranging from birthdays to holidays. The natural sweetness of the carrots, along with the spice blend of cinnamon and nutmeg, results in a cake that's both delicious and satisfying.
Making a moist carrot cake is easier than you might think. This recipe not only delivers on flavor but also guarantees that your cake stays tender and moist. With a generous layer of cream cheese icing to top it off, this dessert is sure to impress your guests and leave them asking for seconds.
Ingredients:
- 2 cups all-purpose flour
- 2 cups granulated sugar
- 1 teaspoon baking powder
- 1 teaspoon baking soda
- 1 teaspoon salt
- 1 teaspoon ground cinnamon
- 1/2 teaspoon ground nutmeg
- 4 large eggs
- 1 cup vegetable oil
- 3 cups grated carrots (about 4-5 medium carrots)
- 1 cup crushed pineapple, drained
- 1 cup chopped walnuts or pecans (optional)
Instructions:
Preheat your oven to 350°F (175°C) and grease two 9-inch round cake pans.
In a large mixing bowl, whisk together the flour, sugar, baking powder, baking soda, salt, cinnamon, and nutmeg.
In another bowl, beat the eggs and mix in the vegetable oil, grated carrots, and crushed pineapple.
Gradually combine the wet ingredients with the dry ingredients until just blended, then fold in the nuts if using.
Divide the batter evenly between the prepared pans and bake for 25-30 minutes, or until a toothpick inserted in the center comes out clean.
Allow the cakes to cool in the pans for 10 minutes before transferring them to a wire rack to cool completely.
Extra Tips:
For the best flavor, use freshly grated carrots instead of pre-packaged ones, as they tend to be drier.
Make sure to let your cake layers cool completely before frosting with cream cheese icing to prevent melting.
If you prefer, you can add a pinch of vanilla extract to your icing for an extra layer of flavor.
This cake can also be made a day in advance; simply store it in an airtight container to keep it fresh.
Enjoy your moist carrot cake as a delightful centerpiece for your next celebration!
Rich Flourless Chocolate Cake
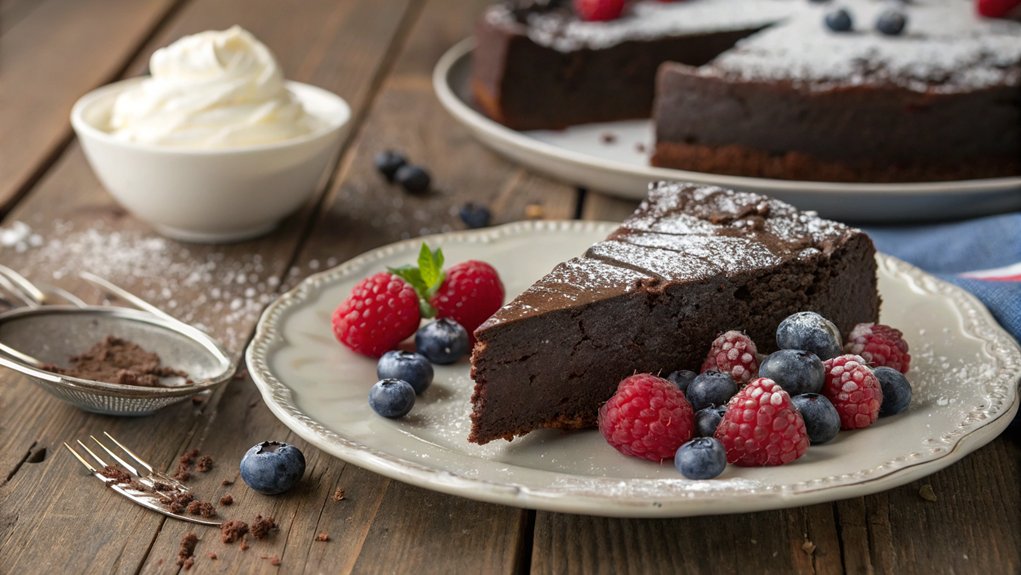
Flourless chocolate cake is a decadent dessert that's perfect for chocolate lovers and those who need a gluten-free option. This rich and fudgy cake is made primarily from high-quality chocolate, butter, eggs, and sugar, resulting in a luxurious texture that melts in your mouth. Because it contains no flour, the cake has an intense chocolate flavor that can be enjoyed on its own or dressed up with various toppings such as whipped cream, fresh berries, or a dusting of powdered sugar.
Baking a flourless chocolate cake is surprisingly simple and requires minimal ingredients, making it an ideal choice for both novice and experienced bakers alike. The cake can be prepared in just one bowl, and the baking process is quick, allowing you to whip up a stunning dessert in no time.
Whether you're celebrating a birthday, an anniversary, or simply indulging in a sweet treat, this flourless chocolate cake will surely impress your guests and leave them wanting more.
Ingredients:
- 8 ounces bittersweet or semisweet chocolate, chopped
- 1/2 cup unsalted butter
- 3/4 cup granulated sugar
- 1/4 teaspoon salt
- 1 teaspoon vanilla extract
- 4 large eggs
- 1/2 cup unsweetened cocoa powder
To prepare the cake, preheat your oven to 375°F (190°C) and grease an 8-inch round cake pan with butter or non-stick spray. In a heatproof bowl, combine the chopped chocolate and butter, then melt them together over a pot of simmering water, stirring until smooth.
Once melted, remove the bowl from the heat and whisk in the sugar, salt, and vanilla extract. Allow the mixture to cool slightly before adding the eggs one at a time, mixing well after each addition. Finally, sift in the cocoa powder and gently fold until just combined.
Pour the batter into the prepared cake pan and bake for 25-30 minutes, or until the center is set but still slightly soft. Let the cake cool in the pan for 10 minutes before inverting onto a serving plate.
For best results, allow the cake to cool completely before serving to enhance its rich flavors. You can also refrigerate the cake for a firmer texture if desired.
When serving, consider pairing it with a dollop of whipped cream, a scoop of vanilla ice cream, or fresh berries for a delightful contrast to the intense chocolate. This cake can be stored in an airtight container in the refrigerator for up to a week, making it a great make-ahead dessert for your next celebration.
Coconut Cream Cake With Fresh Coconut
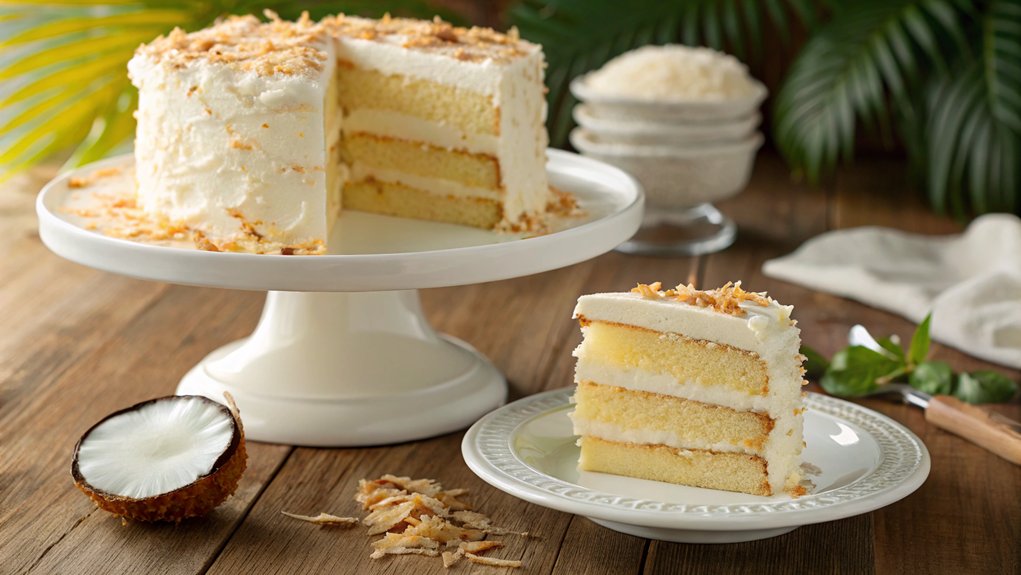
Coconut Cream Cake with Fresh Coconut is a delightful dessert that brings a tropical flair to any celebration. This cake isn't only visually stunning but also packed with rich coconut flavor, making it a crowd-pleaser at birthdays, weddings, or any festive gathering.
The use of fresh coconut elevates the dish, adding a delightful texture and natural sweetness that pairs beautifully with the creamy frosting. Making this cake is an enjoyable experience, as it combines simple ingredients into a luscious treat.
The moist layers of coconut cake are complemented by a smooth coconut cream frosting, creating a perfect balance of flavors. Whether you're a coconut lover or just looking to impress your guests, this cake is sure to be a hit.
Ingredients:
- 2 cups all-purpose flour
- 1 ½ cups granulated sugar
- ½ cup unsalted butter, softened
- 1 cup coconut milk
- 4 large eggs
- 1 tablespoon baking powder
- 1 teaspoon vanilla extract
- ½ teaspoon salt
- 1 ½ cups shredded fresh coconut (plus extra for garnish)
Instructions:
Preheat your oven to 350°F (175°C) and grease and flour three 9-inch round cake pans.
In a large mixing bowl, cream together the softened butter and sugar until light and fluffy. Gradually add the eggs, mixing well after each addition. Then, mix in the coconut milk and vanilla extract.
In another bowl, whisk together the flour, baking powder, and salt. Slowly combine the dry ingredients with the wet mixture, folding in the shredded fresh coconut until just combined.
Divide the batter evenly among the prepared cake pans and bake for 25-30 minutes, or until a toothpick inserted in the center comes out clean. Let the cakes cool in the pans for 10 minutes before transferring them to a wire rack to cool completely.
Extra Tips:
For the best flavor and texture, be sure to use fresh coconut for shredding. If you can't find fresh coconut, unsweetened shredded coconut can be substituted, but the flavor may be slightly different.
To add an extra touch, consider toasting the shredded coconut lightly before garnishing the cake. Additionally, refrigerating the cake for a few hours before serving can enhance the creaminess of the frosting and make it easier to slice.
Enjoy your tropical creation!
Strawberry Shortcake With Whipped Cream
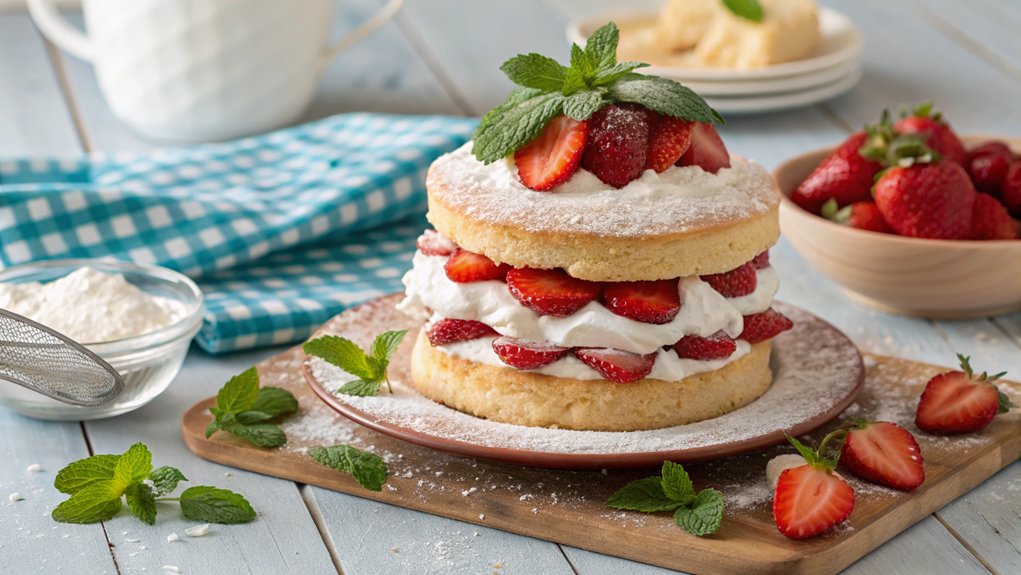
Strawberry shortcake is a classic dessert that captures the essence of summer with its fresh, juicy strawberries and light, fluffy whipped cream. This delightful treat is perfect for any celebration, whether it's a birthday, picnic, or just a sweet way to enjoy a sunny day.
The combination of tender, buttery cake and ripe strawberries creates a symphony of flavors that will leave your guests wanting more.
To make the perfect strawberry shortcake, it's important to use the freshest strawberries available. You can either purchase them from your local grocery store or visit a nearby farmer's market during strawberry season for the best quality.
This recipe will guide you through creating a delicious strawberry shortcake that's sure to impress your family and friends.
Ingredients:
- 2 cups all-purpose flour
- 1/4 cup granulated sugar
- 1 tablespoon baking powder
- 1/2 teaspoon salt
- 1/2 cup unsalted butter, cold and cubed
- 1 cup heavy cream
- 1 teaspoon vanilla extract
- 4 cups fresh strawberries, hulled and sliced
- 1/4 cup powdered sugar (for strawberries)
- 2 cups heavy whipping cream
- 1/4 cup granulated sugar (for whipped cream)
- 1 teaspoon vanilla extract (for whipped cream)
Cooking Instructions:
Preheat your oven to 425°F (220°C). In a large bowl, whisk together the flour, granulated sugar, baking powder, and salt.
Cut in the cold butter until the mixture resembles coarse crumbs. Pour in the heavy cream and vanilla extract, stirring until just combined.
Turn the dough onto a floured surface, knead gently, and roll out to about 1-inch thickness. Cut into rounds and place on a baking sheet. Bake for 12-15 minutes or until golden brown.
While the cakes cool, mix the sliced strawberries with powdered sugar and let them sit for about 15 minutes to release their juices.
In another bowl, whip the heavy cream with granulated sugar and vanilla extract until soft peaks form.
Extra Tips:
For an even more flavorful cake, consider adding a splash of lemon juice or zest to the strawberries for a citrusy kick.
You can also experiment with different types of berries, such as blueberries or raspberries, for a mixed berry shortcake.
When serving, assemble the shortcake just before eating to prevent the cake from becoming soggy, and enjoy it fresh for the best taste and texture.
Pineapple Upside-Down Cake
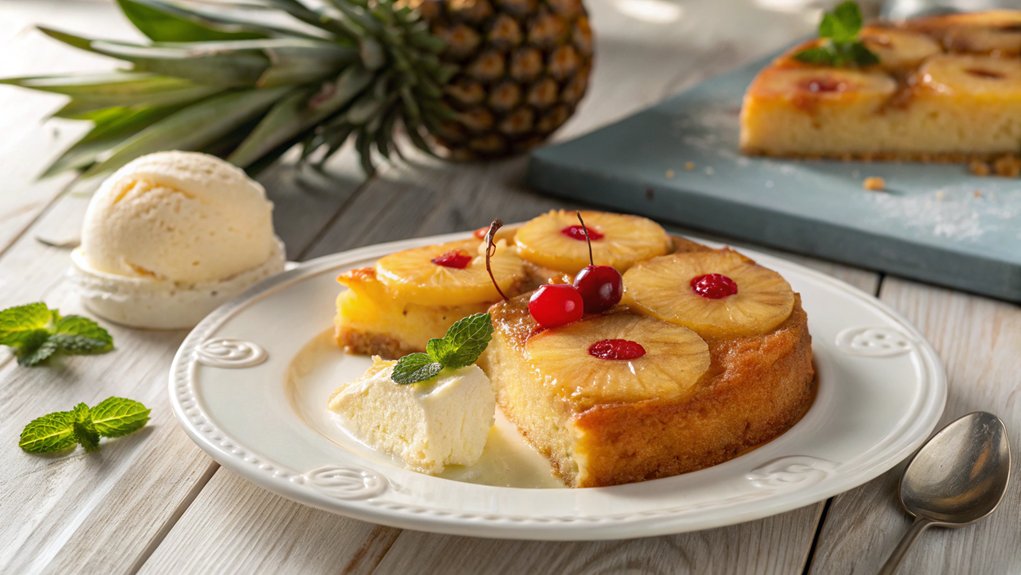
Pineapple Upside-Down Cake is a classic dessert that beautifully marries the sweetness of pineapples with a moist, buttery cake. This delightful treat is often associated with celebrations and brings an element of nostalgia, making it a favorite at gatherings, birthdays, and even potlucks.
The cake's stunning presentation, with caramelized pineapple rings adorning the top, makes it a showstopper that's sure to impress your guests.
Making Pineapple Upside-Down Cake at home is easier than you might think. With just a few simple ingredients and a bit of time, you can create a deliciously moist cake that bursts with flavor.
Whether you're a seasoned baker or a beginner, this recipe will guide you through the process of crafting this timeless dessert that's sure to become a staple in your baking repertoire.
Ingredients:
- 1/2 cup unsalted butter
- 1 cup packed brown sugar
- 1 can (20 oz) sliced pineapple in juice, drained
- Maraschino cherries (optional)
- 1 1/2 cups all-purpose flour
- 1 cup granulated sugar
- 1/2 cup milk
- 3 1/2 teaspoons baking powder
- 1 teaspoon vanilla extract
- 1/2 teaspoon salt
- 3 large eggs
Instructions:
Preheat your oven to 350°F (175°C). In an oven-safe skillet, melt the butter over medium heat, then sprinkle the brown sugar evenly over the melted butter.
Arrange the drained pineapple slices on top of the sugar mixture, and place a cherry in the center of each pineapple slice if desired.
In a large mixing bowl, combine the flour, granulated sugar, baking powder, salt, milk, vanilla extract, and eggs. Beat the mixture until smooth and pour it evenly over the pineapple layer in the skillet.
Bake for 35-40 minutes or until a toothpick inserted in the center comes out clean. Allow the cake to cool for a few minutes, then invert onto a serving plate to reveal the beautiful pineapple topping.
Extra Tips:
For an added depth of flavor, consider using dark brown sugar instead of light brown sugar, as it will enhance the caramelization of the pineapples.
You can also experiment with adding a pinch of cinnamon or nutmeg to the batter for a warm spice note.
Make sure to let the cake cool slightly before inverting to prevent it from breaking apart. Enjoy your Pineapple Upside-Down Cake warm or at room temperature, and consider serving it with a scoop of vanilla ice cream for an extra indulgent treat!
Chocolate Marble Cake
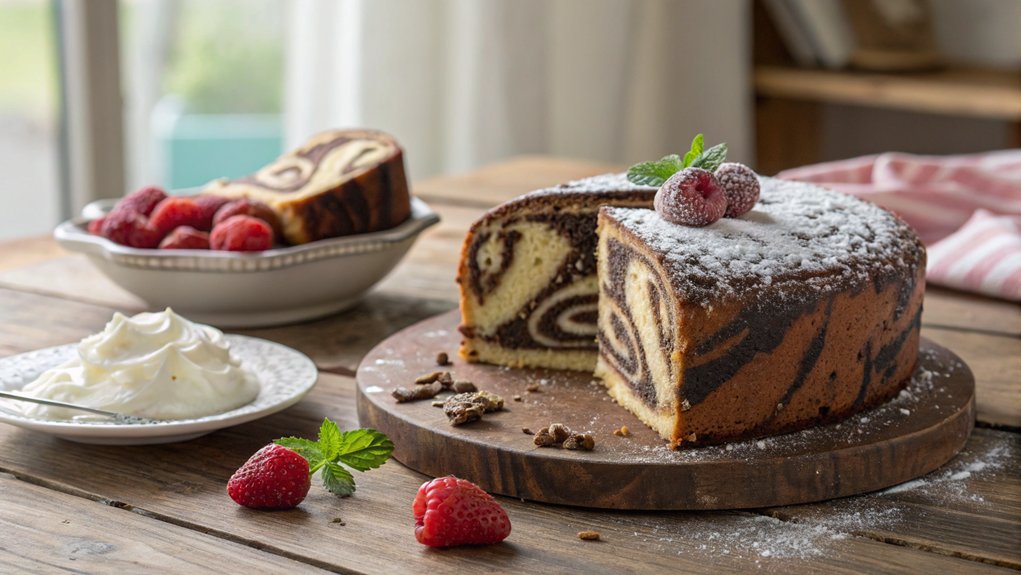
Chocolate Marble Cake is a delightful dessert that perfectly blends the rich, decadent flavor of chocolate with the light, fluffy texture of vanilla cake. This recipe isn't only visually stunning with its beautiful marbled effect, but it also provides a delicious combination of flavors that will satisfy any sweet tooth. Ideal for birthdays, anniversaries, or any special gathering, this cake will surely impress your guests with its elegance and taste.
Making a Chocolate Marble Cake is simpler than you might think. With a few basic ingredients, you can create a stunning centerpiece for your dessert table. The key to achieving the marbled effect lies in the careful layering and swirling of the chocolate and vanilla batters. Follow this easy recipe to create a cake that's as delightful to look at as it's to eat!
Ingredients:
- 1 ¾ cups all-purpose flour
- 1 ½ teaspoons baking powder
- ½ teaspoon salt
- ½ cup unsalted butter, softened
- 1 cup granulated sugar
- 2 large eggs
- 1 teaspoon vanilla extract
- ¾ cup milk
- ½ cup unsweetened cocoa powder
- ¼ cup hot water
Instructions:
Preheat your oven to 350°F (175°C) and grease a 9-inch round cake pan. In a bowl, whisk together the flour, baking powder, and salt.
In a separate large bowl, cream the butter and sugar until light and fluffy. Add the eggs one at a time, mixing well after each addition, and then stir in the vanilla extract. Gradually add the flour mixture and milk, alternating between the two, until just combined.
Divide the batter in half; mix cocoa powder and hot water into one half to create the chocolate batter. Spoon alternating dollops of the vanilla and chocolate batters into the prepared pan. Use a knife or skewer to gently swirl the batters together, creating a marble effect.
Bake for 30-35 minutes or until a toothpick inserted into the center comes out clean. Allow the cake to cool for 10 minutes in the pan before transferring it to a wire rack to cool completely.
Extra Tips:
For an even richer flavor, consider adding chocolate chips to the chocolate batter or a sprinkle of nuts for added texture.
Make sure to not overmix the batters during the swirling process, as you want to maintain distinct layers for that beautiful marbled look.
Finally, feel free to frost the cake with your favorite chocolate or vanilla icing, or serve it with fresh fruit and whipped cream for a light and delicious finish.
Almond Joy Cake With Coconut and Chocolate
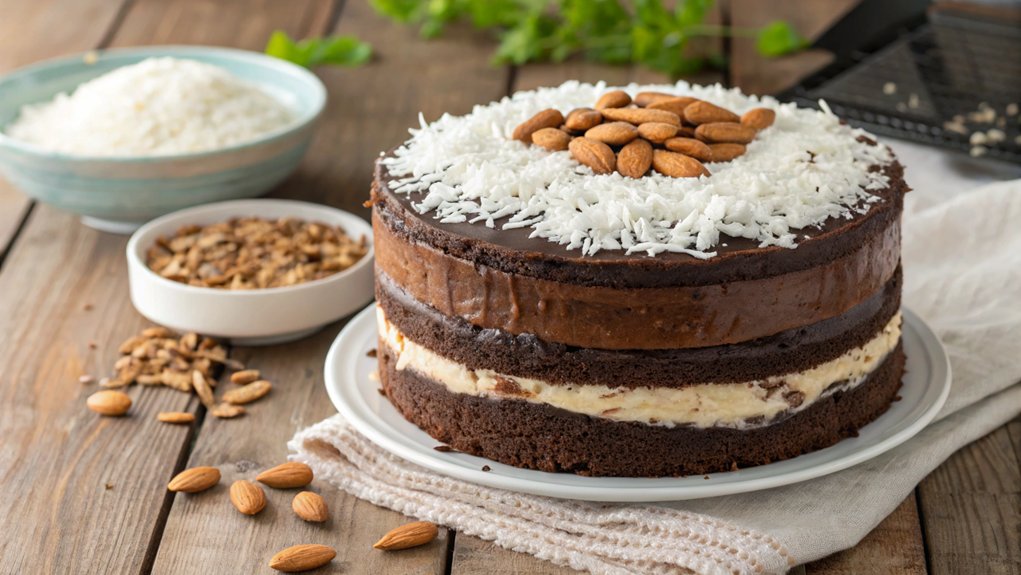
Indulge in the rich flavors of the Almond Joy Cake, a delightful dessert that combines the classic tastes of chocolate, coconut, and almonds. This cake is perfect for any celebration, whether it's a birthday, an anniversary, or simply a weekend treat.
The moist chocolate cake is layered with a luscious coconut filling and topped with a decadent chocolate ganache, making it a show-stopping centerpiece for your dessert table.
To bring this delectable dessert to life, you'll need a few key ingredients that reflect the iconic Almond Joy candy bar. The sweet combination of shredded coconut and crunchy almonds creates a satisfying texture that complements the soft, rich chocolate cake perfectly.
With a few simple steps, you'll have a stunning cake that will impress your guests and satisfy your sweet tooth.
Ingredients:
- 1 ¾ cups all-purpose flour
- 1 ½ cups granulated sugar
- ¾ cup unsweetened cocoa powder
- 1 ½ teaspoons baking powder
- 1 ½ teaspoons baking soda
- 1 teaspoon salt
- 2 large eggs
- 1 cup whole milk
- ½ cup vegetable oil
- 2 teaspoons vanilla extract
- 1 cup boiling water
- 1 ½ cups shredded coconut
- 1 cup chopped almonds
- 1 cup heavy cream
- 8 ounces semi-sweet chocolate, chopped
Instructions:
Preheat your oven to 350°F (175°C) and grease and flour two 9-inch round cake pans.
In a large bowl, mix together the flour, sugar, cocoa powder, baking powder, baking soda, and salt. Add the eggs, milk, vegetable oil, and vanilla extract, and mix until well combined.
Carefully stir in the boiling water until the batter is smooth. Divide the batter evenly between the prepared pans and bake for 30-35 minutes, or until a toothpick inserted into the center comes out clean.
Let the cakes cool in the pans for 10 minutes before transferring them to a wire rack to cool completely.
While the cakes cool, prepare the coconut filling by mixing shredded coconut and chopped almonds in a bowl.
For the ganache, heat the heavy cream until just simmering and pour it over the chopped chocolate, stirring until smooth.
Once the cakes are completely cool, spread the coconut mixture between the layers, top with the ganache, and garnish with additional almonds and coconut if desired.
Extra Tips:
For an even richer flavor, consider adding almond extract to the cake batter or the coconut filling.
Additionally, if you prefer a more intense chocolate flavor, you can use dark chocolate for the ganache.
Make sure your cakes are completely cool before assembling to prevent the ganache from melting.
This cake can also be made a day in advance; just store it in an airtight container in the refrigerator to keep it fresh!
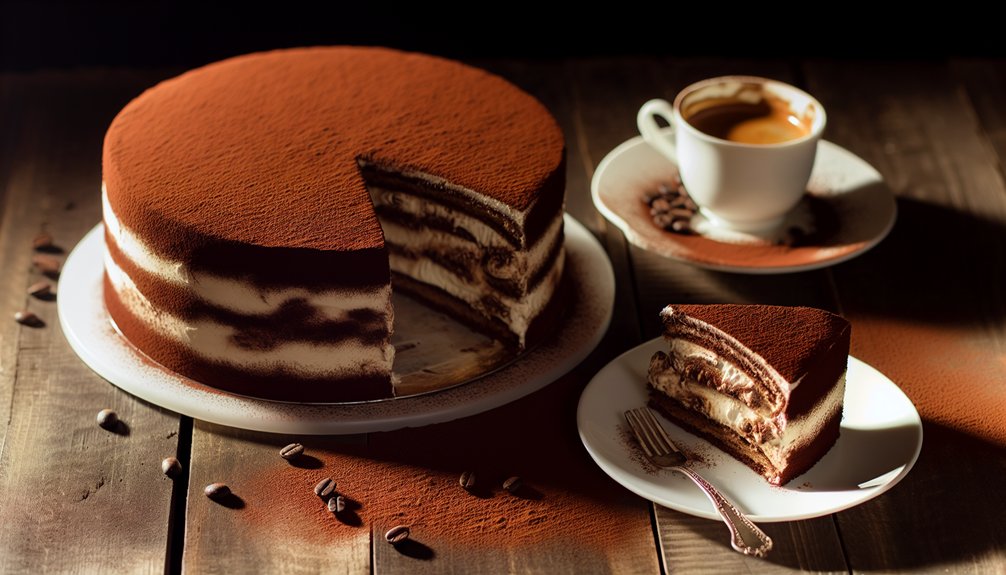
Tiramisu Cake for Coffee Lovers
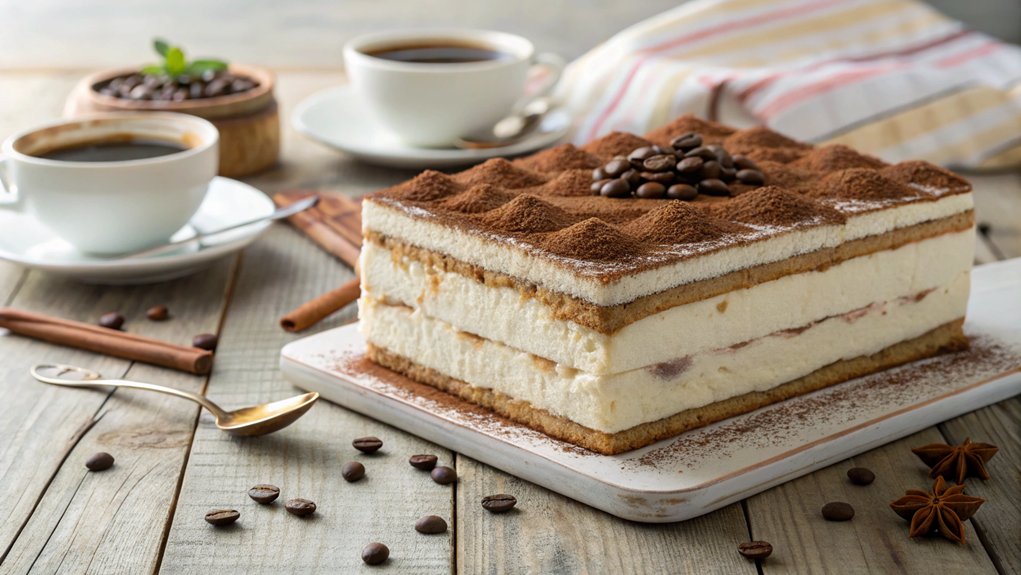
Tiramisu Cake is a delightful twist on the traditional Italian dessert, perfect for coffee lovers seeking a decadent treat. This cake combines rich coffee flavors with light mascarpone cream and layers of fluffy cake to create a dessert that's both indulgent and satisfying. The best part? It's surprisingly easy to make, allowing you to impress your guests with minimal effort.
To achieve the authentic taste of tiramisu, you'll want to use quality ingredients, especially when it comes to the coffee and mascarpone cheese. This cake is ideal for birthdays, anniversaries, or even a casual coffee gathering with friends. So, ready your baking tools and get ready to create a cake that will transport you straight to Italy with every bite.
Ingredients:
- 2 cups all-purpose flour
- 1 ½ cups granulated sugar
- ½ cup unsweetened cocoa powder
- 1 cup strong brewed coffee, cooled
- ½ cup vegetable oil
- 3 large eggs
- 1 tsp vanilla extract
- 1 tsp baking powder
- ½ tsp baking soda
- ½ tsp salt
- 16 oz mascarpone cheese
- 1 cup heavy whipping cream
- ¼ cup powdered sugar
- Cocoa powder for dusting
Cooking Instructions:
Preheat your oven to 350°F (175°C) and grease two 9-inch round cake pans. In a large mixing bowl, whisk together the flour, granulated sugar, cocoa powder, baking powder, baking soda, and salt.
In another bowl, combine the cooled coffee, vegetable oil, eggs, and vanilla extract. Gradually mix the wet ingredients into the dry ingredients until just combined. Divide the batter evenly between the prepared pans and bake for 25-30 minutes or until a toothpick inserted in the center comes out clean.
Once baked, let the cakes cool completely. While cooling, whip the heavy cream with powdered sugar until stiff peaks form, then gently fold in the mascarpone until smooth. Once the cakes are cooled, layer them with the mascarpone mixture, and dust the top with cocoa powder.
Extra Tips:
For an extra kick of flavor, consider adding a splash of coffee liqueur to the coffee mixture used for soaking the cake layers; this addition enhances the coffee taste and adds depth.
Additionally, if you prefer a more pronounced coffee flavor, you can use espresso instead of brewed coffee. Allow the cake to chill in the refrigerator for a few hours or overnight after assembling; this will let the flavors meld beautifully, ensuring each slice is a creamy, coffee-infused delight. Enjoy your Tiramisu Cake!


