
It’s funny how a simple summer day can spark a craving for ice cream. If you’ve ever found yourself longing for a scoop of something creamy and delicious, you’re not alone. Homemade ice cream offers endless possibilities, from classic flavors to unique blends that surprise your taste buds. You might just discover your new favorite treat among these 14 recipes. What will you make first?
Classic Vanilla Ice Cream
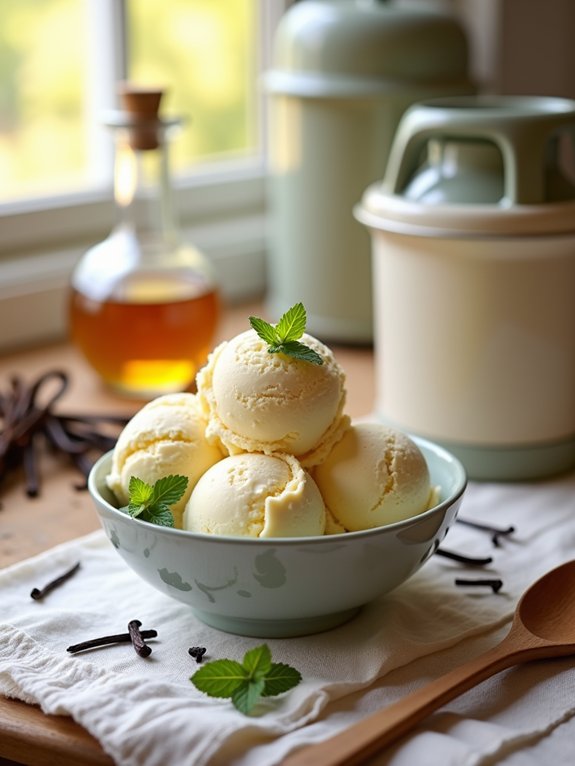
Homemade vanilla ice cream is a delightful treat that brings back memories of warm summer days and family gatherings. With its rich, creamy texture and the simple yet elegant flavor of vanilla, this classic dessert is a favorite for all ages.
Making vanilla ice cream at home allows you to control the ingredients and customize the sweetness and flavor to your liking. Plus, the satisfaction of creating your own ice cream from scratch is truly rewarding.
To make classic vanilla ice cream, you don’t need any fancy equipment or complicated techniques. Just a few simple ingredients and a little bit of patience will yield a deliciously smooth and creamy treat.
Whether you enjoy it in a cone, a bowl, or as a part of your favorite dessert, this homemade version will surely impress your friends and family.
Ingredients:
- 2 cups heavy cream
- 1 cup whole milk
- 3/4 cup granulated sugar
- 1 tablespoon pure vanilla extract
- Pinch of salt
- 5 large egg yolks
Instructions:
In a medium saucepan, combine the heavy cream, whole milk, sugar, and salt. Heat the mixture over medium heat until it begins to steam, but don’t let it boil.
In a separate bowl, whisk the egg yolks until they’re light and frothy. Gradually add about a cup of the warm cream mixture into the egg yolks, whisking constantly to temper them.
Then, slowly pour the tempered egg yolk mixture back into the saucepan, stirring continuously until the mixture thickens slightly and coats the back of a spoon. Remove from heat, stir in the vanilla extract, and let it cool to room temperature.
Once cooled, cover and refrigerate for at least 4 hours or overnight. Finally, churn the mixture in an ice cream maker according to the manufacturer’s instructions, then transfer it to an airtight container and freeze until firm.
Extra Tips:
For an even richer vanilla flavor, consider using vanilla bean paste or scraping the seeds from a vanilla pod into your mixture.
Additionally, make sure all your ingredients are cold before mixing; this helps improve the texture of the final ice cream. If you don’t have an ice cream maker, you can still achieve a creamy consistency by placing the mixture in a freezer-safe container and stirring every 30 minutes for the first 2-3 hours to break up any ice crystals.
Enjoy your homemade treat!
Rich Chocolate Ice Cream
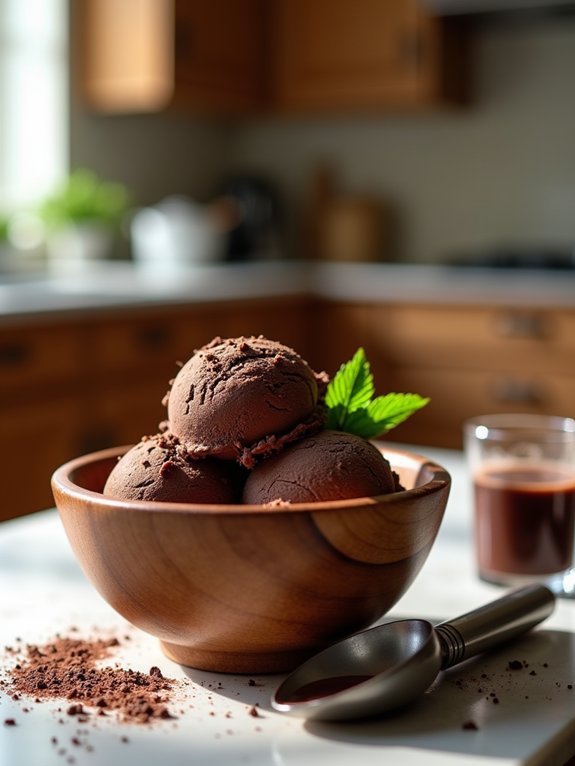
Rich Chocolate Ice Cream is a decadent treat that promises to satisfy any chocolate lover’s cravings. This creamy, smooth, and indulgent dessert is perfect for warm summer days or any time you want to indulge in something sweet. With just a few simple ingredients, you can create a rich and velvety ice cream that rivals your favorite ice cream shop.
Making homemade ice cream allows you to control the quality of the ingredients and customize the flavor according to your preference. The combination of dark chocolate and cream creates a luxurious texture that melts in your mouth. Plus, you can easily adjust the sweetness and richness to suit your taste. Gather your ingredients, and let’s get started on this delightful chocolate ice cream recipe!
Ingredients:
- 2 cups heavy cream
- 1 cup whole milk
- 3/4 cup granulated sugar
- 1 cup dark chocolate (chopped)
- 1 teaspoon vanilla extract
- 1/4 teaspoon salt
- 4 large egg yolks
Cooking Instructions:
In a medium saucepan, combine the heavy cream, whole milk, and sugar over medium heat. Stir until the sugar dissolves, then add the chopped dark chocolate, stirring continuously until melted and smooth.
In a separate bowl, whisk the egg yolks until pale in color. Gradually pour in a small amount of the warm chocolate mixture to temper the yolks, then whisk the yolk mixture back into the saucepan. Continue cooking over low heat, stirring constantly until the mixture thickens enough to coat the back of a spoon.
Remove from heat, stir in the vanilla extract and salt, then let it cool before refrigerating for at least 4 hours or overnight. Once chilled, churn in an ice cream maker according to the manufacturer’s instructions until it reaches a soft-serve consistency. Transfer to a container and freeze until firm.
Extra Tips:
For the best flavor, use high-quality dark chocolate with at least 70% cocoa content. This will give your ice cream a rich and intense chocolate flavor.
Additionally, if you prefer a smoother texture, consider straining the mixture through a fine mesh sieve before chilling to remove any lumps. Feel free to mix in chocolate chips, nuts, or swirls of fudge during the churning process for added texture and flavor variations. Enjoy your homemade chocolate ice cream!
Strawberry Swirl Ice Cream
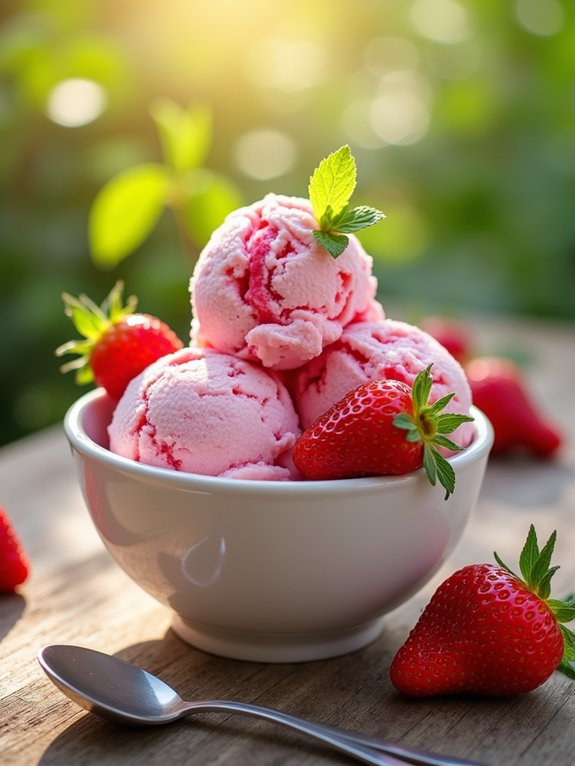
Making homemade strawberry swirl ice cream is a delightful way to enjoy the sweet taste of summer all year round. The vibrant flavors of fresh strawberries combined with the creamy texture of ice cream create a revitalizing dessert that can be enjoyed by everyone. This recipe is simple and allows the natural sweetness of strawberries to shine through, making it a perfect treat for hot days or special occasions.
To achieve the perfect strawberry swirl, you’ll want to use ripe, juicy strawberries that are bursting with flavor. The key is to create a strawberry sauce that can be swirled into the ice cream base, giving it that beautiful marbled effect. This dessert isn’t only delicious but also a fun way to involve family and friends in the ice cream-making process. With a few basic ingredients, you can whip up a batch of this scrumptious treat in no time!
Ingredients:
- 2 cups fresh strawberries, hulled and sliced
- 3/4 cup granulated sugar, divided
- 1 cup heavy cream
- 1 cup whole milk
- 1 teaspoon vanilla extract
- Pinch of salt
Instructions:
In a medium saucepan over medium heat, combine the sliced strawberries and 1/4 cup of sugar. Cook until the strawberries release their juices and the mixture becomes syrupy, about 5-7 minutes. Remove from heat and let it cool.
In a separate bowl, whisk together the remaining sugar, heavy cream, milk, vanilla extract, and salt until well combined. Pour the mixture into an ice cream maker and churn according to the manufacturer’s instructions. Once the ice cream reaches a soft-serve consistency, gently fold in the strawberry sauce, creating swirls throughout the ice cream.
Transfer to a lidded container and freeze for at least 4 hours or until firm.
Extra Tips:
For an even more pronounced strawberry flavor, consider adding a splash of lemon juice to the strawberry mixture while cooking. This will enhance the natural sweetness and add a lovely tartness.
Additionally, if you don’t have an ice cream maker, you can still make this recipe by freezing the mixture in a shallow dish and stirring it every 30 minutes until it reaches a creamy consistency. Enjoy your homemade strawberry swirl ice cream with fresh strawberry slices on top for an extra touch!
Mint Chocolate Chip Ice Cream
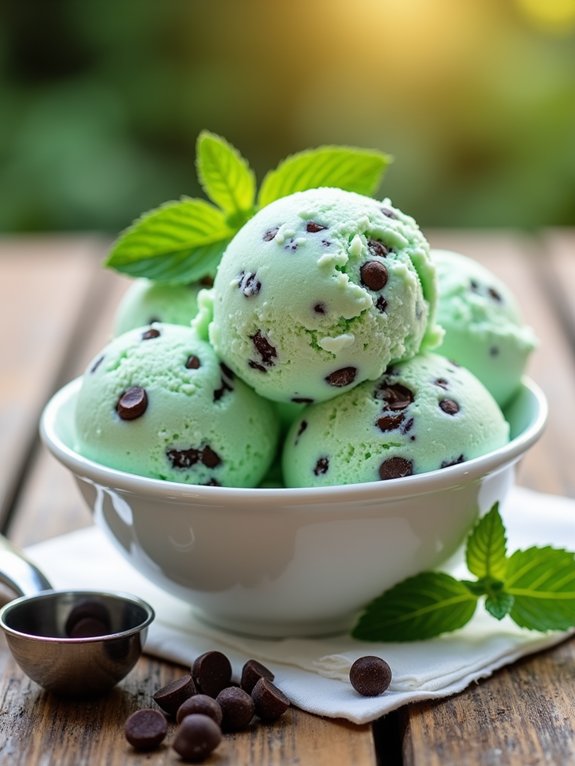
Mint Chocolate Chip Ice Cream is a rejuvenating and delightful treat that perfectly balances the coolness of mint with the rich flavor of chocolate. This homemade version isn’t only delicious but also allows you to control the ingredients, ensuring a fresh and creamy result.
Whether you’re enjoying it on a hot summer day or as a comforting dessert after dinner, this mint chocolate chip ice cream is sure to please your taste buds and impress your friends and family.
Making this ice cream from scratch is a breeze, especially if you have an ice cream maker. The process involves infusing cream with fresh mint leaves, which adds a vibrant flavor to the base.
Once prepared, the mixture is churned and combined with chocolate chips for that signature crunchy texture. You can customize the recipe by adjusting the mint intensity or using different types of chocolate, making it a versatile and fun dessert to create.
Ingredients:
- 2 cups heavy cream
- 1 cup whole milk
- 3/4 cup granulated sugar
- 1 teaspoon pure vanilla extract
- 1 cup fresh mint leaves (lightly packed)
- 1/2 cup chocolate chips (dark or semi-sweet)
- A pinch of salt
- Green food coloring (optional)
Instructions:
In a saucepan, combine the heavy cream, whole milk, and granulated sugar over medium heat, stirring until the sugar dissolves.
Add the fresh mint leaves and a pinch of salt, letting the mixture come just to a simmer. Remove from heat and cover, allowing the mint to steep for about 30 minutes.
After steeping, strain the mixture to remove the mint leaves and stir in the vanilla extract and food coloring, if desired. Chill the mixture in the refrigerator for at least 2 hours or until completely cold.
Once chilled, pour the mixture into your ice cream maker and churn according to the manufacturer’s instructions. Just before it’s done churning, fold in the chocolate chips, then transfer the ice cream to an airtight container and freeze for at least 4 hours before serving.
Extra Tips:
For an even more intense mint flavor, consider using peppermint extract in addition to or instead of fresh mint leaves. Start with a few drops and adjust according to your taste preference.
Additionally, if you don’t have an ice cream maker, you can pour the mixture into a shallow dish and freeze it, stirring every 30 minutes until it reaches the desired consistency. This method will give you a slightly different texture but will still be delicious!
Cookies and Cream Ice Cream
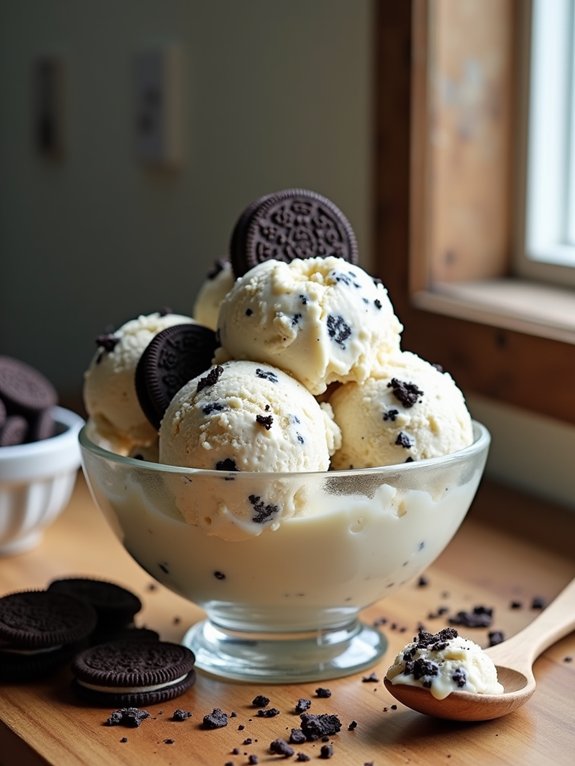
Cookies and cream ice cream is a delightful treat that combines the rich creaminess of vanilla ice cream with the crunchy, chocolatey goodness of Oreo cookies. This classic flavor is a favorite among ice cream lovers of all ages and is incredibly easy to make at home.
With just a few simple ingredients and minimal effort, you can whip up a batch that will impress your friends and family.
Making cookies and cream ice cream allows you to customize the level of creaminess and cookie chunks to your preference. Whether you prefer a smooth, velvety texture with just a hint of cookie, or a chunky, cookie-filled delight, this recipe can be adjusted to suit your taste.
Plus, with no need for an ice cream maker, you can enjoy this delicious dessert any time you want!
Ingredients:
- 2 cups heavy cream
- 1 cup whole milk
- 3/4 cup granulated sugar
- 1 teaspoon vanilla extract
- 10-12 Oreo cookies, crushed
Instructions:
In a large mixing bowl, whisk together the heavy cream, whole milk, granulated sugar, and vanilla extract until the sugar is fully dissolved.
Once combined, gently fold in the crushed Oreo cookies, ensuring they’re evenly distributed throughout the mixture.
Pour the mixture into a container with a lid and freeze for about 4-6 hours, or until solid. For the best texture, stir the mixture every hour during the first three hours of freezing.
Extra Tips:
For an even richer flavor, consider adding a pinch of salt to the mixture, as it enhances the sweetness.
If you want a more intense cookie flavor, try using double-stuffed Oreos or mix in some chocolate syrup before freezing.
To serve, let the ice cream sit at room temperature for a few minutes to soften, making it easier to scoop.
Enjoy your homemade cookies and cream ice cream!
Coffee Espresso Ice Cream

Coffee Espresso Ice Cream is a delightful treat that combines the rich, bold flavors of coffee with the creamy, smooth texture of ice cream. Perfect for coffee lovers, this homemade dessert isn’t only easy to make but also a fantastic way to cool down on a warm day or to serve at gatherings.
The espresso adds a sophisticated twist that elevates this classic dessert and makes it suitable for both casual and elegant occasions. Making your own Coffee Espresso Ice Cream at home allows you to control the ingredients and tailor the flavors to your liking.
This recipe uses freshly brewed espresso or strong coffee for an intense flavor that truly shines through in every scoop. With just a few simple ingredients, you can create a deliciously indulgent ice cream that will impress your friends and family.
Ingredients
- 2 cups heavy cream
- 1 cup whole milk
- 1 cup granulated sugar
- 1 tablespoon vanilla extract
- 1 cup freshly brewed espresso or strong coffee
- Pinch of salt
- 4 large egg yolks
Instructions
In a medium saucepan, whisk together the heavy cream, whole milk, sugar, and a pinch of salt over medium heat until the sugar is dissolved and the mixture is heated through, but not boiling.
In a separate bowl, whisk the egg yolks until smooth, and then slowly pour in a cup of the hot cream mixture, whisking continuously to temper the yolks. Pour the egg mixture back into the saucepan and cook on low heat, stirring constantly until the mixture thickens enough to coat the back of a spoon.
Remove from heat and stir in the freshly brewed espresso and vanilla extract. Allow the mixture to cool, then refrigerate for at least 4 hours or overnight.
Once chilled, churn the mixture in an ice cream maker according to the manufacturer’s instructions before transferring it to a container and freezing until firm.
Extra Tips
For an even richer flavor, consider adding a few tablespoons of coffee liqueur to the mixture before churning.
If you don’t have an ice cream maker, you can pour the mixture into a shallow dish and freeze it, stirring every 30 minutes until it reaches your desired consistency.
Additionally, feel free to customize your Coffee Espresso Ice Cream by folding in chocolate chips, crushed cookies, or toasted nuts for added texture and flavor.
Salted Caramel Ice Cream
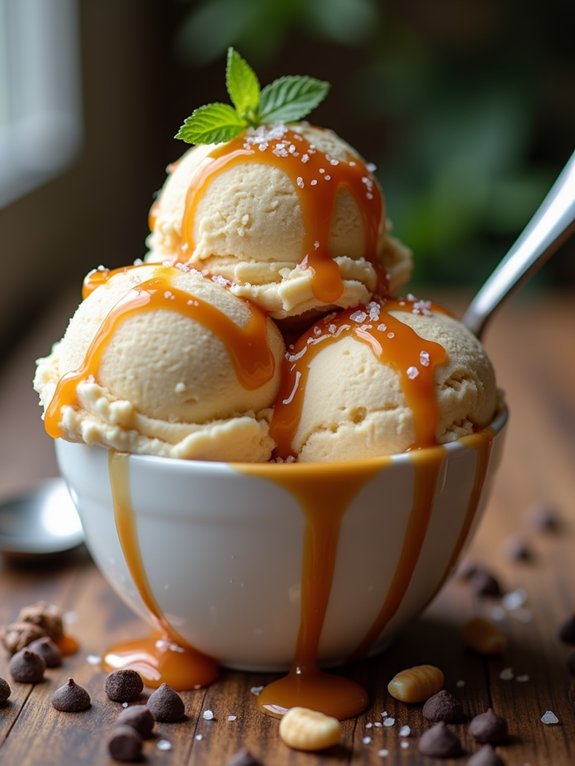
Homemade Salted Caramel Ice Cream is a delightful treat that combines the rich, buttery flavor of caramel with a hint of salt to create a perfect balance of sweet and savory. The process of making this ice cream isn’t only rewarding but also allows you to customize the flavors to your liking. With just a few simple ingredients, you can create a creamy and indulgent dessert that will impress your family and friends.
This recipe is perfect for any occasion, whether it’s a summer barbecue, a birthday party, or simply a cozy night in. The salted caramel sauce is easy to make and can be drizzled over the ice cream or mixed in for an extra burst of flavor. Once you’ve mastered this recipe, feel free to experiment with different mix-ins like chocolate chips or nuts for a personalized touch.
Ingredients:
- 1 cup granulated sugar
- 6 tablespoons unsalted butter, cut into pieces
- 1/2 cup heavy cream
- 1 teaspoon sea salt
- 2 cups heavy cream (for the ice cream)
- 1 cup whole milk
- 3/4 cup granulated sugar (for the ice cream)
- 1 teaspoon vanilla extract
- 5 large egg yolks
Instructions:
To make the salted caramel, start by heating 1 cup of granulated sugar in a medium saucepan over medium heat, stirring constantly until it melts into a golden-brown liquid.
Once melted, carefully add 6 tablespoons of butter and stir until melted and combined. Slowly pour in 1/2 cup of heavy cream (the mixture will bubble up), and then stir in 1 teaspoon of sea salt. Set aside to cool.
For the ice cream base, whisk together 2 cups of heavy cream, 1 cup of whole milk, 3/4 cup of granulated sugar, and 1 teaspoon of vanilla extract in a bowl.
In a separate bowl, whisk the egg yolks. Gradually add some of the warm cream mixture to the yolks, whisking constantly to temper them, then pour the yolk mixture back into the saucepan.
Cook over medium heat until the mixture thickens enough to coat the back of a spoon. Strain the mixture into a bowl and let it chill in the refrigerator.
Once chilled, churn the ice cream in an ice cream maker according to the manufacturer’s instructions. Once churned, gently fold in the salted caramel sauce, then transfer to a container and freeze until firm.
Extra Tips:
When making the salted caramel, be cautious while adding the heavy cream, as it can bubble up and cause splatters.
To achieve the best texture for your ice cream, make certain that both the ice cream base and the salted caramel are thoroughly chilled before mixing.
If you don’t have an ice cream maker, you can pour the mixture into a shallow dish and stir every 30 minutes until it reaches a creamy consistency.
Enjoy your homemade salted caramel ice cream!
Pistachio Ice Cream
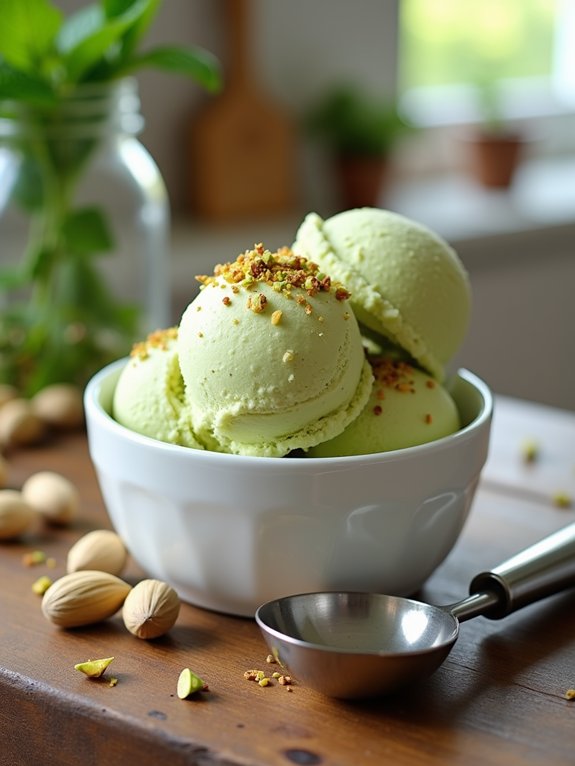
Pistachio ice cream is a delightful treat that combines the rich, nutty flavor of pistachios with the creamy texture of homemade ice cream. This recipe is perfect for those warm summer days or any time you want to indulge in a delicious dessert.
Making your own ice cream allows you to control the ingredients and customize the flavor to your liking, ensuring a fresh and satisfying treat that will impress your family and friends.
To make pistachio ice cream, you’ll need a few simple ingredients and an ice cream maker. The process is straightforward and rewarding, as the result is a smooth and creamy ice cream that’s bursting with pistachio flavor.
Whether you serve it in a cone, a bowl, or as a topping for a warm dessert, this pistachio ice cream is sure to be a hit.
Ingredients:
- 1 cup unsalted pistachios (shelled)
- 2 cups heavy cream
- 1 cup whole milk
- 3/4 cup granulated sugar
- 1 teaspoon vanilla extract
- 1/4 teaspoon salt
- 1 tablespoon lemon juice (optional)
Instructions:
Start by blending the shelled pistachios in a food processor until they’re finely ground.
In a medium saucepan, combine the ground pistachios, heavy cream, whole milk, sugar, vanilla extract, and salt. Heat the mixture over medium heat until it’s warm but not boiling, stirring occasionally to dissolve the sugar.
Once heated, remove from the heat and let it cool for about 30 minutes. If desired, strain the mixture through a fine-mesh sieve to remove any larger pieces of pistachio.
Add the lemon juice for a slight tang, if using. Pour the mixture into an ice cream maker and churn according to the manufacturer’s instructions until it reaches a soft-serve consistency.
Transfer the ice cream to an airtight container and freeze for at least 4 hours, or until firm.
Extra Tips:
For an even richer flavor, consider toasting the pistachios lightly before grinding them. This will enhance their nuttiness and give your ice cream a deeper taste.
If you don’t have an ice cream maker, you can still make this recipe by placing the mixture in a shallow dish and stirring it vigorously every 30 minutes for several hours until it reaches your desired consistency.
Enjoy your homemade pistachio ice cream!
Lavender Honey Ice Cream
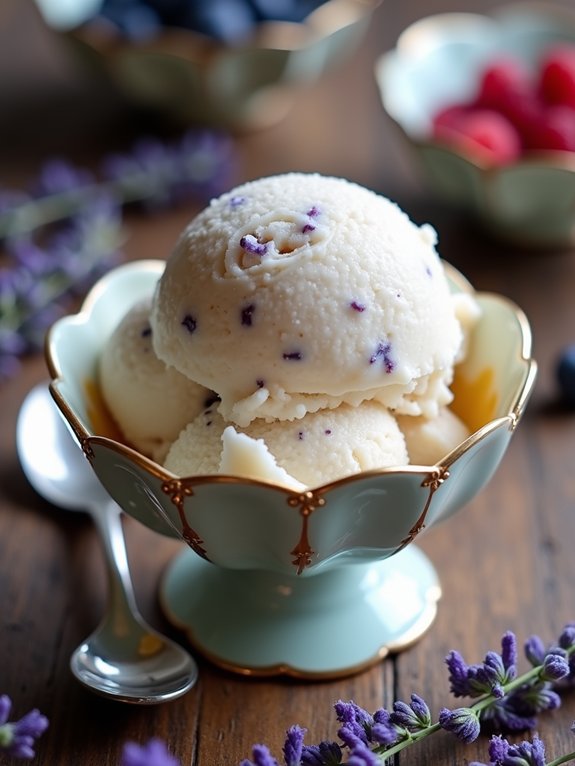
Lavender Honey Ice Cream is a delightful and fragrant dessert that brings a touch of elegance to any occasion. The combination of floral lavender and sweet honey creates a unique flavor profile that’s both invigorating and soothing. This creamy ice cream is perfect for warm summer evenings or as a sophisticated treat to impress your guests.
Making homemade ice cream might seem intimidating, but with this simple recipe, you can enjoy the luxurious taste of Lavender Honey Ice Cream right from your own kitchen.
To create this delightful dessert, you’ll need to gather a few key ingredients and set aside some time for the mixture to chill. The infusion of lavender in the cream adds a beautiful aroma and flavor that pairs wonderfully with the natural sweetness of honey. This recipe requires an ice cream maker, but if you don’t have one, don’t worry—you can still achieve a creamy texture with a little extra effort.
Ingredients:
- 2 cups heavy cream
- 1 cup whole milk
- 3/4 cup honey
- 1 tablespoon dried culinary lavender
- 5 large egg yolks
- 1 teaspoon vanilla extract
- Pinch of salt
Instructions:
In a saucepan, combine the heavy cream, whole milk, honey, and dried lavender. Heat the mixture over medium heat until it begins to steam, then remove it from the heat and allow it to steep for about 30 minutes.
In a separate bowl, whisk the egg yolks until they’re pale, then slowly temper them by adding a small amount of the warm cream mixture to the yolks while whisking continuously. Once combined, pour the egg yolk mixture back into the saucepan and cook over low heat, stirring constantly until it thickens enough to coat the back of a spoon.
Strain the mixture to remove the lavender, stir in the vanilla extract and a pinch of salt, then chill in the refrigerator for at least 4 hours or overnight. Once chilled, churn the mixture in your ice cream maker according to the manufacturer’s instructions, then transfer to a container and freeze until firm.
Extra Tips:
When using dried lavender, make certain it’s labeled as culinary lavender to avoid any harmful additives.
You can also adjust the amount of honey to your taste preferences—add more for a sweeter ice cream or less for a more subtle flavor. If you want a stronger lavender taste, consider infusing the cream for a longer period or adding a few extra tablespoons of dried lavender.
Enjoy your Lavender Honey Ice Cream as is, or serve it with fresh berries or a drizzle of honey for an extra touch!
Mango Sorbet
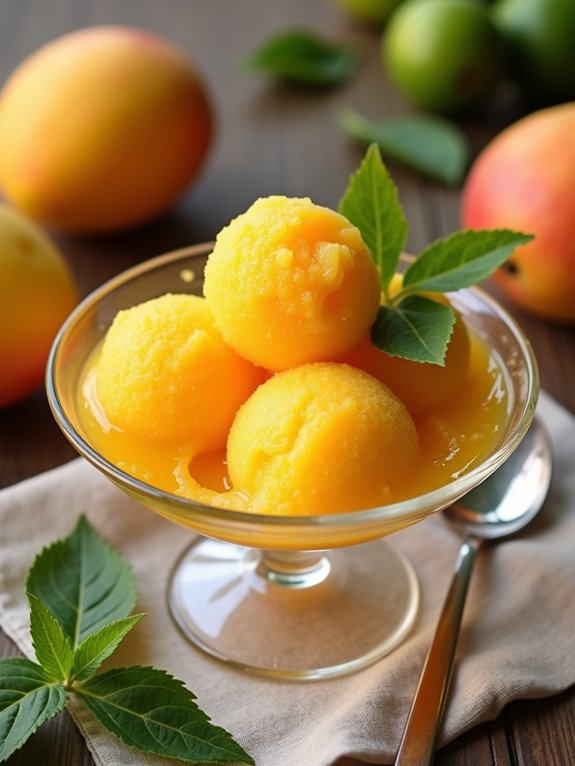
Mango sorbet is a revitalizing and delightful treat that captures the essence of summer in every spoonful. This fruity dessert isn’t only easy to make but also requires minimal ingredients, making it perfect for anyone looking to satisfy their sweet tooth without the guilt. The vibrant flavor of ripe mangoes shines through, and the smooth texture will leave you craving more.
Whether you’re enjoying it on a hot day or serving it as a light dessert after a meal, mango sorbet is sure to impress.
To create a wonderfully creamy and flavorful mango sorbet, it’s crucial to use ripe, sweet mangoes. The better the quality of the fruit, the more delicious your sorbet will be. This recipe is versatile, allowing you to enjoy it as-is or customize it with additional flavorings such as lime juice or coconut milk.
With just a few simple steps, you’ll be on your way to making this tropical delight at home.
Ingredients:
- 4 ripe mangoes
- 1 cup granulated sugar
- 1 cup water
- 2 tablespoons lime juice
- Pinch of salt
Instructions:
Begin by peeling and pitting the mangoes, then chop them into small pieces. Place the mango pieces in a blender or food processor, and blend until smooth.
In a saucepan, combine the sugar, water, and pinch of salt, bringing it to a gentle boil until the sugar dissolves completely. Remove from heat and let it cool.
Once cooled, mix the sugar syrup with the mango puree and lime juice. Pour the mixture into a shallow dish and freeze for about 4-6 hours, stirring every hour to break up any ice crystals, until the sorbet is firm yet scoopable.
Extra Tips:
For an even smoother texture, consider straining the mango puree before mixing it with the sugar syrup. This will help eliminate any fibrous bits.
Additionally, you can experiment with different fruits or add a splash of your favorite liqueur for a grown-up twist. If you have an ice cream maker, using it will yield an even creamier sorbet in less time.
Don’t forget to let the sorbet sit at room temperature for a few minutes before serving to make scooping easier!
Peanut Butter Cup Ice Cream
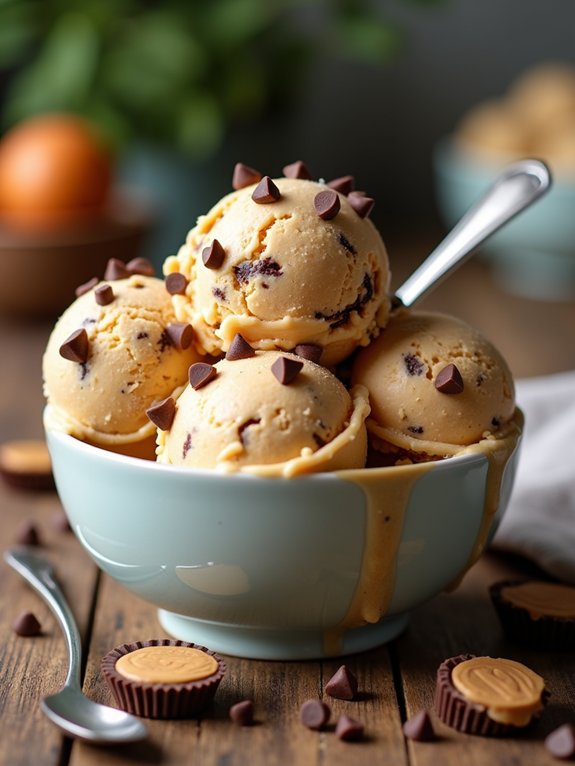
If you’re a fan of rich and creamy desserts, then this peanut butter cup ice cream is sure to become a favorite in your household. The combination of smooth peanut butter, sweetened cream, and chunks of chocolate peanut butter cups creates a delectable treat that’s perfect for any occasion.
Whether it’s a hot summer day or a cozy movie night, this homemade ice cream will satisfy your sweet tooth and impress your family and friends.
Making this peanut butter cup ice cream isn’t only easy but also a fun activity to do with kids or friends. With just a few simple ingredients and a little bit of time, you can whip up a batch that rivals any ice cream shop.
The best part? You can customize it by adding more or less peanut butter and varying the amount of chocolate cups based on your preferences. So, grab your ice cream maker and let’s get started!
Ingredients:
- 2 cups heavy cream
- 1 cup whole milk
- 3/4 cup granulated sugar
- 1 cup creamy peanut butter
- 1 teaspoon vanilla extract
- 1/2 cup chopped chocolate peanut butter cups
Instructions:
In a mixing bowl, combine the heavy cream, whole milk, granulated sugar, peanut butter, and vanilla extract, whisking until the mixture is smooth and the sugar has dissolved.
Pour the mixture into your ice cream maker and churn according to the manufacturer’s instructions. Once it reaches a soft-serve consistency, gently fold in the chopped peanut butter cups.
Transfer the ice cream to an airtight container and freeze for at least 4 hours or until firm.
Extra Tips:
To achieve the best flavor and texture, make sure your heavy cream and whole milk are very cold before mixing them together.
For an even richer taste, you can use natural, unsweetened peanut butter, although this may alter the sweetness of the ice cream slightly.
If you don’t have an ice cream maker, you can still make this dessert by pouring the mixture into a shallow dish and freezing it, stirring every 30 minutes for about 2-3 hours until it reaches the desired consistency.
Enjoy your homemade peanut butter cup ice cream!
Coconut Lime Ice Cream
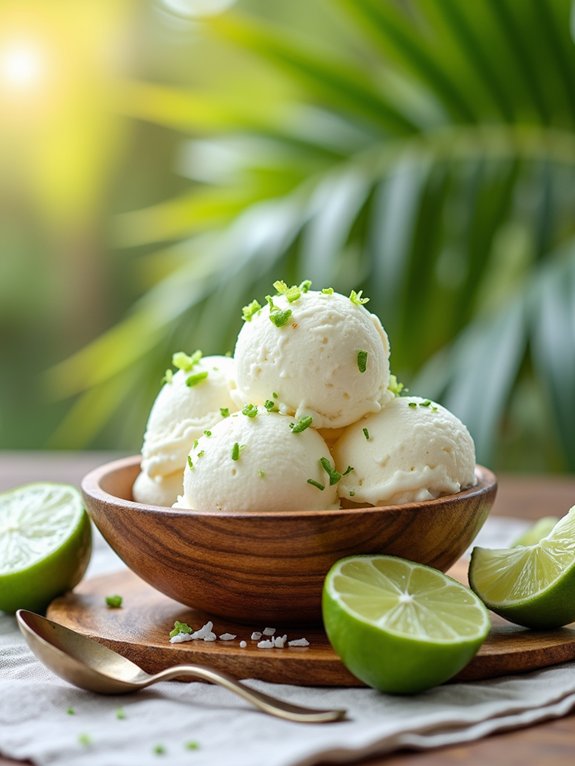
Indulging in a revitalizing coconut lime ice cream is a delightful way to beat the heat and enjoy a taste of tropical paradise right in your home. The combination of creamy coconut and zesty lime creates a harmonious flavor profile that’s both invigorating and satisfying.
Whether you’re serving it at a summer gathering or simply treating yourself after a long day, this homemade ice cream is sure to impress.
Making coconut lime ice cream is surprisingly simple and requires just a few ingredients. With a little bit of preparation, you can whip up this creamy treat and store it in your freezer for whenever the craving strikes. This recipe doesn’t require an ice cream maker, making it accessible for everyone to enjoy a homemade dessert that rivals any store-bought option.
Ingredients:
- 1 can (13.5 oz) coconut milk (full fat)
- 1 cup heavy cream
- 1/2 cup sweetened condensed milk
- 1/4 cup fresh lime juice
- Zest of 2 limes
- 1/2 cup granulated sugar
- Pinch of salt
Instructions:
In a mixing bowl, combine the coconut milk, heavy cream, sweetened condensed milk, fresh lime juice, lime zest, granulated sugar, and a pinch of salt. Whisk the mixture until the sugar is completely dissolved and all ingredients are well blended.
Pour the mixture into an airtight container and freeze it for about 4-6 hours or until it reaches a firm and scoopable consistency. Before serving, let it sit at room temperature for a few minutes to soften slightly.
Extra Tips:
For an added twist, consider mixing in toasted coconut flakes or a swirl of lime curd before freezing for extra texture and flavor.
If you have an ice cream maker, you can churn the mixture after combining the ingredients for a creamier texture. Additionally, verify that your container is well-sealed to prevent ice crystals from forming while it freezes.
Enjoy your homemade coconut lime ice cream with fresh fruit or as a topping for your favorite desserts!
Raspberry Ripple Ice Cream
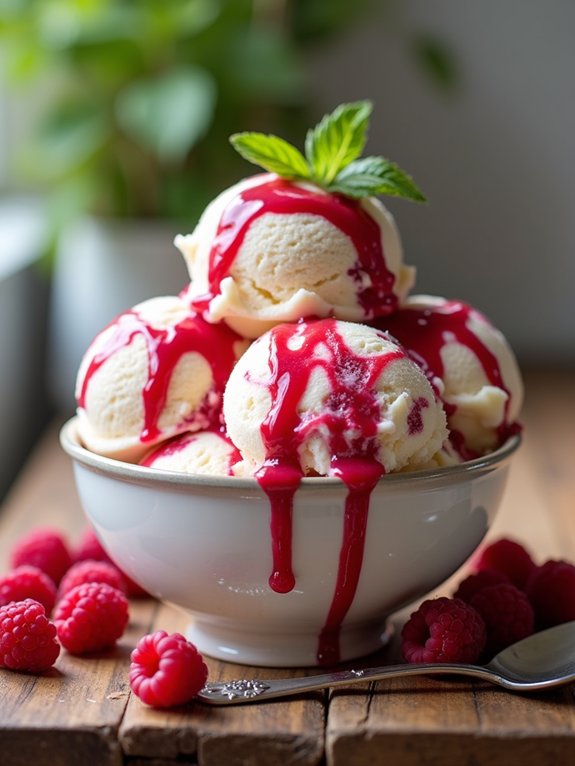
Raspberry Ripple Ice Cream is a revitalizing and delightful treat that perfectly marries the sweet creaminess of ice cream with the tartness of fresh raspberries. Making this luscious dessert at home allows you to control the ingredients, ensuring that you use only the freshest and most delicious components.
The beautiful raspberry swirl not only adds flavor but also an eye-catching appeal to your homemade ice cream, making it a perfect dessert for any occasion. This recipe is simple enough for beginners, yet impressive enough to wow your friends and family.
With just a few basic ingredients and a little time, you can create a creamy, dreamy ice cream that captures the essence of summer. Whether served in a cone, a bowl, or as a topping for a warm dessert, Raspberry Ripple Ice Cream is sure to be a hit.
Ingredients:
- 2 cups heavy cream
- 1 cup whole milk
- 3/4 cup granulated sugar
- 1 teaspoon vanilla extract
- 1 cup fresh raspberries
- 2 tablespoons powdered sugar
- 1 tablespoon lemon juice
Cooking Instructions:
In a mixing bowl, whisk together the heavy cream, whole milk, granulated sugar, and vanilla extract until the sugar is dissolved.
Pour the mixture into your ice cream maker and churn according to the manufacturer’s instructions until it reaches a soft-serve consistency.
Meanwhile, in a separate bowl, combine the fresh raspberries, powdered sugar, and lemon juice, gently mashing the raspberries to create a sauce.
Once the ice cream is ready, layer it in a container, alternating between the ice cream and raspberry sauce to create a ripple effect.
Use a knife to swirl the raspberry sauce throughout the ice cream, then freeze for at least 4 hours until firm.
Extra Tips:
For the best flavor, use ripe, in-season raspberries.
If you prefer a smoother texture, you can strain the raspberry mixture to remove the seeds before swirling it into the ice cream.
Additionally, if you don’t have an ice cream maker, you can pour the mixture into a shallow dish and stir it every 30 minutes until it solidifies.
Enjoy your homemade Raspberry Ripple Ice Cream on sunny days or as a sweet indulgence any time of the year!
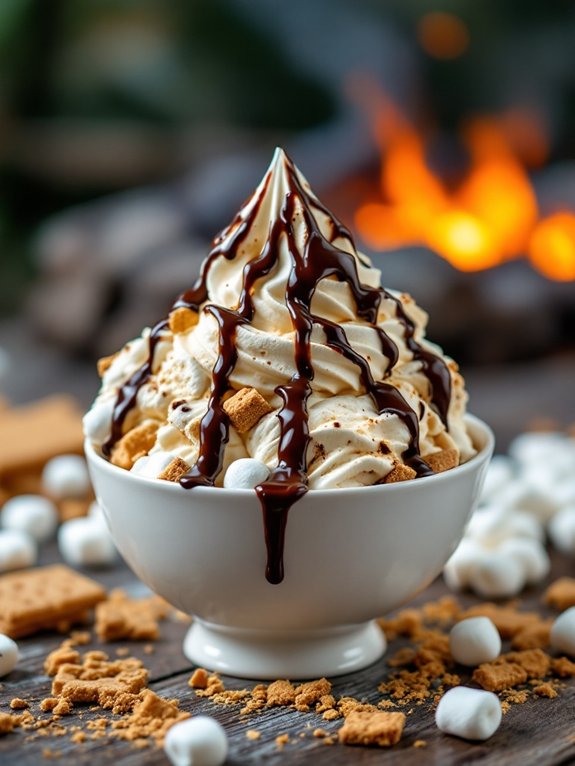
S’mores Ice Cream
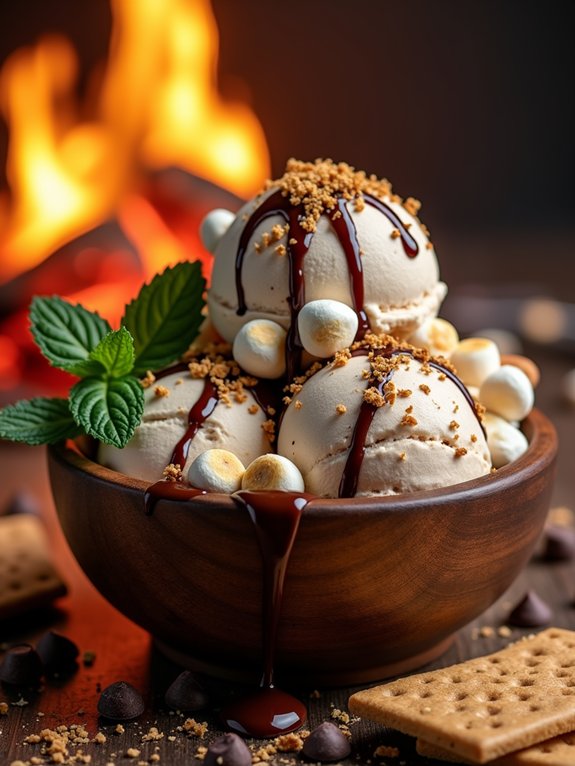
S’mores ice cream is a delightful twist on the classic campfire treat, capturing the essence of gooey marshmallows, rich chocolate, and crunchy graham crackers. This no-churn recipe makes it easy to whip up a batch of creamy, dreamy ice cream that will transport you back to those summer nights spent roasting marshmallows over an open flame.
With just a few simple ingredients, you can create a frozen dessert that’s perfect for sharing with friends and family or simply enjoying on your own.
The beauty of s’mores ice cream lies in its versatility. You can customize the flavors and textures to suit your preferences—whether you prefer chunkier bits of graham cracker, extra chocolate swirls, or a heavier marshmallow presence. No matter how you choose to make it, this treat is sure to impress and satisfy your sweet tooth cravings.
Gather your ingredients and get ready to indulge in a delicious bowl of homemade s’mores ice cream!
Ingredients:
- 2 cups heavy whipping cream
- 1 cup sweetened condensed milk
- 1 teaspoon vanilla extract
- 1/2 cup mini marshmallows
- 1/2 cup chocolate chips
- 1/2 cup crushed graham crackers
- 1/4 cup chocolate syrup (for drizzling)
Instructions:
In a large mixing bowl, whip the heavy cream until stiff peaks form. Gently fold in the sweetened condensed milk and vanilla extract until well combined.
Next, carefully mix in the mini marshmallows, chocolate chips, and crushed graham crackers, ensuring they’re evenly distributed throughout the mixture. Transfer the mixture to an airtight container, drizzle with chocolate syrup, and cover it before placing it in the freezer for at least 4-6 hours or until firm.
Extra Tips:
For an even richer flavor, consider adding a splash of chocolate or vanilla extract to the heavy cream while whipping it.
To create a more pronounced s’mores experience, you can toast the mini marshmallows slightly before folding them into the ice cream mixture. Finally, if you’re feeling adventurous, try adding a layer of melted chocolate or caramel sauce in the middle of your ice cream for an extra treat!


