
Like a warm summer breeze, fruit-based sweets can refresh your palate and brighten your day. You might think of popsicles and sorbets as childhood treats, but these light desserts have evolved. From vibrant parfaits to elegant tarts, there’s a delightful array to explore. Curious about how these fruity creations can elevate your next gathering or offer a satisfying snack? Let’s uncover twelve of the best options that combine flavor and simplicity.
Fruity Popsicles

Fruity popsicles are a revitalizing and delightful treat that are perfect for hot summer days or any time you’re craving something sweet and fruity. They’re incredibly easy to make and can be customized with your favorite fruits, making them a versatile dessert option for everyone in the family. Not only are they delicious, but they also provide a healthy alternative to store-bought frozen treats, as you can control the ingredients and avoid added sugars and preservatives.
To create these delightful popsicles, you can experiment with various combinations of fruits, juices, and even yogurt for added creaminess. Fresh fruits like strawberries, mangoes, blueberries, and peaches work wonderfully, while fruit juices can enhance the flavor and sweetness. The process is simple and can be a fun activity for kids to get involved in, allowing them to choose their favorite fruits and help with the preparation.
Ingredients:
- 2 cups of chopped fresh fruit (strawberries, mangoes, peaches, etc.)
- 1 cup of fruit juice (orange, apple, or coconut)
- 1 tablespoon of honey or maple syrup (optional)
- 1 cup of yogurt (optional for creaminess)
- Popsicle molds
- Sticks (if not included with molds)
Instructions:
Begin by blending the chopped fruit in a blender until smooth, then mix in your chosen fruit juice and sweetener if desired. If you want a creamier texture, you can also add yogurt to the mixture.
Once everything is well combined, pour the mixture into popsicle molds, leaving a little space at the top for expansion. Insert sticks and freeze for at least 4-6 hours or until solid. To remove the popsicles, run warm water over the outside of the molds for a few seconds, then gently pull them out.
Extra Tips:
Feel free to get creative with your fruity popsicles by layering different fruit purees or mixing in some chopped fruits for added texture. You can also try incorporating herbs like mint or basil for a unique flavor twist.
For a fun presentation, consider using colorful molds or adding edible glitter to the mixture before freezing. If you’re making these for kids, let them choose their favorite fruits to get them excited about this healthy treat!
Mango Sorbet
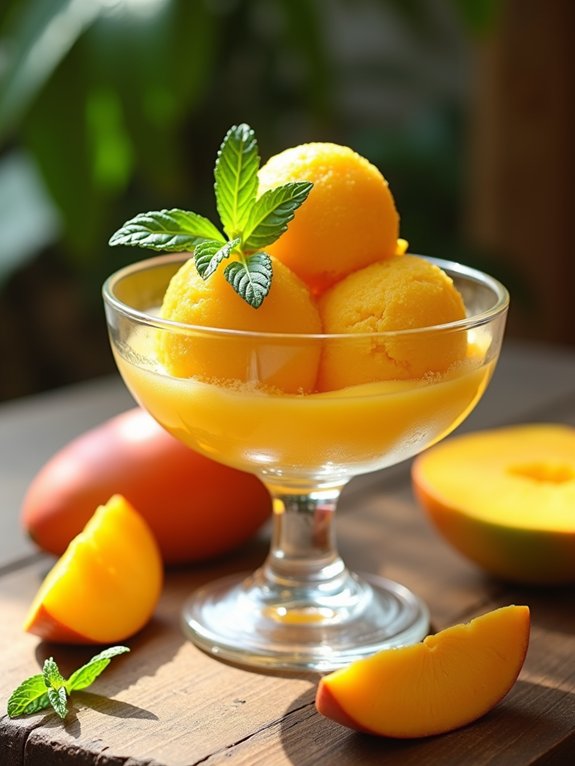
Mango sorbet is a delightful and invigorating dessert that captures the essence of summer in every spoonful. Made from ripe, juicy mangoes, this frozen treat isn’t only delicious but also a healthier alternative to traditional ice cream.
The natural sweetness of the mango combined with a hint of lime juice creates a perfect balance of flavors, making it an ideal choice for a hot day or a special occasion. Whether served on its own, alongside other desserts, or garnished with fresh mint, mango sorbet is sure to impress.
Making mango sorbet at home is surprisingly simple and requires just a few ingredients. With no need for an ice cream maker, this recipe allows you to enjoy the vibrant taste of mangoes without any fuss.
Just prepare the mixture, freeze it, and blend it to achieve a smooth, creamy texture. In no time, you’ll have a delicious, tropical dessert that will have everyone asking for seconds!
Ingredients:
- 3 ripe mangoes, peeled and pitted
- 1/2 cup granulated sugar
- 1/2 cup water
- 1 tablespoon lime juice
- Pinch of salt
Instructions:
In a blender or food processor, combine the mango flesh, sugar, water, lime juice, and salt. Blend until the mixture is completely smooth and well combined.
Pour the mango mixture into a shallow dish or a freezer-safe container, and place it in the freezer for about 4-5 hours until it’s mostly frozen. Once frozen, scrape the mixture with a fork to break it up, and then blend it again to achieve a creamy consistency.
Return the sorbet to the freezer for another hour before serving.
Extra Tips:
For the best flavor, choose ripe mangoes that are fragrant and slightly soft to the touch. If you prefer a sweeter sorbet, feel free to adjust the amount of sugar based on the sweetness of the mangoes.
Additionally, you can experiment by adding other fruits or flavors, such as coconut milk or mint, to create a unique twist on this classic dessert.
Berry Parfait
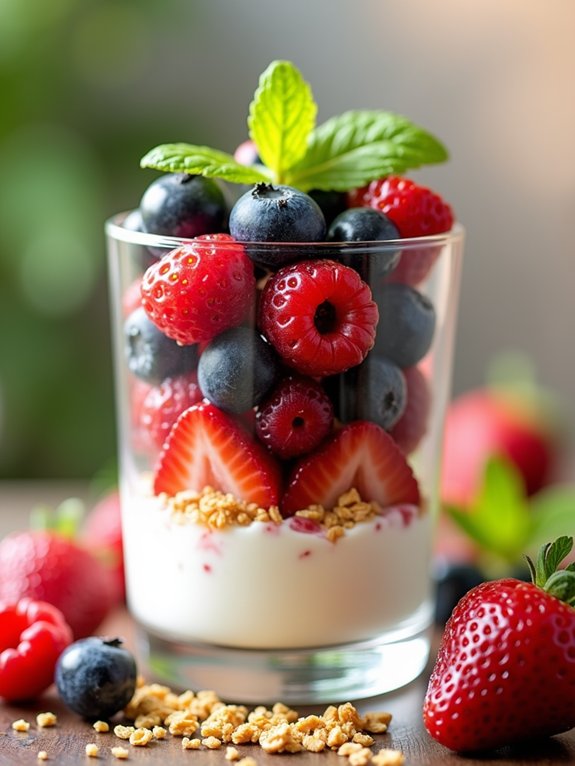
Berry parfaits are a delightful and visually appealing dessert that showcases the freshness of various berries layered with creamy yogurt and crunchy granola. Perfect for breakfast, a snack, or a light dessert, these parfaits aren’t only delicious but also packed with nutrients.
The combination of tart berries, smooth yogurt, and crunchy granola creates a symphony of flavors and textures that’s sure to please anyone.
Making a berry parfait is quick and easy, allowing you to whip up a healthy treat in no time. You can customize your parfait with your favorite berries, whether it be strawberries, blueberries, raspberries, or blackberries. This recipe is versatile and can be altered to suit your taste preferences or dietary needs, making it a fantastic option for everyone.
Ingredients:
- 2 cups mixed berries (strawberries, blueberries, raspberries, blackberries)
- 2 cups Greek yogurt (plain or flavored)
- 1 cup granola
- 2 tablespoons honey or maple syrup (optional)
- Fresh mint leaves for garnish (optional)
Instructions:
In a clear glass or bowl, start by layering a spoonful of Greek yogurt at the bottom, followed by a layer of mixed berries and then a layer of granola.
Repeat the layers until the glass is filled, finishing with a layer of berries on top. Drizzle honey or maple syrup over the top if desired, and garnish with fresh mint leaves for an added touch.
Extra Tips:
For the best flavor and texture, use fresh, ripe berries. If you want to add more creaminess, consider using flavored yogurt or incorporating a layer of whipped cream.
Feel free to experiment with different types of granola or add nuts for extra crunch. Prepare individual servings in advance for a quick grab-and-go snack, but assemble the parfaits just before serving to keep the granola crunchy.
Watermelon Granita
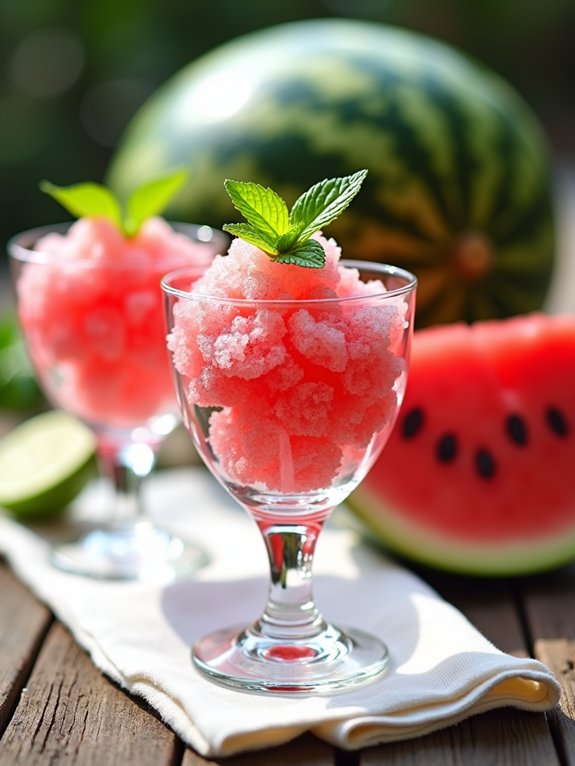
Watermelon granita is a revitalizing and light dessert that perfectly captures the essence of summer. This Italian-inspired frozen treat is incredibly easy to make, requiring just a few simple ingredients and minimal effort. The natural sweetness of ripe watermelon shines through, making it a delightful way to cool off on a hot day.
To make watermelon granita, you only need a ripe watermelon, some sugar, and a splash of lime juice. The result is a vibrant and colorful dessert that not only looks beautiful but also tastes amazing. Serve it in elegant glasses or bowls for a sophisticated touch, or simply scoop it into cones for a fun, casual treat.
Ingredients:
- 4 cups of seedless watermelon, cubed
- 1/4 cup of granulated sugar
- 2 tablespoons of fresh lime juice
- Pinch of salt
Instructions:
In a blender, combine the cubed watermelon, sugar, lime juice, and salt. Blend until the mixture is smooth and fully combined.
Pour the blended watermelon mixture into a shallow dish and place it in the freezer. After about 30 minutes, use a fork to scrape the mixture, breaking up any ice crystals that form.
Repeat this process every 30 minutes for about 2-3 hours, or until the granita has a fluffy, snow-like texture. Once ready, serve it immediately or store it in the freezer for later use.
Extra Tips:
For the best flavor, choose a watermelon that’s perfectly ripe, as this will enhance the sweetness of your granita.
You can also experiment by adding other fruits such as strawberries or mint for a unique twist. If you prefer a smoother texture, you can strain the mixture through a fine-mesh sieve after blending.
Remember to scrape the granita before serving to achieve that light and airy consistency!
Peach Crumble

Peach crumble is a delightful dessert that celebrates the juicy sweetness of ripe peaches, beautifully complemented by a buttery, crunchy topping. This dish isn’t only easy to prepare but also perfect for showcasing fresh summer fruit.
Whether you’re hosting a gathering or simply indulging in a sweet treat at home, peach crumble is sure to be a hit with everyone at the table. The combination of tender, baked peaches with a crumbly topping creates a delightful balance of textures and flavors.
Serve it warm with a scoop of vanilla ice cream or a dollop of whipped cream for an extra indulgent experience. This recipe is a fantastic way to make the most of peach season and can be adapted with other fruits if desired.
Ingredients:
- 4 ripe peaches, sliced
- 1/2 cup granulated sugar
- 1 tablespoon lemon juice
- 1 teaspoon cinnamon
- 1 cup all-purpose flour
- 1/2 cup rolled oats
- 1/2 cup brown sugar
- 1/2 cup unsalted butter, softened
- 1/4 teaspoon salt
Instructions:
Preheat your oven to 350°F (175°C). In a large bowl, combine the sliced peaches, granulated sugar, lemon juice, and cinnamon to coat the peaches evenly.
Transfer the peach mixture to a greased baking dish. In another bowl, mix together the flour, oats, brown sugar, softened butter, and salt until the mixture is crumbly.
Sprinkle the topping evenly over the prepared peaches. Bake for about 30-35 minutes, or until the topping is golden brown and the peaches are bubbly.
Extra Tips:
For a deeper flavor, consider adding a pinch of nutmeg or almond extract to the peach filling. If you prefer a crunchier topping, bake the crumble a few minutes longer, keeping an eye on it to prevent burning.
You can also experiment with adding nuts, such as chopped pecans or walnuts, to the topping for added texture and flavor. Enjoy your delicious peach crumble warm or at room temperature!
Pineapple Coconut Chia Pudding

Pineapple Coconut Chia Pudding is a delightful and nutritious dessert that transports you to a tropical paradise with every spoonful. This creamy and invigorating treat combines the natural sweetness of pineapple with the rich, nutty flavor of coconut, making it a perfect indulgence for warm weather or as a healthy breakfast option.
Chia seeds, known for their high fiber and omega-3 content, add a satisfying texture while helping to thicken the pudding, resulting in a dish that’s both delicious and beneficial for your health.
Making this pudding is incredibly easy and requires minimal effort, making it an ideal recipe for busy individuals or families. Simply mix the ingredients together and let them sit to allow the chia seeds to absorb the liquid and swell. The result is a luscious, creamy pudding that can be enjoyed on its own or topped with your favorite fruits, nuts, or granola for added crunch.
Whether you’re serving it at a brunch gathering or enjoying it as a snack, Pineapple Coconut Chia Pudding is sure to impress.
Ingredients:
- 1 cup coconut milk (canned or carton)
- 1/2 cup fresh pineapple, diced
- 1/4 cup chia seeds
- 2 tablespoons honey or maple syrup (to taste)
- 1 teaspoon vanilla extract
- Pinch of salt
- Toasted coconut flakes (for garnish)
Instructions:
In a mixing bowl, combine the coconut milk, diced pineapple, chia seeds, honey or maple syrup, vanilla extract, and a pinch of salt. Stir well to guarantee the chia seeds are evenly distributed, then cover the bowl and refrigerate for at least 4 hours or overnight.
Once the pudding has set, give it a good stir before serving, and top with toasted coconut flakes for an extra crunchy texture.
Extra Tips:
For an even more tropical flavor, consider adding a splash of lime juice to the mixture before refrigerating. You can also experiment with different fruits, such as mango or passion fruit, to personalize your pudding.
If you prefer a smoother texture, blend the pineapple into the coconut milk before mixing in the chia seeds. This dish can be stored in the refrigerator for up to five days, making it a great make-ahead option for meal prep.
Enjoy your delicious and healthy Pineapple Coconut Chia Pudding!
Strawberry Shortcake
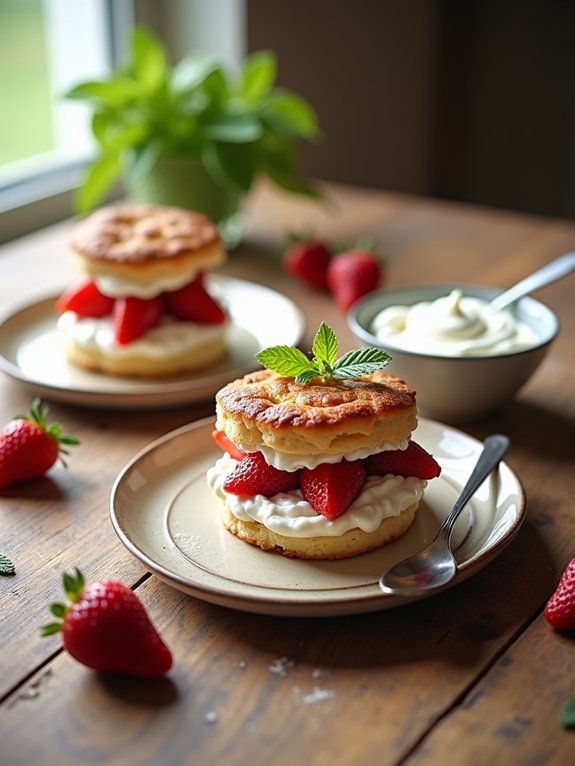
Strawberry shortcake is a delightful dessert that perfectly balances the sweetness of strawberries with the light, fluffy texture of cake. This classic treat is especially popular during the summer months when strawberries are in season, but it can be enjoyed year-round. The combination of fresh strawberries, whipped cream, and tender biscuits creates a deliciously satisfying experience that’s sure to impress family and friends.
Making strawberry shortcake isn’t only simple but also an enjoyable experience. Whether you choose to bake your own biscuits or use store-bought ones, the key to a great strawberry shortcake lies in the freshness of the strawberries and the lightness of the whipped cream. This recipe will guide you through creating a mouth-watering strawberry shortcake that’s perfect for any occasion.
Ingredients:
- 1 pound fresh strawberries, hulled and sliced
- 1/4 cup granulated sugar
- 2 cups all-purpose flour
- 1 tablespoon baking powder
- 1/2 teaspoon salt
- 1/4 cup unsalted butter, cold and cubed
- 1 cup heavy cream
- 1/4 cup powdered sugar
- 1 teaspoon vanilla extract
Instructions:
In a mixing bowl, combine the sliced strawberries with granulated sugar and set aside to macerate.
In a separate bowl, whisk together the flour, baking powder, and salt. Add the cold butter and mix until the mixture resembles coarse crumbs. Gradually stir in 3/4 cup of heavy cream until just combined.
Turn the dough onto a floured surface, pat it into a 1-inch thick rectangle, and cut out rounds using a biscuit cutter. Place the rounds on a baking sheet and bake at 425°F (220°C) for about 15-18 minutes or until golden brown.
Once baked, let the biscuits cool slightly, then slice them in half horizontally. Whip the remaining heavy cream with powdered sugar and vanilla extract until soft peaks form.
To assemble, layer the bottom biscuit with strawberries, add a dollop of whipped cream, and top with the other half of the biscuit. Repeat for each serving.
Extra Tips:
For an enhanced flavor, consider adding a splash of lemon juice or zest to the strawberries while they macerate. This will add a revitalizing brightness to the dessert.
Additionally, if you have leftover whipped cream, you can serve it on the side for guests to add as they wish. If you prefer a richer flavor, substitute half of the heavy cream with mascarpone cheese for a creamy twist.
Enjoy your homemade strawberry shortcake!
Banana Oatmeal Cookies
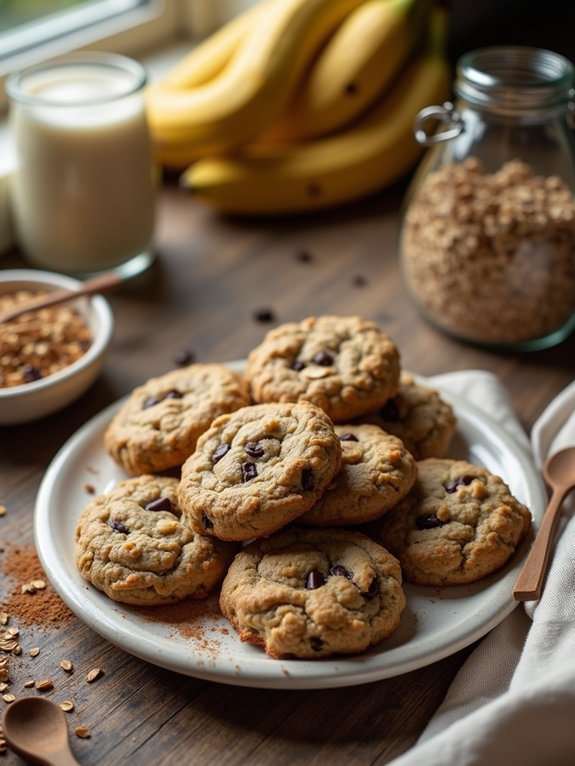
Banana oatmeal cookies are a delightful and healthy treat that perfectly combine the natural sweetness of ripe bananas with the hearty texture of oats. These cookies aren’t only easy to make, but they also require minimal ingredients, making them a great option for a quick snack or dessert.
They’re an excellent choice for those seeking a healthier alternative to traditional cookies, without sacrificing flavor or satisfaction.
These cookies are also incredibly versatile; you can customize them with a variety of add-ins such as chocolate chips, nuts, or dried fruits. The ripe bananas provide moisture and sweetness, while the oats offer a wholesome base that will keep you feeling full.
Whether you enjoy them fresh out of the oven or as a grab-and-go snack, banana oatmeal cookies are sure to become a favorite in your household.
Ingredients:
- 2 ripe bananas
- 1 cup oats (old-fashioned or quick-cooking)
- 1/2 teaspoon vanilla extract
- 1/2 teaspoon cinnamon (optional)
- 1/4 cup chocolate chips or nuts (optional)
Cooking Instructions:
Preheat your oven to 350°F (175°C) and line a baking sheet with parchment paper. In a mixing bowl, mash the ripe bananas until smooth. Stir in the oats, vanilla extract, and cinnamon until well combined.
If desired, fold in chocolate chips or nuts for added flavor and texture. Drop spoonfuls of the mixture onto the prepared baking sheet, spacing them about 2 inches apart. Bake for 10-12 minutes or until the edges are golden brown.
Allow the cookies to cool on the baking sheet for a few minutes before transferring them to a wire rack to cool completely.
Extra Tips:
For the best flavor and texture, use very ripe bananas with plenty of brown spots. You can also experiment with different types of oats or add-ins to suit your taste.
If you’re looking to make the cookies a bit healthier, consider reducing the amount of chocolate chips or using dark chocolate. These cookies can be stored in an airtight container for up to a week, making them a convenient option for meal prep or quick snacks throughout the week.
Apple Nachos
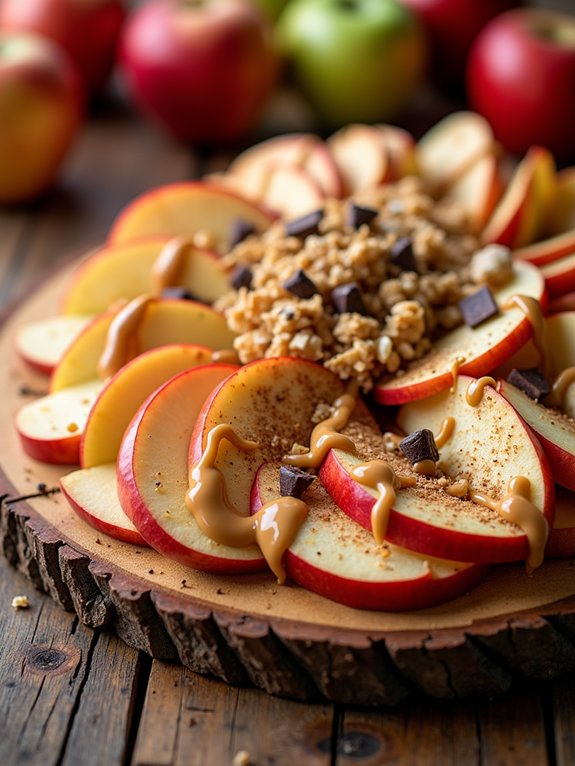
Apple nachos are a delightful and healthy twist on traditional nachos, perfect for a snack or dessert that the whole family will enjoy. This fun recipe combines sliced apples with a variety of toppings, making it customizable to suit your taste preferences. The sweetness of the apples pairs beautifully with toppings like melted peanut butter, chocolate drizzle, and crunchy granola, creating a satisfying and nutritious treat.
Not only are apple nachos incredibly easy to prepare, but they also offer a visually appealing presentation that will impress guests at parties or gatherings. You can use any variety of apples, but crisp and sweet varieties like Honeycrisp or Fuji work particularly well.
Plus, with the versatility of toppings, you can mix and match to create your own unique flavor combinations. Let’s explore this simple yet delicious recipe!
Ingredients
- 2 medium apples (any variety)
- 1/4 cup peanut butter or almond butter
- 1/4 cup granola
- 1/4 cup mini chocolate chips
- 1/4 cup caramel sauce
- 1 tablespoon chopped nuts (optional)
- 1 tablespoon shredded coconut (optional)
- Cinnamon (optional, for dusting)
Cooking Instructions
Start by washing the apples thoroughly and then slicing them into thin wedges or rounds, discarding the core.
Arrange the apple slices on a platter or large plate, slightly overlapping them for a beautiful presentation. Drizzle the peanut butter over the apple slices, followed by the caramel sauce.
Sprinkle the granola, mini chocolate chips, and any optional toppings like chopped nuts or shredded coconut evenly over the apples. If desired, finish with a light dusting of cinnamon for added flavor.
Extra Tips
To prevent the apple slices from browning, you can toss them in a little lemon juice before assembling the nachos.
Additionally, feel free to get creative with your toppings—consider adding yogurt for a creamy texture or using different types of nut butter.
These apple nachos are best enjoyed fresh, but they can be assembled ahead of time; just keep the toppings separate until you’re ready to serve. Enjoy this healthy treat with friends and family!
Citrus Fruit Salad
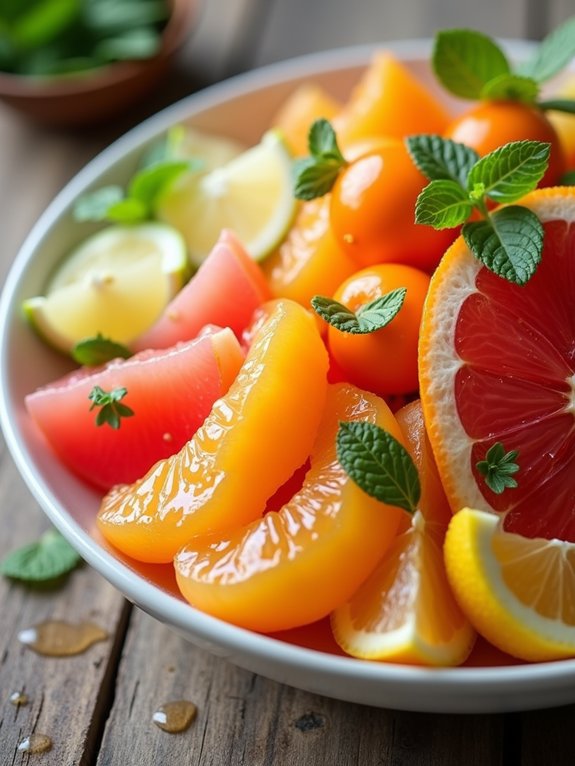
Citrus fruit salad is a revitalizing and vibrant dish that brightens up any meal or gathering. Bursting with flavors from various citrus fruits, this salad isn’t only delicious but also packed with vitamins and antioxidants.
Perfect for a light dessert or a side dish, it’s easy to prepare and can be customized with your favorite fruits. The combination of sweet and tangy flavors will surely tantalize your taste buds.
To elevate your citrus salad, consider adding a touch of honey or a sprinkle of mint for an added layer of flavor. This dish is incredibly versatile—feel free to experiment with different citrus varieties such as blood oranges, grapefruits, or mandarins.
Whether you serve it chilled on a hot summer day or as a palate cleanser during a dinner party, this citrus fruit salad will delight your guests and leave them wanting more.
Ingredients:
- 2 oranges
- 2 grapefruits
- 1 lemon
- 1 lime
- 2 mandarins
- 1 tablespoon honey (optional)
- Fresh mint leaves for garnish (optional)
Cooking Instructions:
Begin by carefully peeling all the citrus fruits, making sure that you remove the white pith for a clean presentation.
Segment the fruits by cutting between the membranes to release the juicy sections. Collect all the segments in a large mixing bowl, and if desired, drizzle with honey to enhance sweetness.
Gently toss the salad to combine, then transfer to a serving dish and garnish with fresh mint leaves.
Extra Tips:
To guarantee the freshest and juiciest citrus salad, choose fruits that are firm and fragrant.
If you’re preparing the salad ahead of time, consider waiting to add the honey and mint until just before serving to maintain the vibrant colors and flavors.
Additionally, you can also add a sprinkle of chia seeds or shredded coconut for extra texture and nutrition. Enjoy your delightful and healthy citrus fruit salad!
Raspberry Lemonade Bars
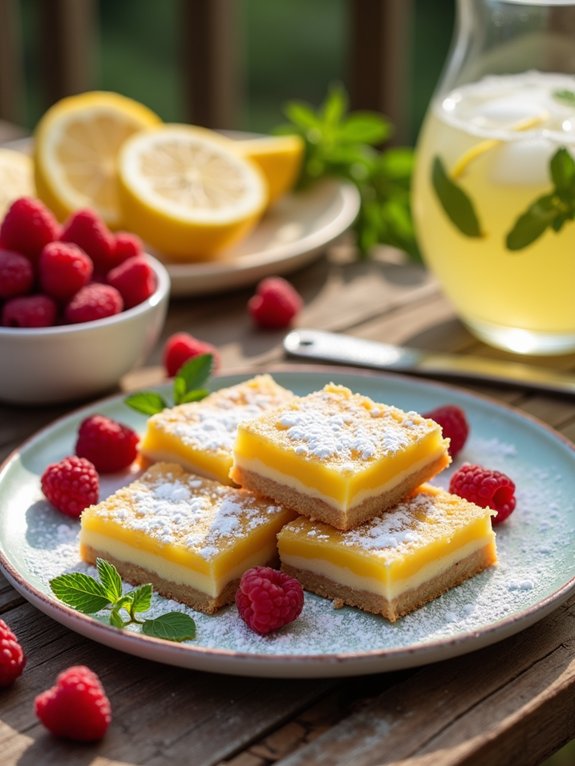
Raspberry Lemonade Bars are a delightful dessert that perfectly balances tartness and sweetness. These bars capture the essence of summer with their vibrant colors and invigorating flavors, making them a perfect treat for gatherings, picnics, or simply to enjoy at home. The combination of zesty lemon and juicy raspberries in a buttery crust creates a delectable experience that’s hard to resist.
The process of making these bars is quite simple and rewarding. With a few basic ingredients, you can whip up a batch that will impress your family and friends. Whether served chilled or at room temperature, Raspberry Lemonade Bars will surely tantalize the taste buds and leave everyone craving more.
Ingredients:
- 1 cup all-purpose flour
- 1/2 cup powdered sugar
- 1/4 cup unsalted butter, softened
- 1/4 teaspoon salt
- 2 large eggs
- 1 cup granulated sugar
- 1/4 cup fresh lemon juice
- Zest of 1 lemon
- 1 cup fresh raspberries
- 1/4 teaspoon baking powder
To make Raspberry Lemonade Bars, begin by preheating your oven to 350°F (175°C) and greasing an 8×8-inch baking dish. In a mixing bowl, combine the flour, powdered sugar, softened butter, and salt to form a crumbly dough. Press this mixture evenly into the bottom of the prepared baking dish and bake for about 15 minutes until lightly golden.
While the crust is baking, whisk together the eggs, granulated sugar, lemon juice, lemon zest, and baking powder in a separate bowl. Gently fold in the fresh raspberries, then pour this mixture over the pre-baked crust. Return the dish to the oven and bake for an additional 20-25 minutes or until set. Allow the bars to cool completely before slicing into squares.
For best results, let the bars chill in the refrigerator for a couple of hours before serving to allow the flavors to meld and the texture to firm up. You can also dust the tops with additional powdered sugar for a beautiful presentation. If you’re feeling adventurous, consider adding a touch of fresh mint or a dollop of whipped cream when serving for an extra layer of flavor!
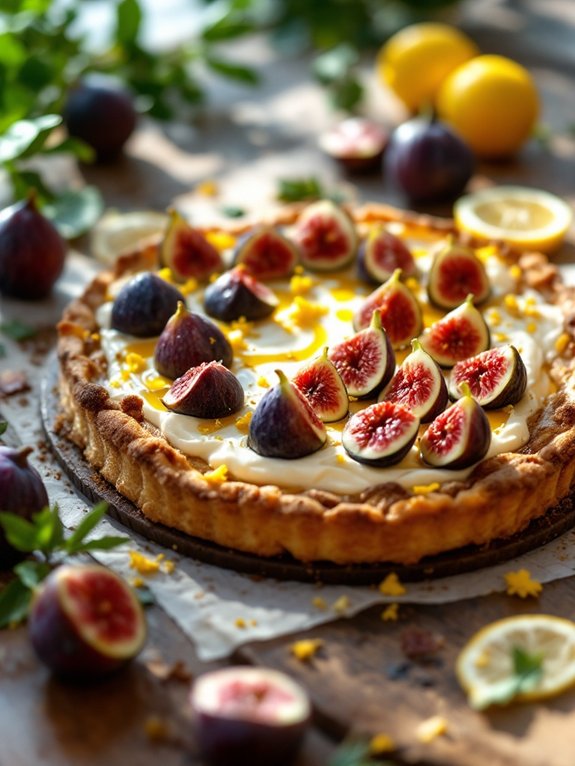
Fig and Ricotta Tart
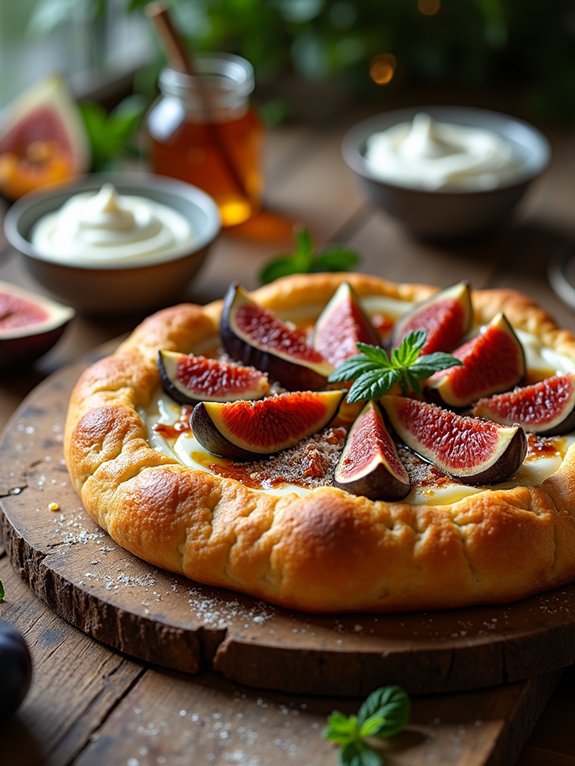
The Fig and Ricotta Tart is a delightful dessert that combines the creamy richness of ricotta cheese with the natural sweetness of fresh figs. This tart is perfect for any occasion, whether it’s a summer gathering or a cozy fall dinner. The flaky pastry crust serves as a lovely base that complements the smooth filling, while the figs add a burst of flavor and texture that elevates the dish.
Making this tart is simpler than it may seem. With just a handful of ingredients, you can create a stunning dessert that will impress your guests. The combination of ricotta, honey, and vanilla creates a luscious filling that pairs beautifully with the caramelized figs on top. Serve it with a dollop of whipped cream or a drizzle of honey for an extra touch of sweetness.
Ingredients:
- 1 pre-made tart pastry shell
- 1 cup ricotta cheese
- 1/4 cup honey
- 1 teaspoon vanilla extract
- 1/2 teaspoon lemon zest
- 8-10 fresh figs, halved
- 2 tablespoons olive oil
- 1 tablespoon brown sugar
- Pinch of salt
To prepare the Fig and Ricotta Tart, preheat your oven to 375°F (190°C). In a mixing bowl, combine the ricotta cheese, honey, vanilla extract, lemon zest, and a pinch of salt, stirring until smooth and well incorporated.
Pour the ricotta mixture into the prepared tart shell and spread it evenly. Arrange the halved figs on top of the ricotta filling, cut side up. Drizzle olive oil over the figs and sprinkle with brown sugar. Bake the tart in the preheated oven for 25-30 minutes, or until the figs are slightly caramelized and the filling is set. Allow it to cool before slicing and serving.
For best results, choose ripe figs for their natural sweetness and flavor. If figs aren’t in season, you can substitute them with other fruits like pears or peaches. Additionally, feel free to experiment with spices such as cinnamon or nutmeg in the ricotta mixture for added warmth.
This tart can be enjoyed warm or chilled, making it versatile and perfect for any dessert table.


