

If you’re looking for quick and delicious gluten-free dinner options, you’re in the right place. These 15 recipes are designed to make weeknight meals effortless and satisfying. From vibrant stir-fries to comforting curries, there’s something for everyone. Plus, many of these dishes can be whipped up in under 30 minutes. Curious about which recipes can elevate your dinner routine? Let’s take a closer look at some standout options.
Quinoa and Black Bean Stir-Fry
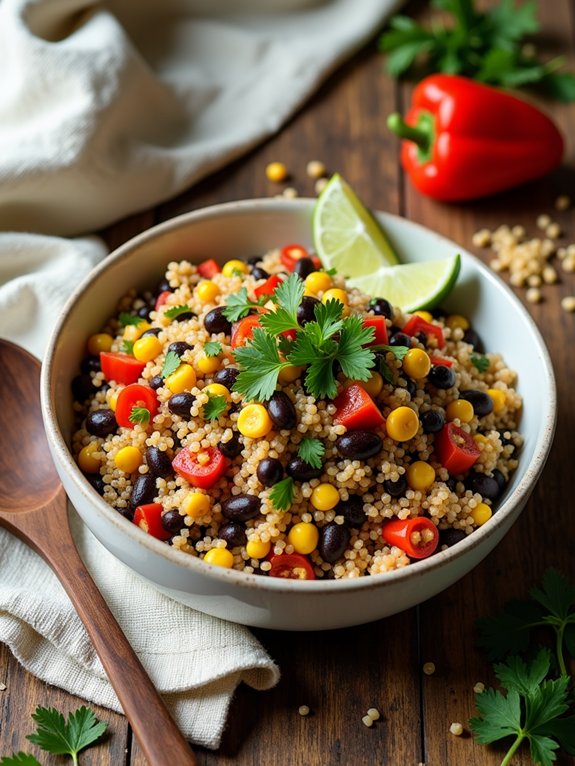
Quinoa and black bean stir-fry is a delicious and nutritious dish that’s perfect for a quick and easy dinner. This gluten-free recipe combines protein-packed quinoa with fiber-rich black beans and a colorful array of vegetables, making it a well-rounded meal. Not only is it filling, but it also offers a burst of flavors and textures that will satisfy your taste buds while keeping your health in check.
This stir-fry is versatile and can be customized to suit your preferences. You can add any vegetables you have on hand, such as bell peppers, zucchini, or carrots, and switch up the spices to create a meal that’s uniquely yours. Whether you’re preparing dinner for yourself or serving a crowd, quinoa and black bean stir-fry is a great option that can be made in under 30 minutes.
Ingredients:
- 1 cup quinoa, rinsed
- 2 cups vegetable broth or water
- 1 can (15 oz) black beans, drained and rinsed
- 1 red bell pepper, diced
- 1 cup corn (fresh, frozen, or canned)
- 1 small onion, diced
- 2 cloves garlic, minced
- 1 teaspoon cumin
- 1 teaspoon paprika
- Salt and pepper to taste
- 2 tablespoons olive oil
- Fresh cilantro for garnish (optional)
- Lime wedges for serving (optional)
Instructions:
In a medium saucepan, combine the rinsed quinoa and vegetable broth or water, and bring to a boil. Once boiling, reduce the heat to low, cover, and simmer for about 15 minutes or until the quinoa is fluffy and the liquid is absorbed.
Meanwhile, in a large skillet, heat the olive oil over medium heat. Add the diced onion and garlic, sautéing for 2-3 minutes until softened. Add the diced bell pepper and corn, cooking for an additional 3-4 minutes.
Stir in the black beans, cooked quinoa, cumin, paprika, salt, and pepper, mixing well to combine. Cook for another 5 minutes, allowing the flavors to meld, and serve garnished with fresh cilantro and lime wedges, if desired.
Extra Tips:
For added flavor, consider marinating the black beans in lime juice and spices before adding them to the stir-fry. You can also experiment with different herbs and spices, such as chili powder or oregano, to enhance the dish further.
Leftovers can be stored in an airtight container in the fridge for up to three days, making this recipe perfect for meal prep. Enjoy your healthy and satisfying stir-fry!
Zucchini Noodles With Pesto and Cherry Tomatoes
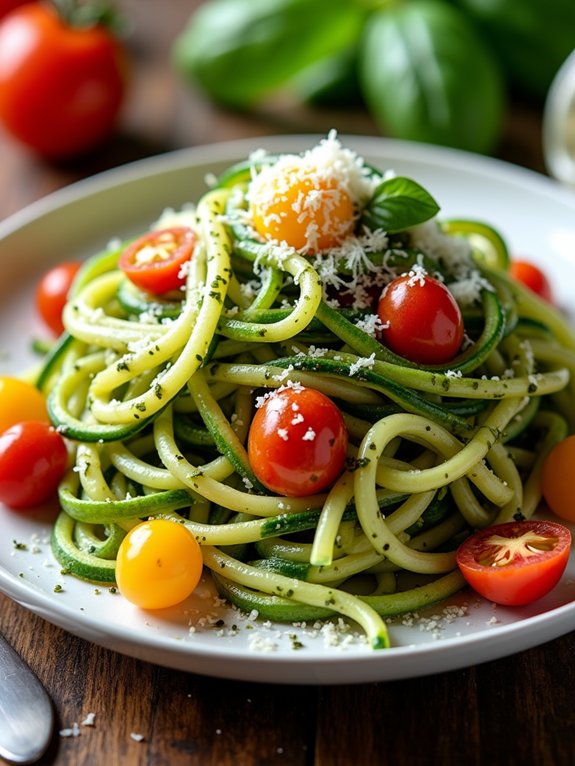
Zucchini noodles, also known as “zoodles,” are a fantastic gluten-free alternative to traditional pasta. They aren’t only low in carbs but also packed with nutrients, making them a healthy choice for dinner. When paired with vibrant cherry tomatoes and a flavorful pesto sauce, this dish becomes a delicious and satisfying meal that can be whipped up in no time.
Making zucchini noodles is simple and fun, and it’s a great way to incorporate more vegetables into your diet. The combination of fresh ingredients and bold flavors in this recipe makes it perfect for a quick weeknight dinner or an impressive dish for guests. Plus, it’s versatile enough that you can add your favorite proteins or other vegetables to customize it to your liking.
Ingredients:
- 4 medium zucchinis
- 1 cup cherry tomatoes, halved
- 1 cup prepared pesto (store-bought or homemade)
- 2 tablespoons olive oil
- Salt and pepper to taste
- Grated Parmesan cheese (optional, for serving)
- Fresh basil leaves (optional, for garnish)
Cooking Instructions:
Using a spiralizer or a vegetable peeler, create zucchini noodles from the zucchinis and set them aside.
In a large skillet, heat the olive oil over medium heat, then add the cherry tomatoes and sauté for about 3-4 minutes until they begin to soften.
Add the zucchini noodles to the skillet and cook for an additional 2-3 minutes, tossing gently until they’re just tender.
Remove from heat and stir in the pesto, mixing well to combine. Season with salt and pepper to taste.
Serve immediately, garnished with grated Parmesan cheese and fresh basil leaves if desired.
Extra Tips:
When making zucchini noodles, be sure not to overcook them, as they can become mushy quickly.
For added flavor, you can roast the cherry tomatoes in the oven with a drizzle of olive oil and a sprinkle of salt before adding them to the zoodles.
Feel free to customize the dish by adding grilled chicken, shrimp, or your favorite vegetables to make it heartier.
Also, if you’re making your own pesto, consider adding nuts like pine nuts or walnuts for an extra crunch and flavor boost!
One-Pan Lemon Garlic Chicken and Asparagus
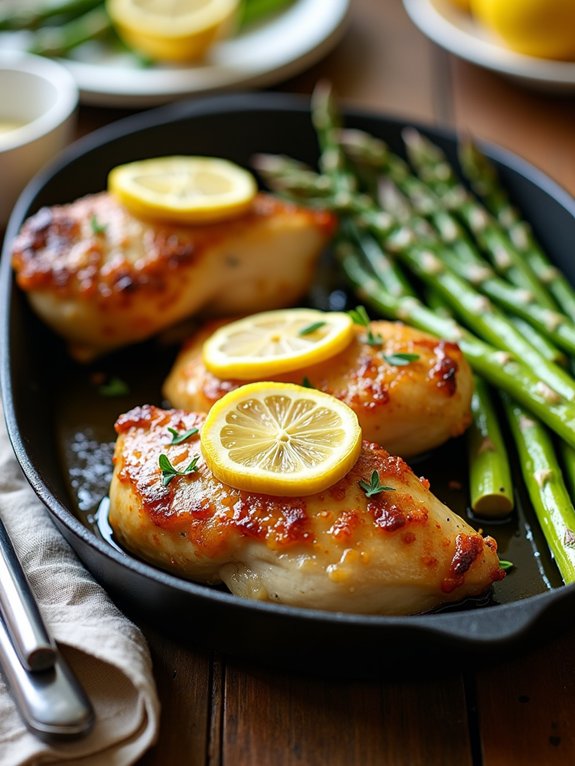
One-Pan Lemon Garlic Chicken and Asparagus is a delightful and healthy dinner option that’s perfect for busy weeknights. This dish isn’t only gluten-free but also packed with flavor, thanks to the zesty lemon and aromatic garlic. The combination of tender chicken and crisp asparagus makes for a balanced meal, and the one-pan method means less cleanup for you!
To make this dish, you’ll need just a few simple ingredients, making it an accessible choice for anyone looking to whip up a quick and satisfying dinner. The vibrant colors and fresh flavors make it a feast for the eyes as well as the palate. Plus, it’s easily customizable; feel free to add your favorite vegetables or adjust the seasoning to suit your taste.
Ingredients:
- 4 boneless, skinless chicken breasts
- 1 bunch of asparagus, trimmed
- 4 cloves garlic, minced
- 2 lemons (one for juice, one for slices)
- 2 tablespoons olive oil
- Salt and pepper to taste
- 1 teaspoon dried thyme (or fresh, if available)
- 1 teaspoon paprika (optional)
Instructions:
Preheat your oven to 400°F (200°C). In a large mixing bowl, combine the olive oil, minced garlic, lemon juice, salt, pepper, thyme, and paprika.
Add the chicken breasts to the bowl and toss to coat them evenly with the marinade. In a large oven-safe skillet, arrange the marinated chicken breasts and surround them with the trimmed asparagus.
Squeeze additional lemon juice over the asparagus and place lemon slices on top of the chicken. Bake for about 25-30 minutes or until the chicken is cooked through and the asparagus is tender.
Extra Tips:
For added flavor, marinate the chicken in the lemon-garlic mixture for at least 30 minutes before cooking. If you prefer a crispier texture, broil the chicken for the last 2-3 minutes of cooking.
Feel free to substitute the asparagus with other seasonal vegetables like bell peppers or zucchini, and adjust cooking times as necessary. Enjoy your delicious and healthy one-pan meal!
Sweet Potato and Chickpea Curry

Sweet Potato and Chickpea Curry is a delicious and hearty dish that’s perfect for a cozy dinner any night of the week. This vibrant curry is packed with nutrients and flavor, combining the natural sweetness of sweet potatoes with the protein-rich goodness of chickpeas.
It’s not only gluten-free but also vegan, making it an excellent option for anyone looking to enjoy a wholesome meal. The curry is aromatic and satisfying, thanks to a blend of spices that transform simple ingredients into a comforting dish.
The creamy texture of coconut milk enhances the flavors and adds richness to the curry, making it a favorite for both adults and kids alike. Serve it with a side of rice or gluten-free naan for a complete meal that will leave everyone asking for seconds.
Ingredients:
- 2 medium sweet potatoes, peeled and diced
- 1 can (15 oz) chickpeas, drained and rinsed
- 1 can (14 oz) coconut milk
- 1 medium onion, chopped
- 2 cloves garlic, minced
- 1 tablespoon ginger, grated
- 2 tablespoons curry powder
- 1 teaspoon turmeric
- 1 teaspoon cumin
- Salt and pepper, to taste
- 2 tablespoons olive oil
- Fresh cilantro, for garnish (optional)
Cooking Instructions:
In a large pot, heat the olive oil over medium heat and sauté the onion until translucent. Add the garlic and ginger, cooking for another minute until fragrant.
Stir in the curry powder, turmeric, and cumin, allowing the spices to bloom for about 30 seconds. Add the diced sweet potatoes, chickpeas, and coconut milk, then bring the mixture to a simmer.
Cover and cook for about 20-25 minutes, or until the sweet potatoes are tender. Season with salt and pepper to taste, and garnish with fresh cilantro before serving.
Extra Tips:
To enhance the flavor of your Sweet Potato and Chickpea Curry, consider adding a splash of lime juice or a teaspoon of maple syrup for a hint of sweetness.
You can also customize the recipe by adding other vegetables like spinach, bell peppers, or peas for added nutrition. If you prefer a thicker curry, let it simmer uncovered for a few minutes to reduce the liquid.
Enjoy experimenting with different spices to create your perfect curry!
Beef and Broccoli Stir-Fry

Beef and broccoli stir-fry is a classic dish that isn’t only delicious but also quick to prepare, making it perfect for busy weeknight dinners. This gluten-free version utilizes tamari sauce, which provides that savory umami flavor without the gluten. You can customize this stir-fry by adding more vegetables or adjusting the level of spice to suit your taste.
The combination of tender beef and crisp broccoli in a flavorful sauce makes this dish both satisfying and nutritious. Serve it over a bed of rice or quinoa for a complete meal that will keep you full and energized. This recipe is sure to become a go-to in your gluten-free dinner repertoire.
Ingredients:
- 1 pound flank steak, thinly sliced against the grain
- 2 cups broccoli florets
- 2 tablespoons tamari sauce (gluten-free soy sauce)
- 1 tablespoon cornstarch
- 2 tablespoons vegetable oil
- 3 cloves garlic, minced
- 1 teaspoon fresh ginger, minced
- 1 tablespoon sesame oil
- Salt and pepper to taste
- Cooked rice or quinoa for serving
In a large bowl, combine the sliced flank steak with tamari sauce and cornstarch, tossing until the meat is well coated.
Heat vegetable oil in a large skillet or wok over medium-high heat. Add the beef in a single layer and stir-fry for about 3-4 minutes until browned. Remove the beef from the skillet and set aside.
In the same skillet, add the broccoli, garlic, and ginger, and stir-fry for 2-3 minutes until the broccoli is tender-crisp. Return the beef to the skillet, drizzle with sesame oil, and stir everything together for an additional minute.
Season with salt and pepper to taste and serve over cooked rice or quinoa.
For best results, slice the beef as thinly as possible to guarantee it cooks quickly and evenly. Marinating the beef for at least 15 minutes before cooking can enhance the flavor and tenderness.
Feel free to add other vegetables like bell peppers or snap peas for a colorful and nutritious addition to your stir-fry. Enjoy this easy and versatile dish with your favorite gluten-free sides!
Cauliflower Fried Rice
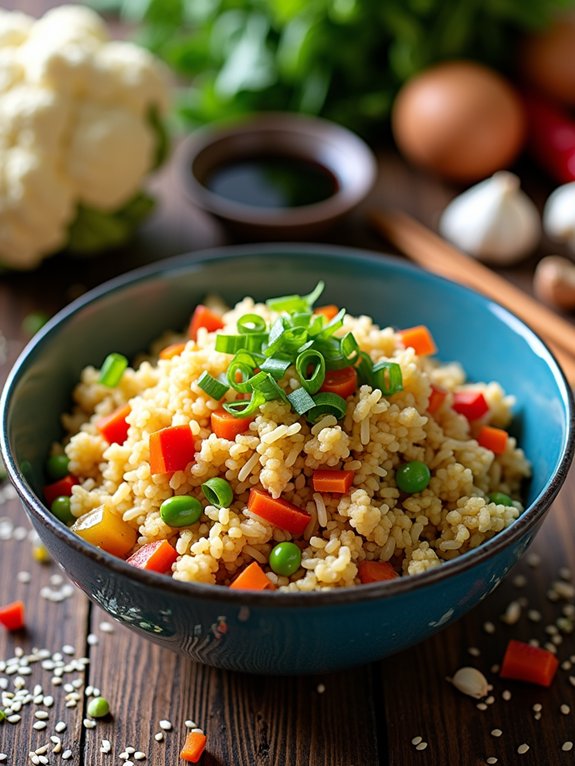
Cauliflower Fried Rice is a delicious and nutritious alternative to traditional fried rice, perfect for those following a gluten-free diet. This dish isn’t only low in carbohydrates but also packed with flavor and texture, making it an ideal weeknight dinner option.
With the versatility of cauliflower, you can customize your fried rice with your favorite vegetables and proteins, ensuring every bite is satisfying and wholesome. This recipe is simple to prepare and can be made in under 30 minutes, making it a fantastic choice for busy evenings.
You can easily swap out ingredients based on what you have on hand, whether it’s adding some chicken, shrimp, or tofu for added protein. The end result is a colorful, healthy meal that the whole family will love.
Ingredients:
- 1 medium head of cauliflower, riced
- 2 tablespoons olive oil
- 3 green onions, chopped
- 2 cloves garlic, minced
- 1 cup mixed vegetables (carrots, peas, bell peppers)
- 2 large eggs, beaten
- 3 tablespoons gluten-free soy sauce or tamari
- Salt and pepper to taste
- Optional: cooked protein (chicken, shrimp, or tofu)
Cooking Instructions:
In a large skillet or wok, heat the olive oil over medium heat. Add the green onions and garlic, sautéing until fragrant, about 1 minute.
Stir in the mixed vegetables and cook for another 3-4 minutes until tender. Push the veggie mixture to one side of the pan and pour in the beaten eggs, scrambling them until fully cooked.
Next, add the riced cauliflower to the skillet, mixing everything together. Drizzle the gluten-free soy sauce over the mixture, and season with salt and pepper to taste.
Cook for an additional 5-7 minutes, stirring frequently, until the cauliflower is tender and slightly golden.
Extra Tips:
For best results, make sure to rice your cauliflower using a food processor or box grater for uniform pieces that mimic the texture of traditional rice.
You can also experiment with different vegetables based on your preferences or what’s in season. If you prefer a bit of heat, consider adding a dash of chili sauce or red pepper flakes to elevate the flavor.
Enjoy your Cauliflower Fried Rice as a standalone dish or serve it alongside your favorite protein for a complete meal!
Shrimp Tacos With Mango Salsa
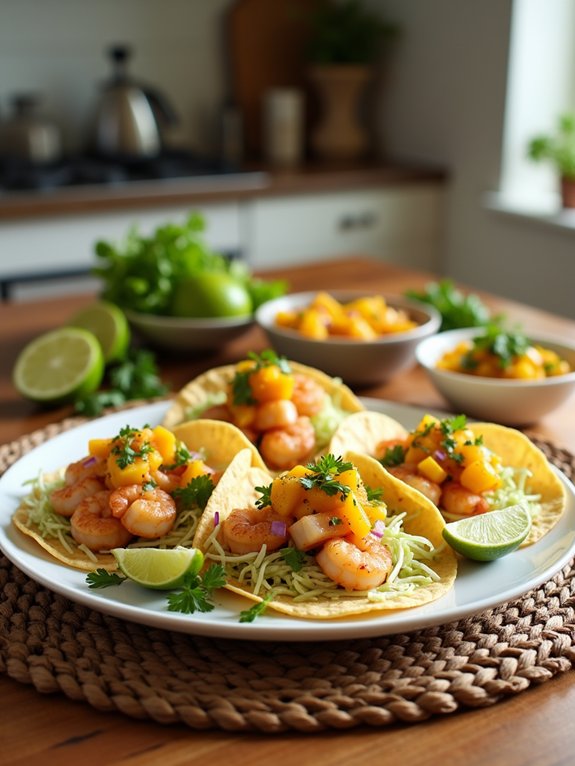
Shrimp tacos with mango salsa are a vibrant and delicious option for an easy gluten-free dinner. The combination of succulent shrimp and the invigorating sweetness of mango creates a delightful balance of flavors. These tacos aren’t only quick to prepare but also packed with nutrients, making them a perfect choice for a weeknight meal or a casual gathering with friends.
In addition to being gluten-free, shrimp tacos are incredibly versatile. You can easily customize them with your favorite toppings or adjust the spice level to suit your taste. The mango salsa adds a burst of liveliness, and the crunchy cabbage gives a satisfying texture, making each bite a delightful experience. Gather your ingredients, and let’s get started on this quick and tasty dish!
Ingredients:
- 1 pound shrimp, peeled and deveined
- 1 tablespoon olive oil
- 1 teaspoon chili powder
- 1/2 teaspoon garlic powder
- Salt and pepper to taste
- 8 small corn tortillas
- 1 cup shredded cabbage
- 1 ripe mango, diced
- 1/4 red onion, finely chopped
- 1/4 cup fresh cilantro, chopped
- Juice of 1 lime
Cooking Instructions:
In a medium bowl, combine the shrimp with olive oil, chili powder, garlic powder, salt, and pepper.
Heat a skillet over medium-high heat and cook the seasoned shrimp for about 2-3 minutes on each side until they turn pink and opaque.
While the shrimp are cooking, prepare the mango salsa by mixing the diced mango, red onion, cilantro, and lime juice in a separate bowl.
Once the shrimp are done, warm the corn tortillas in the skillet for a few seconds on each side, then assemble the tacos by placing shrimp on each tortilla, topping with shredded cabbage and mango salsa.
Extra Tips:
For an added kick, consider marinating the shrimp in lime juice and spices for about 15-30 minutes before cooking. This not only enhances the flavor but also helps to tenderize the shrimp.
Additionally, feel free to experiment with other toppings like avocado, jalapeños, or a drizzle of creamy yogurt for extra richness.
Enjoy your shrimp tacos fresh for the best flavor and texture!
Spaghetti Squash With Marinara Sauce

Spaghetti squash is a versatile and nutritious alternative to traditional pasta, making it a great choice for those following a gluten-free diet. With its natural sweetness and ability to absorb flavors, this squash can be transformed into a delicious meal when paired with a rich marinara sauce. Not only is it easy to prepare, but it also offers a satisfying texture that can satisfy even the pickiest eaters.
To prepare spaghetti squash with marinara sauce, you’ll first need to bake the squash until it’s tender enough to shred into spaghetti-like strands. Once your squash is ready, it pairs beautifully with homemade or store-bought marinara sauce, which adds a hearty, flavorful element to the dish. This meal can be customized with additional toppings such as fresh basil, grated cheese, or sautéed vegetables for an extra burst of flavor and nutrition.
Ingredients:
- 1 medium spaghetti squash
- 2 cups marinara sauce (homemade or store-bought)
- 2 tablespoons olive oil
- Salt and pepper to taste
- Fresh basil for garnish (optional)
- Grated Parmesan cheese (optional)
Cooking Instructions:
Preheat your oven to 400°F (200°C). Cut the spaghetti squash in half lengthwise and scoop out the seeds. Drizzle the inside of each half with olive oil and season with salt and pepper.
Place the squash cut-side down on a baking sheet and roast for about 30-40 minutes, or until the flesh is tender and easily shredded with a fork. Once cooked, carefully flip the squash over, fluff the strands with a fork, and top with warm marinara sauce, garnishing with fresh basil and Parmesan cheese if desired.
Extra Tips:
When selecting a spaghetti squash, look for one that feels heavy for its size and has a firm, symmetrical shape. If you want to save time, you can microwave the squash instead of baking it—simply poke holes in the skin and microwave on high for about 10-12 minutes, turning halfway through.
Additionally, feel free to customize your marinara sauce by adding sautéed garlic, onions, or your favorite vegetables for a more robust flavor.
Stuffed Bell Peppers

Stuffed bell peppers are a colorful and nutritious option for a gluten-free dinner that can easily be customized to fit your taste preferences. These delightful vessels aren’t only visually appealing but also packed with flavor and nutrients. The combination of tender bell peppers filled with a savory mixture of protein, grains, and vegetables makes for a hearty meal that the whole family will love.
Preparing stuffed bell peppers is a great way to use up leftover ingredients in your fridge. You can stuff them with a variety of fillings such as ground meat, quinoa, rice, beans, or a combination of your favorite vegetables. This dish isn’t only versatile but also allows for easy portion control, making it perfect for meal prep or family dinners.
Ingredients:
- 4 large bell peppers (any color)
- 1 cup cooked quinoa or rice
- 1 pound ground turkey, beef, or plant-based protein
- 1 cup black beans, drained and rinsed
- 1 cup corn (fresh, frozen, or canned)
- 1 small onion, diced
- 2 cloves garlic, minced
- 1 teaspoon cumin
- 1 teaspoon chili powder
- Salt and pepper to taste
- 1 cup shredded cheese (optional)
- Fresh cilantro or parsley for garnish (optional)
To begin, preheat your oven to 375°F (190°C). Cut the tops off the bell peppers and remove the seeds and membranes. In a large skillet, sauté the onion and garlic over medium heat until softened.
Add the ground meat or plant-based protein, cooking until browned. Stir in the cooked quinoa or rice, black beans, corn, cumin, chili powder, salt, and pepper, mixing well to combine.
Stuff each bell pepper with the filling mixture and place them upright in a baking dish. If desired, sprinkle cheese on top of each pepper. Cover the dish with aluminum foil and bake for 30 minutes. Remove the foil and bake for an additional 10-15 minutes, until the peppers are tender and the filling is heated through.
When cooking stuffed bell peppers, feel free to get creative with the fillings. You can add other vegetables such as zucchini or spinach, or switch up the spices to suit your palate.
If you want to make the dish even healthier, consider using cauliflower rice instead of traditional grains. Finally, don’t forget to garnish with fresh herbs before serving for an added burst of flavor!
Chicken Fajita Bowl

If you’re looking for a quick and satisfying dinner option that’s both gluten-free and packed with flavor, a Chicken Fajita Bowl is the perfect choice. This dish combines tender, seasoned chicken with colorful bell peppers and onions, all served over a base of rice or quinoa.
It’s not only easy to prepare but also customizable, allowing you to add your favorite toppings like avocado, salsa, or fresh cilantro. With all the vibrant ingredients and spices, this Chicken Fajita Bowl is sure to please everyone at the dinner table.
Whether you’re cooking for yourself or a group, this recipe is designed to be both efficient and delicious, making it a go-to meal for those busy weeknights. Plus, it’s an excellent way to enjoy the flavors of traditional fajitas in a convenient bowl format.
Ingredients:
- 1 pound boneless, skinless chicken breasts, sliced
- 2 tablespoons olive oil
- 1 teaspoon chili powder
- 1 teaspoon cumin
- 1 teaspoon garlic powder
- 1 teaspoon onion powder
- Salt and pepper, to taste
- 1 bell pepper (red, green, or yellow), sliced
- 1 onion, sliced
- 2 cups cooked rice or quinoa
- Optional toppings: avocado, salsa, cilantro, lime wedges
Cooking Instructions:
In a large skillet, heat the olive oil over medium-high heat, then add the sliced chicken and season with chili powder, cumin, garlic powder, onion powder, salt, and pepper.
Cook for about 5-7 minutes, stirring occasionally until the chicken is cooked through. Add the sliced bell pepper and onion to the skillet and sauté for an additional 4-5 minutes, until the vegetables are tender.
Serve the chicken and vegetable mixture over a bed of rice or quinoa, and top with your choice of optional toppings.
Extra Tips:
To guarantee your Chicken Fajita Bowl is bursting with flavor, marinate the chicken in the spices for at least 30 minutes before cooking. This will enhance the taste and make the chicken more tender.
Additionally, feel free to experiment with other vegetables or proteins—shrimp or beef can also work great in this dish. For a little kick, consider adding jalapeños or a sprinkle of chili flakes!
Eggplant Parmesan
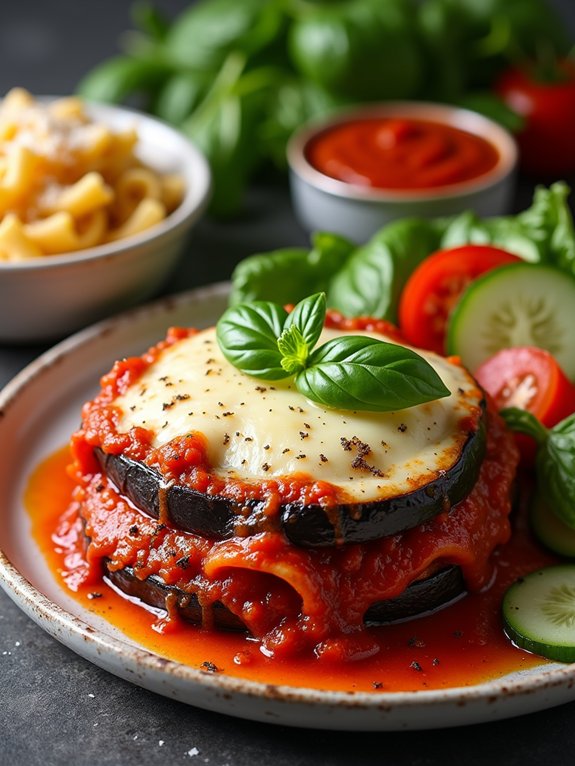
Eggplant Parmesan is a delightful dish that beautifully combines layers of tender, breaded eggplant with rich marinara sauce and gooey melted cheese. This gluten-free version maintains all the classic flavors while ensuring that those with gluten sensitivities can enjoy a comforting meal. The savory aroma of the baking eggplant will fill your kitchen, inviting everyone to the table for a satisfying dinner.
This dish not only pleases the palate but also provides a wonderful way to incorporate more vegetables into your meals. As the eggplant bakes to a golden perfection, the cheese melts into a creamy texture, and the sauce adds a savory depth that complements the dish perfectly. Whether enjoyed on its own or paired with a side salad, Eggplant Parmesan is sure to become a favorite in your household.
Ingredients:
- 2 medium eggplants, sliced into ½-inch rounds
- Salt, for sweating the eggplant
- 1 cup gluten-free breadcrumbs
- 1 cup grated Parmesan cheese
- 1 teaspoon dried oregano
- 2 cups marinara sauce (gluten-free)
- 2 cups shredded mozzarella cheese
- Olive oil, for drizzling
- Fresh basil leaves, for garnish (optional)
To prepare the Eggplant Parmesan, first, preheat your oven to 375°F (190°C). Sprinkle the sliced eggplant with salt and let it sit for about 30 minutes to draw out excess moisture. Rinse and pat the eggplant dry.
In a shallow dish, combine the gluten-free breadcrumbs, half of the Parmesan cheese, and oregano. Dip each eggplant slice in the breadcrumb mixture and arrange them on a baking sheet. Drizzle with olive oil and bake for 25-30 minutes, flipping halfway through, until golden brown.
In a baking dish, spread a layer of marinara sauce, then layer half of the baked eggplant, followed by more marinara, half of the mozzarella cheese, and half of the remaining Parmesan. Repeat the layers, finishing with mozzarella on top. Bake for another 25 minutes until bubbly and golden.
When making Eggplant Parmesan, it’s important to sweat the eggplant to reduce its bitterness and prevent it from becoming soggy during baking. If you want to add extra flavor, consider mixing some Italian herbs into the breadcrumb mixture or using fresh herbs in the layers.
For a more robust dish, you can also add sautéed mushrooms or spinach between the layers. Enjoy your homemade, gluten-free Eggplant Parmesan with a side of gluten-free pasta or a fresh salad for a well-rounded meal!
Thai Peanut Chicken Salad

Thai Peanut Chicken Salad is a vibrant and flavorful dish that perfectly combines the crunch of fresh vegetables with the rich, nutty essence of a homemade peanut dressing. This recipe isn’t only gluten-free but also simple to prepare, making it an ideal choice for busy weeknights or a light, satisfying lunch. The balance of protein from the chicken, healthy fats from the peanuts, and an abundance of colorful veggies guarantees that you’re getting a nutritious meal that’s sure to please your taste buds.
In this salad, you can customize the ingredients based on what you have on hand or your personal preferences. Feel free to add or substitute vegetables such as bell peppers, cucumbers, or even edamame for an extra punch of flavor and texture. The homemade peanut dressing is the star of the show, as it ties all the ingredients together with its creamy, savory goodness. It’s a dish that can be made ahead of time, allowing the flavors to meld beautifully.
Ingredients:
- 2 cups cooked chicken, shredded or diced
- 4 cups mixed salad greens (such as romaine, spinach, or arugula)
- 1 cup shredded carrots
- 1 cup red cabbage, thinly sliced
- 1 cup bell peppers, sliced (any color)
- 1/2 cup green onions, chopped
- 1/2 cup unsalted peanuts, roughly chopped
- 1/4 cup fresh cilantro, chopped (optional)
For the dressing:
- 1/4 cup creamy peanut butter
- 2 tablespoons soy sauce (gluten-free)
- 1 tablespoon honey or maple syrup
- 1 tablespoon rice vinegar
- 1 tablespoon sesame oil
- 1 teaspoon grated ginger
- 1-2 tablespoons water (to thin, as needed)
To prepare the Thai Peanut Chicken Salad, start by combining all the salad ingredients in a large bowl: cooked chicken, salad greens, shredded carrots, red cabbage, bell peppers, green onions, and peanuts.
In a separate bowl, whisk together all the dressing ingredients until smooth and creamy, adjusting the consistency with water as needed. Pour the dressing over the salad and toss gently to combine, making sure that all the ingredients are well-coated.
Serve immediately for a rejuvenating meal or refrigerate for up to an hour to allow the flavors to deepen.
Extra tips for making this dish: To save time, you can use rotisserie chicken instead of cooking your own. Additionally, if you prefer more spice, consider adding a dash of sriracha or red pepper flakes to the dressing.
This salad can also be stored in an airtight container in the fridge for up to two days, but keep the dressing separate until you’re ready to serve for the best texture. Enjoy your flavorful, gluten-free meal!
Lemon Herb Grilled Salmon

Lemon Herb Grilled Salmon is a delightful and nutritious dish that’s perfect for a quick weeknight dinner or a special occasion. The combination of fresh herbs and zesty lemon elevates the natural flavors of the salmon, making it a hit with both seafood lovers and those new to fish. This recipe isn’t only gluten-free but also packed with omega-3 fatty acids, making it a healthy choice for families.
Grilling salmon is one of the easiest and most rewarding ways to prepare this fish. The high heat of the grill gives the salmon a perfectly charred exterior while keeping the inside moist and flaky. By marinating the salmon in a simple mixture of lemon juice, herbs, and olive oil, you guarantee that every bite is bursting with flavor. Pair it with a fresh salad or steamed vegetables for a complete meal that everyone will enjoy.
Ingredients:
- 4 salmon fillets
- 1/4 cup olive oil
- 2 lemons (juiced and zested)
- 2 cloves garlic (minced)
- 2 tablespoons fresh parsley (chopped)
- 2 tablespoons fresh dill (chopped)
- Salt and pepper to taste
Cooking Instructions:
In a medium bowl, whisk together olive oil, lemon juice, lemon zest, minced garlic, parsley, dill, salt, and pepper to create the marinade.
Place the salmon fillets in a shallow dish or a resealable plastic bag and pour the marinade over them, ensuring they’re well coated. Allow the salmon to marinate in the refrigerator for at least 30 minutes.
Preheat the grill to medium-high heat and lightly oil the grates. Remove the salmon from the marinade and place it skin-side down on the grill. Cook for 4-6 minutes per side, or until the salmon flakes easily with a fork and has nice grill marks.
Extra Tips:
For the best flavor, try to use fresh herbs whenever possible, as they can greatly enhance the taste of the dish.
If you prefer, you can also add other herbs like thyme or basil to the marinade for a different flavor profile.
To prevent sticking, make sure your grill is preheated and well-oiled. Additionally, if you’re cooking for a larger group, you can easily double the recipe and cook the salmon in batches.
Enjoy your delicious and healthy Lemon Herb Grilled Salmon!
Vegetable and Lentil Soup

Vegetable and lentil soup is a wholesome and hearty dish that’s perfect for any day of the week. Packed with nutritious ingredients, this soup not only delivers on flavor but also provides a great source of protein and fiber thanks to the lentils and vegetables.
It’s easy to make, and the best part is that you can customize it with whatever vegetables you have on hand, making it a versatile choice for a gluten-free dinner. This soup is ideal for meal prep, as it stores well in the refrigerator and can even be frozen for later use.
A warm bowl of vegetable and lentil soup is comforting and satisfying, making it a favorite among families and individuals alike. Whether served with a side of gluten-free bread or enjoyed on its own, this recipe will surely become a staple in your gluten-free cooking repertoire.
Ingredients:
- 1 tablespoon olive oil
- 1 onion, diced
- 2 carrots, diced
- 2 celery stalks, diced
- 3 garlic cloves, minced
- 1 teaspoon ground cumin
- 1 teaspoon dried thyme
- 1 cup green or brown lentils, rinsed
- 6 cups vegetable broth
- 1 can (14.5 ounces) diced tomatoes
- 2 cups spinach or kale, chopped
- Salt and pepper to taste
- Optional: Fresh parsley for garnish
In a large pot, heat the olive oil over medium heat and add the diced onion, carrots, and celery. Sauté until the vegetables are soft, about 5-7 minutes.
Stir in the minced garlic, cumin, and thyme, cooking for another minute until fragrant. Add the lentils, vegetable broth, and diced tomatoes, and bring the mixture to a boil. Reduce the heat and let it simmer for about 25-30 minutes, or until the lentils are tender.
Finally, stir in the spinach or kale and season with salt and pepper before serving. For extra flavor, consider adding a splash of lemon juice or a sprinkle of crushed red pepper flakes for some heat.
You can also experiment with different herbs and spices to suit your taste. If you prefer a creamier texture, blend a portion of the soup before adding the greens. This soup is wonderfully adaptable, so feel free to make it your own!
Gluten-Free Pizza With Your Favorite Toppings

Gluten-free pizza is a delightful way to enjoy a classic favorite without the gluten. Whether you’re celiac, gluten-intolerant, or simply looking to reduce your gluten intake, making a delicious pizza at home can be both satisfying and straightforward. This recipe uses a gluten-free crust that’s easy to prepare and can be topped with your favorite ingredients, from classic pepperoni to a medley of fresh vegetables.
Creating the perfect gluten-free pizza allows you to customize it to suit your taste preferences. The dough can be made from various gluten-free flours, and you can experiment with different sauces, cheeses, and toppings. Whether you’re preparing a quick weeknight dinner or a fun meal for friends and family, this gluten-free pizza recipe is sure to impress everyone at the table.
Ingredients:
- 1 ½ cups gluten-free all-purpose flour
- ½ teaspoon salt
- 2 teaspoons baking powder
- 1 teaspoon garlic powder
- 1 teaspoon olive oil
- 1 cup warm water
- 1 cup pizza sauce
- 2 cups shredded mozzarella cheese
- Your favorite toppings (e.g., pepperoni, bell peppers, mushrooms, olives, spinach)
Cooking Instructions:
Preheat your oven to 425°F (220°C). In a large bowl, mix together the gluten-free flour, salt, baking powder, and garlic powder.
Add the olive oil and warm water, stirring until a dough forms. Transfer the dough to a floured surface and roll it out to your desired thickness.
Place the rolled-out dough on a pizza stone or baking sheet lined with parchment paper. Spread the pizza sauce over the crust, sprinkle with mozzarella cheese, and add your favorite toppings.
Bake for 15-20 minutes, or until the cheese is bubbly and the crust is golden brown.
Extra Tips:
To achieve a crispy crust, consider pre-baking the crust for about 5-7 minutes before adding the sauce and toppings. This will help ascertain that the bottom doesn’t become soggy.
Additionally, using a pizza stone can help distribute heat evenly and provide a better texture. Don’t be afraid to get creative with your toppings—gluten-free pizza is versatile and can cater to a wide array of flavors, so let your imagination run wild!


