
Did you know that nearly 70% of people skip lunch at work or school, often opting for unhealthy snacks instead? This not only impacts your energy levels but also affects your overall productivity. You might be looking for ways to make your lunch both easy and nutritious, and that’s where these 15 simple lunchbox ideas come in. From vibrant quinoa salads to satisfying wraps, there’s a variety of options that can keep you fueled throughout the day. Curious about which meals can seamlessly fit into your busy schedule?
Quinoa Salad With Veggies
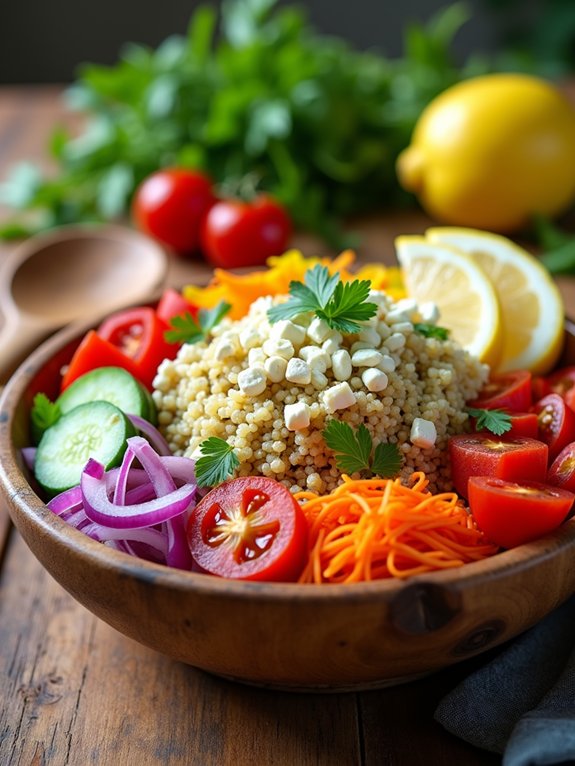
Quinoa salad with veggies is a nutritious and colorful dish that makes for an excellent lunch option. Packed with protein, fiber, and a variety of vitamins, this salad isn’t only filling but also invigorating. The nutty flavor of quinoa pairs beautifully with crisp vegetables, making it a delightful meal any time of day.
Plus, it’s easy to prepare and can be customized with your favorite ingredients or whatever you have on hand. This salad is perfect for meal prep, as it can be made in advance and stored in the fridge for several days. The flavors meld together beautifully over time, making it even tastier when enjoyed the next day.
Whether you’re looking for a quick lunch to take to work or a side dish for a family gathering, this quinoa salad with veggies is sure to please.
Ingredients:
- 1 cup quinoa
- 2 cups water or vegetable broth
- 1 bell pepper, diced
- 1 cucumber, diced
- 1 cup cherry tomatoes, halved
- 1 carrot, grated
- 1/4 red onion, finely chopped
- 1/4 cup fresh parsley, chopped
- 1/4 cup feta cheese (optional)
- 3 tablespoons olive oil
- 2 tablespoons lemon juice
- Salt and pepper to taste
To prepare the quinoa salad, rinse the quinoa under cold water and then combine it with water or vegetable broth in a medium saucepan. Bring it to a boil, then reduce the heat, cover, and let it simmer for about 15 minutes, or until the quinoa is fluffy and the liquid has been absorbed.
Once cooked, fluff the quinoa with a fork and let it cool. In a large bowl, combine the cooled quinoa with the diced bell pepper, cucumber, cherry tomatoes, grated carrot, red onion, and parsley. In a small bowl, whisk together the olive oil, lemon juice, salt, and pepper, then pour the dressing over the salad and toss gently to combine.
If desired, sprinkle feta cheese on top before serving. When preparing your quinoa salad, feel free to get creative with the vegetables and add-ins! You can incorporate ingredients like avocado, corn, or chickpeas for added flavor and texture.
For a spicy kick, consider adding diced jalapeños or a pinch of cayenne pepper. This salad is highly adaptable, so make it your own and enjoy the endless possibilities!
Hummus and Veggie Wraps
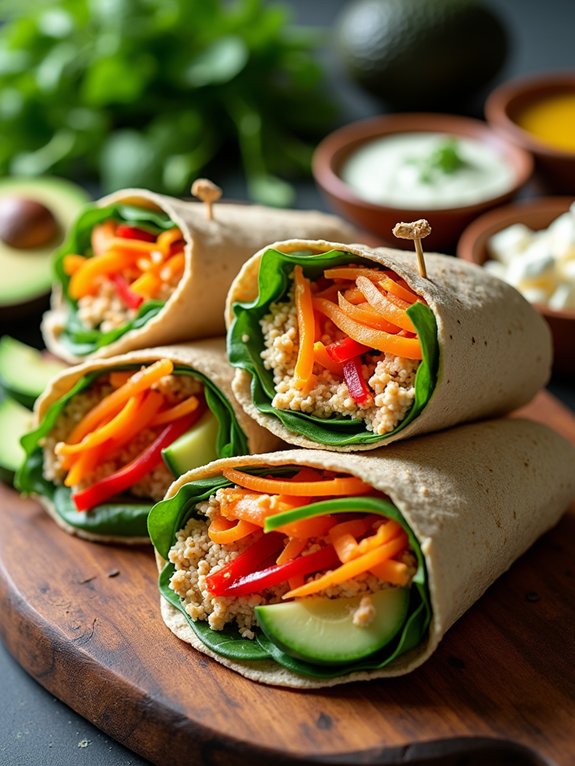
Hummus and veggie wraps are a delightful and nutritious option for a healthy lunchbox. They aren’t only easy to prepare but also versatile, allowing you to customize them with your favorite vegetables and flavors. This dish is packed with protein from the hummus and a variety of vitamins from the fresh vegetables, making it a great choice for both kids and adults.
Plus, they’re perfect for on-the-go meals as they can be easily wrapped and eaten anywhere. To make these wraps even more exciting, consider adding different herbs or spices to the hummus for an extra kick. You could also incorporate different types of wraps, such as whole wheat, spinach, or even gluten-free options, to suit your dietary preferences.
Whether you’re packing them for school, work, or a picnic, hummus and veggie wraps are sure to please and satisfy.
Ingredients:
- 1 large tortilla or wrap (whole wheat, spinach, or gluten-free)
- 1/2 cup hummus (store-bought or homemade)
- 1/2 cup shredded carrots
- 1/2 cup cucumber, thinly sliced
- 1/2 cup bell pepper, thinly sliced
- 1/4 cup red onion, thinly sliced
- 1/4 cup spinach or mixed greens
- Salt and pepper to taste
- Optional: feta cheese, olives, or avocado for added flavor
To prepare the hummus and veggie wraps, start by laying the tortilla flat on a clean surface. Spread the hummus evenly over the tortilla, leaving about an inch border around the edges. Layer the shredded carrots, cucumber, bell pepper, red onion, and spinach on top of the hummus, and sprinkle with salt and pepper.
Carefully roll the tortilla up tightly, starting from one edge and tucking in the fillings as you go. Once rolled, slice the wrap in half diagonally and secure with a toothpick if desired.
When making hummus and veggie wraps, feel free to get creative with your fillings. You can include any vegetables you have on hand, such as zucchini, cherry tomatoes, or radishes. Additionally, for a protein boost, consider adding grilled chicken, turkey slices, or chickpeas.
These wraps can be prepared in advance and stored in the refrigerator for a quick grab-and-go lunch, making them a perfect meal prep option!
Turkey and Avocado Sandwich
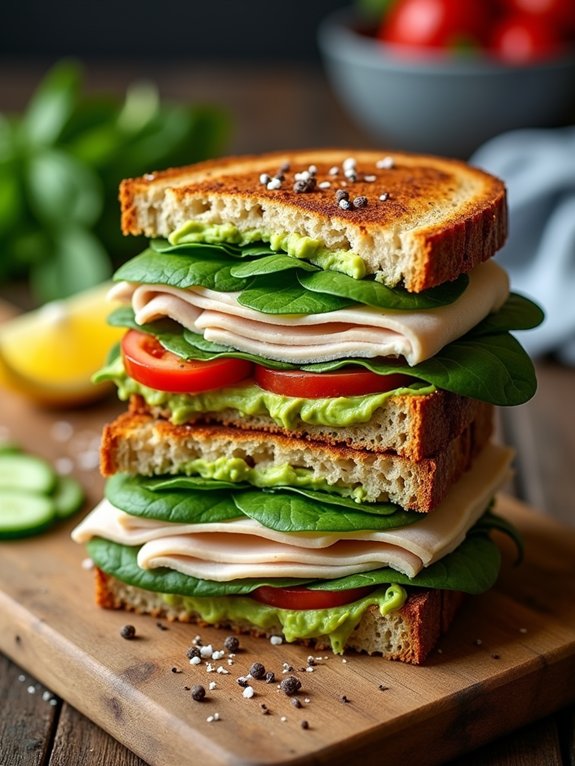
A Turkey and Avocado Sandwich is a delicious and nutritious option for a healthy lunchbox. This sandwich is packed with protein and healthy fats, making it a great choice for keeping energy levels up throughout the day. The creamy avocado complements the savory turkey perfectly, and you can customize it with your favorite toppings for added flavor and texture.
To make this sandwich even more appealing, consider using whole grain or sourdough bread, which adds fiber and a delightful crunch. Fresh vegetables like spinach, tomatoes, or cucumbers can also be layered in for extra nutrients and a pop of color. This sandwich isn’t only easy to prepare but also versatile enough to suit various tastes and dietary preferences.
Ingredients:
- 2 slices of whole grain or sourdough bread
- 4-6 slices of turkey breast
- 1 ripe avocado
- Salt and pepper to taste
- Optional: sliced tomatoes, spinach, or cucumbers
- Optional: mustard or mayonnaise
To prepare the sandwich, start by toasting the bread lightly if desired. While the bread is toasting, cut the avocado in half, remove the pit, and scoop the flesh into a bowl. Mash the avocado with a fork and season it with salt and pepper.
Spread the mashed avocado evenly on one slice of the toasted bread, layer the turkey slices on top, and add any optional toppings like tomatoes, spinach, or cucumbers. If you like, spread mustard or mayonnaise on the other slice of bread before placing it on top to finish the sandwich.
For an added twist, try adding a squeeze of lemon juice to the mashed avocado to enhance its flavor and prevent browning. Additionally, if you’re packing the sandwich for later, consider wrapping it tightly in parchment paper or using a sandwich container to keep it fresh.
Enjoy experimenting with different ingredients and spreads to find your perfect combination!
Greek Yogurt Parfait
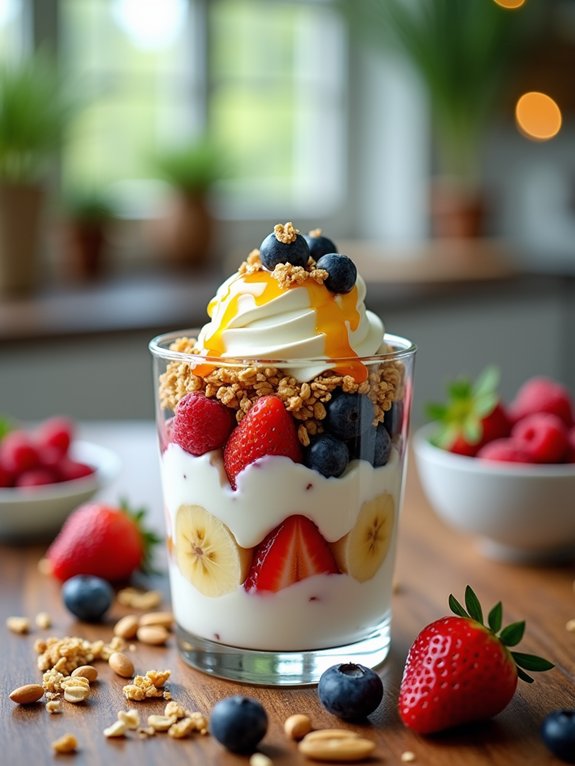
A Greek yogurt parfait is a delicious and nutritious option for a healthy lunchbox. Packed with protein from the yogurt, fiber from the fruits, and crunch from granola, this parfait not only satisfies hunger but also provides lasting energy throughout the day.
It’s versatile, allowing you to customize it with your favorite fruits, nuts, and toppings, making it a perfect choice for both adults and kids.
Creating a Greek yogurt parfait is incredibly simple and can be done in just a few minutes. This dish can be prepared in advance, making it an ideal choice for meal prep.
Layering the ingredients not only makes it visually appealing but also allows the flavors to meld together beautifully. Whether you need a quick lunch, a healthy snack, or a delightful breakfast, this parfait is sure to please.
Ingredients:
- 2 cups Greek yogurt (plain or flavored)
- 1 cup granola
- 1 cup mixed berries (strawberries, blueberries, raspberries)
- 1 banana, sliced
- Honey or maple syrup (optional for drizzling)
- Nuts or seeds (optional for added crunch)
Instructions:
In a glass or bowl, start by layering 1/2 cup of Greek yogurt at the bottom.
Follow it with a layer of granola, then a layer of mixed berries and banana slices.
Repeat the layers until you reach the top, finishing with a dollop of yogurt and a sprinkle of granola.
Drizzle with honey or maple syrup if desired, and top with nuts or seeds for extra texture.
Extra Tips:
To keep your parfait fresh and prevent sogginess, store the granola separately and add it just before serving.
Feel free to experiment with different fruits, such as peaches or kiwi, and try using flavored Greek yogurt for added taste.
This recipe isn’t only customizable but can also be made in larger batches for meal prep, making it a convenient and healthy option for busy days.
Pasta Salad With Spinach

Pasta salad with spinach is a revitalizing and nutritious option that can easily be prepared for a healthy lunchbox. This dish combines al dente pasta with fresh spinach, vibrant vegetables, and a light dressing, making it a perfect meal for any day of the week.
It’s not only quick to assemble but also versatile, allowing you to customize it with your favorite ingredients or whatever you have on hand. To enhance the flavor, you can add a variety of herbs and spices, such as basil or oregano, which complement the greens beautifully.
This pasta salad can be served cold or at room temperature, making it an ideal choice for meal prep. Plus, it keeps well in the refrigerator, so you can make a large batch and enjoy it throughout the week.
Ingredients:
- 2 cups of pasta (penne or fusilli)
- 2 cups fresh spinach, chopped
- 1 cup cherry tomatoes, halved
- 1/2 cucumber, diced
- 1/4 red onion, finely chopped
- 1/4 cup feta cheese, crumbled
- 1/4 cup olive oil
- 2 tablespoons balsamic vinegar
- Salt and pepper to taste
- Optional: 1/4 cup olives, sliced
Instructions:
Cook the pasta according to package instructions until al dente, then drain and rinse under cold water to cool it down.
In a large bowl, combine the cooked pasta, chopped spinach, cherry tomatoes, cucumber, red onion, and feta cheese.
In a separate small bowl, whisk together the olive oil, balsamic vinegar, salt, and pepper. Pour the dressing over the pasta salad and toss gently until everything is well coated.
Serve immediately or refrigerate for later.
Extra Tips:
For added flavor and texture, consider incorporating protein such as grilled chicken, chickpeas, or beans.
You can also experiment with different types of cheese or nuts to enhance the dish. Preparing the salad a few hours in advance allows the flavors to meld beautifully, so it’s a great option for meal prep.
Just remember to keep the dressing separate if you plan to store it for days to maintain the freshness of the ingredients.
Chickpea Salad Bowl
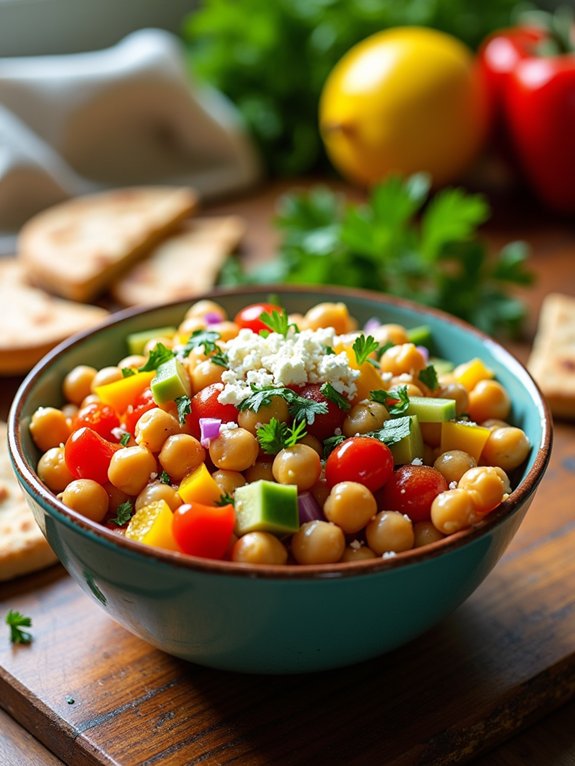
Chickpea salad bowls are a delightful and nutritious option for a healthy lunch, packed with protein and fiber. This vibrant dish isn’t only easy to prepare but also customizable to suit your taste preferences. The combination of fresh vegetables, creamy dressing, and hearty chickpeas makes it a satisfying meal that will keep you energized throughout the day.
In addition to being delicious, chickpea salad bowls are incredibly versatile. You can add your favorite ingredients or seasonal produce to create a unique flavor profile. Whether you choose to enjoy it as a standalone dish or pair it with whole grain pita bread, this salad is sure to become a staple in your lunch rotation.
Ingredients:
- 1 can of chickpeas (15 oz), drained and rinsed
- 1 cup cherry tomatoes, halved
- 1 cucumber, diced
- 1 bell pepper (any color), diced
- 1/4 red onion, finely chopped
- 1/4 cup fresh parsley, chopped
- 1/4 cup feta cheese, crumbled (optional)
- 3 tablespoons olive oil
- 2 tablespoons lemon juice
- Salt and pepper to taste
Cooking Instructions:
In a large mixing bowl, combine the chickpeas, cherry tomatoes, cucumber, bell pepper, red onion, and parsley.
In a separate small bowl, whisk together the olive oil, lemon juice, salt, and pepper to create a dressing.
Pour the dressing over the salad and toss gently until all ingredients are well coated. For an extra touch, sprinkle the crumbled feta cheese on top before serving.
Extra Tips:
Feel free to customize your chickpea salad bowl with additional ingredients like avocado, olives, or roasted vegetables.
To enhance flavors, let the salad sit for about 30 minutes in the refrigerator before serving, allowing the ingredients to meld together beautifully.
This salad can be stored in an airtight container in the fridge for up to three days, making it a perfect make-ahead meal for busy weeks.
Rice and Bean Burrito
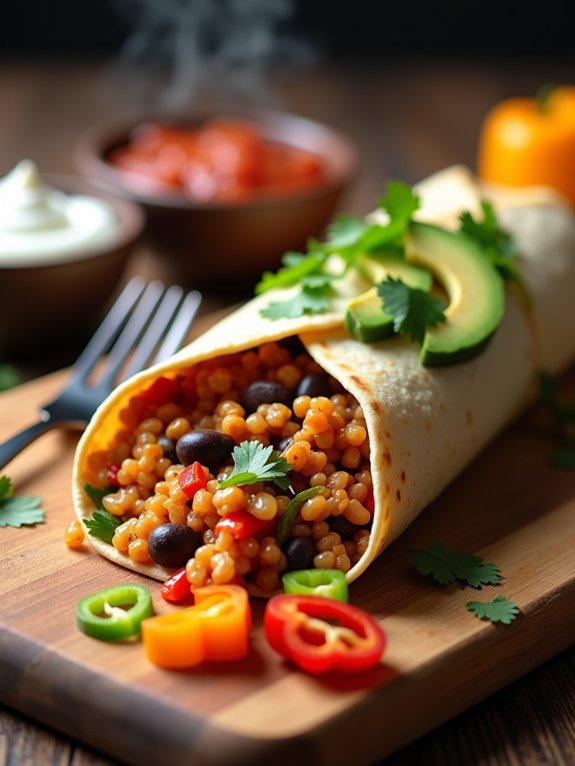
Rice and Bean Burritos are a delicious and nutritious option for a healthy lunchbox. Packed with protein, fiber, and a variety of flavors, these burritos aren’t only satisfying but also easy to prepare. They’re perfect for meal prep, allowing you to whip up a batch over the weekend and enjoy them throughout the week. Customize your burrito with your favorite toppings to keep it exciting!
To make Rice and Bean Burritos, you’ll need a few simple ingredients that come together to create a hearty filling. The combination of rice and beans provides a complete protein, making this dish a fantastic option for vegetarians and meat-eaters alike. Plus, you can easily adapt the recipe to include your favorite vegetables or spices, making it versatile for any taste preference.
Ingredients:
- 1 cup cooked brown rice
- 1 can (15 oz) black beans, rinsed and drained
- 1 cup corn (fresh, frozen, or canned)
- 1 cup diced bell peppers (any color)
- 1 teaspoon cumin
- 1 teaspoon chili powder
- Salt and pepper to taste
- 4 large flour tortillas
- 1 cup shredded cheese (cheddar or Monterey Jack)
- Optional toppings: sour cream, salsa, avocado, or cilantro
In a large mixing bowl, combine the cooked brown rice, black beans, corn, diced bell peppers, cumin, chili powder, salt, and pepper. Mix until everything is well incorporated.
Lay a tortilla flat on a clean surface, add a generous portion of the filling to the center, and sprinkle with cheese. Fold in the sides and roll the tortilla tightly from the bottom up. Repeat the process for the remaining tortillas and filling.
When preparing Rice and Bean Burritos, consider making a double batch and freezing extras for quick meals later. To reheat, simply wrap the burrito in a damp paper towel and microwave for 1-2 minutes until heated through.
You can also experiment with different types of beans or add cooked chicken or beef for extra protein. Don’t forget to try various toppings to add freshness and flavor!
Mini Turkey Meatballs

Mini turkey meatballs are a delicious and healthy option for lunchboxes, perfect for both kids and adults alike. These bite-sized morsels aren’t only easy to make, but they’re also packed with lean protein, making them a nutritious choice that will keep you energized throughout the day. By incorporating various herbs and spices, you can customize the flavor to suit your taste preferences, creating a delightful dish that everyone will love.
Preparing mini turkey meatballs is a simple and straightforward process. They can be made ahead of time and stored in the fridge or freezer, making them a convenient option for busy weekdays. Serve them with a side of whole grain pasta, a fresh salad, or even on their own with a dipping sauce. These versatile meatballs are sure to become a staple in your meal prep routine.
Ingredients:
- 1 lb ground turkey
- 1/2 cup breadcrumbs
- 1/4 cup grated Parmesan cheese
- 1/4 cup chopped fresh parsley
- 1 clove garlic, minced
- 1 egg
- 1 tsp dried oregano
- 1/2 tsp salt
- 1/4 tsp black pepper
- 1/4 cup marinara sauce (optional for serving)
Instructions:
In a large bowl, combine the ground turkey, breadcrumbs, Parmesan cheese, parsley, garlic, egg, oregano, salt, and black pepper. Mix until all the ingredients are well combined.
Preheat the oven to 400°F (200°C) and line a baking sheet with parchment paper. Using your hands, shape the mixture into small meatballs, about 1 inch in diameter, and place them on the prepared baking sheet.
Bake for 15-20 minutes, or until the meatballs are cooked through and golden brown on the outside.
Extra Tips:
For added flavor, consider mixing in different herbs or spices, such as basil or red pepper flakes. You can also swap out the breadcrumbs for crushed oats or gluten-free alternatives if you have dietary restrictions.
To keep them moist, avoid overcooking the meatballs, and for a fun twist, try adding chopped veggies like spinach or bell peppers into the mix. Enjoy these mini turkey meatballs on their own, or pair them with your favorite dipping sauce for a tasty treat!
Caprese Skewers
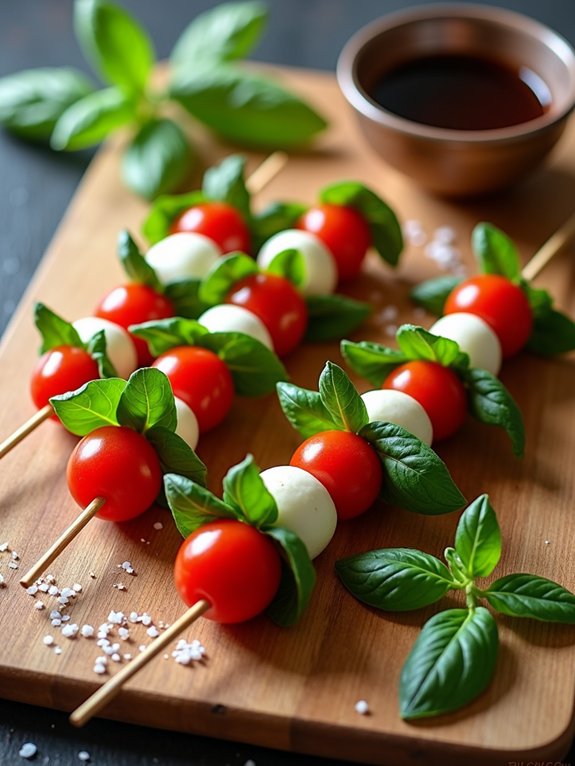
Caprese skewers are a delightful and easy-to-make dish that perfectly embodies the fresh flavors of Italy. This appetizer combines the classic ingredients of a Caprese salad—tomatoes, mozzarella, and basil—on a convenient skewer, making them perfect for lunchboxes, picnics, or as a party snack. Not only are they visually appealing, but they’re also light, invigorating, and packed with nutrients.
To prepare these skewers, you can use cherry tomatoes for their sweetness and bite-sized mozzarella balls for easy assembly. The addition of fresh basil leaves adds a fragrant and aromatic touch. Drizzling the skewers with balsamic glaze just before serving enhances the flavors and gives them an elegant finish. You can easily customize this dish by adding a sprinkle of salt and pepper or other herbs to suit your taste.
Ingredients:
- Cherry tomatoes
- Fresh mozzarella balls
- Fresh basil leaves
- Balsamic glaze
- Salt and pepper (optional)
- Skewers (wooden or metal)
To assemble the Caprese skewers, start by washing the cherry tomatoes and basil leaves. Next, take a skewer and thread a cherry tomato onto it, followed by a basil leaf, and then a mozzarella ball.
Repeat this process until the skewer is filled, leaving a little space at each end for easy handling. Once all skewers are assembled, drizzle them with balsamic glaze and sprinkle with salt and pepper if desired.
For an extra flavor kick, consider marinating the mozzarella balls in olive oil, garlic, and herbs for a few hours before using them in the skewers. This will infuse the cheese with additional taste and make your Caprese skewers even more delectable.
Additionally, you can experiment with different types of tomatoes or add a slice of prosciutto for a savory twist. Enjoy your healthy and colorful lunchbox creation!
Smashed Chickpea Sandwich
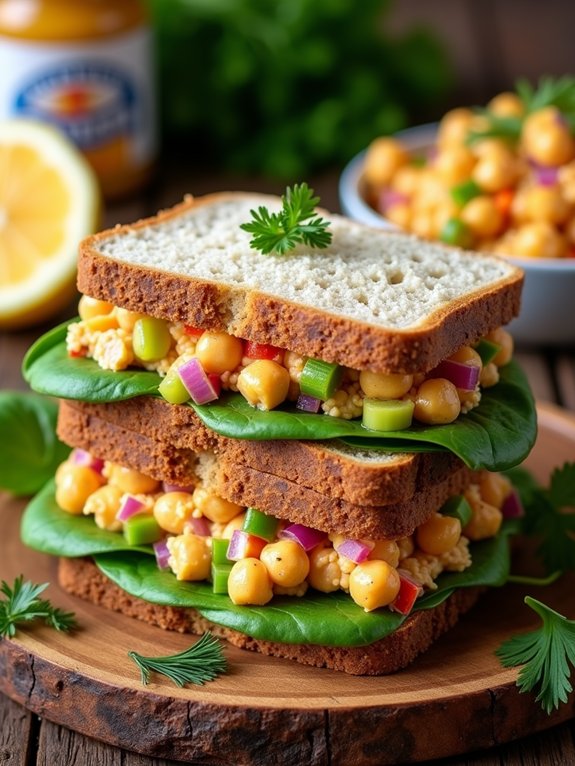
Smashed chickpea sandwiches are a delightful and nutritious lunch option that can be enjoyed by everyone. This versatile recipe isn’t only packed with protein and fiber from the chickpeas, but it also allows for endless customization with your favorite herbs, spices, and veggies. Perfect for meal prep, these sandwiches can be made in advance and stored in the refrigerator, making them a convenient grab-and-go option for busy days.
To create your smashed chickpea sandwich, you’ll need some simple ingredients that are likely already in your pantry. The combination of mashed chickpeas with creamy elements like yogurt or mayo, along with crunchy veggies and zesty seasonings, creates a satisfying filling that can be slathered between slices of whole-grain bread or served in a wrap.
Whether you’re heading to work, school, or a picnic, these sandwiches are sure to please your taste buds and keep you energized throughout the day.
Ingredients:
- 1 can (15 oz) chickpeas, drained and rinsed
- 2 tablespoons plain Greek yogurt or mayonnaise
- 1 tablespoon Dijon mustard
- 1 tablespoon lemon juice
- 1/4 cup red onion, finely chopped
- 1/4 cup celery, finely chopped
- 1/4 cup bell pepper, finely chopped
- Salt and pepper, to taste
- Whole grain bread or wraps
- Lettuce or spinach leaves (optional)
To prepare the smashed chickpea sandwich, start by placing the drained and rinsed chickpeas in a medium mixing bowl. Use a fork or potato masher to gently smash the chickpeas until they reach your desired consistency—some chunks are fine for texture!
Add the Greek yogurt or mayonnaise, Dijon mustard, lemon juice, red onion, celery, and bell pepper to the bowl. Season with salt and pepper to taste, then mix everything together until well combined. Spread the chickpea mixture onto slices of whole grain bread or wrap it in a tortilla, adding lettuce or spinach leaves if desired.
For extra tips, feel free to experiment with different add-ins to suit your taste! Try incorporating diced pickles, shredded carrots, or fresh herbs like dill or parsley for added flavor.
You can also adjust the consistency of the filling by adding more yogurt or mayo if you prefer a creamier texture. If you want to add a bit of a kick, consider mixing in some hot sauce or red pepper flakes. These sandwiches aren’t only delicious but also highly adaptable, allowing you to make them your own!
Fruit and Nut Snack Packs
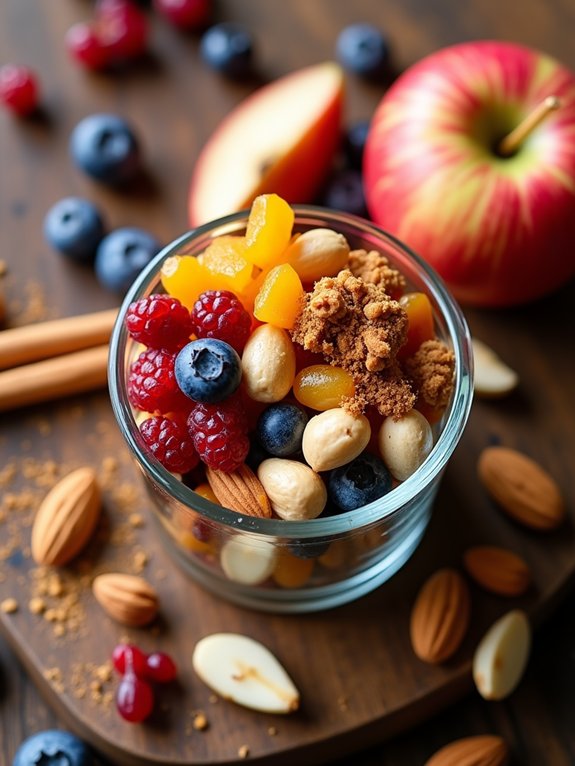
Fruit and nut snack packs are a fantastic way to incorporate healthy, wholesome ingredients into your lunchbox. They provide a perfect balance of natural sugars and healthy fats, making them an ideal energy boost for busy days. Not only are they easy to prepare, but they’re also highly customizable, allowing you to mix and match your favorite fruits and nuts according to your taste preferences.
These snack packs are great for both adults and kids, making them a versatile option for anyone looking to eat healthier. You can prepare them in advance and store them in the fridge for a quick grab-and-go snack or add them to your lunchbox for a nutritious addition to your meal. With just a few simple ingredients, you can create a delicious and satisfying snack that will keep you fueled throughout the day.
Ingredients:
- 1 cup mixed nuts (almonds, walnuts, cashews)
- 1 cup dried fruits (raisins, cranberries, apricots)
- 1 cup fresh fruit (apple slices, berries, grapes)
- 1 tablespoon honey or maple syrup (optional)
- 1 teaspoon cinnamon (optional)
- Small snack-sized containers or bags
Instructions:
In a large bowl, combine the mixed nuts and dried fruits, mixing them well to create an even distribution. If you choose to use honey or maple syrup, drizzle it over the mixture to add a hint of sweetness.
For an extra kick of flavor, sprinkle cinnamon over the top and mix again. Then, portion the mixture into small snack-sized containers or bags, and add fresh fruit on the side to complete your snack pack.
Extra Tips:
Feel free to experiment with different combinations of nuts and fruits based on what you have on hand or what’s in season. For added protein, consider including some dark chocolate chips or yogurt-covered raisins.
Pre-packaging your snack packs can also help you stay on track with healthy eating, as they’re convenient and ready to eat whenever you’re in need of a quick snack.
Spinach and Feta Quesadilla
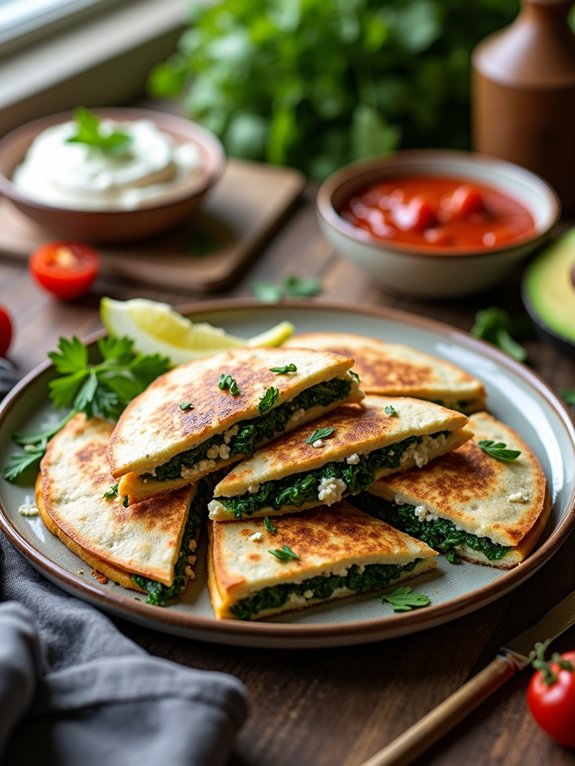
Spinach and Feta Quesadillas are a delicious and nutritious option for a healthy lunchbox. This dish combines the earthy flavor of fresh spinach with the tanginess of feta cheese, all nestled between crispy tortillas. Not only are they easy to make, but they’re also a great way to sneak in some greens, making them a perfect addition to any meal.
Whether you’re preparing lunch for yourself or your kids, these quesadillas are sure to be a hit.
To make Spinach and Feta Quesadillas, you can use either flour or corn tortillas depending on your preference. The beauty of this recipe is its versatility; feel free to add other ingredients like diced tomatoes, olives, or cooked chicken for added flavor and protein.
Serve them with a side of salsa, Greek yogurt, or guacamole for an extra burst of flavor. Get ready to enjoy a delightful, satisfying meal that packs well for lunch!
Ingredients:
- 2 large flour or corn tortillas
- 1 cup fresh spinach, chopped
- 1/2 cup feta cheese, crumbled
- 1/2 cup shredded mozzarella cheese
- 1 tablespoon olive oil
- 1/2 teaspoon garlic powder (optional)
- Salt and pepper to taste
Cooking Instructions:
Heat olive oil in a skillet over medium heat. Add the chopped spinach and sauté until wilted, about 2-3 minutes.
In a bowl, combine the cooked spinach, feta cheese, mozzarella cheese, garlic powder, salt, and pepper. Spread the mixture evenly onto one tortilla, then top with the second tortilla.
Cook the quesadilla in the skillet for 3-4 minutes on each side until golden brown and the cheese is melted. Remove from heat, slice into wedges, and enjoy!
Extra Tips:
For an even crispier quesadilla, you can brush the tortillas lightly with olive oil before cooking.
Additionally, consider adding other vegetables, such as bell peppers or onions, for a more colorful and nutrient-rich meal.
These quesadillas can also be made ahead of time and reheated, making them a convenient option for busy days. Enjoy experimenting with different ingredients to find your perfect combination!
Mason Jar Salad
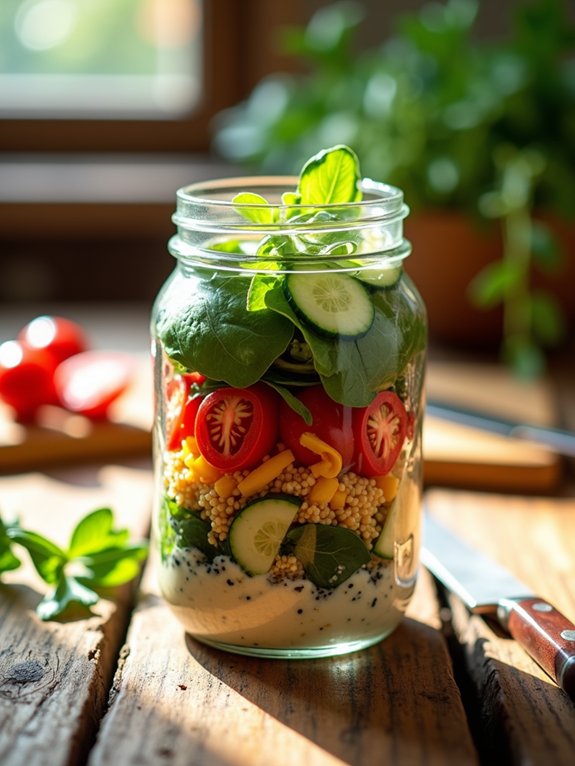
Mason jar salads are a fantastic and convenient way to prepare healthy lunches that are both visually appealing and delicious. They’re perfect for meal prep, allowing you to layer your favorite ingredients in a portable container that stays fresh until you’re ready to enjoy it.
The key to a successful mason jar salad is to layer the ingredients in a way that keeps the greens crisp and prevents them from wilting. By starting with the dressing at the bottom and ending with the greens at the top, you can guarantee that each layer remains fresh and flavorful.
This versatile recipe can be customized to suit your taste preferences and dietary needs. You can use any combination of vegetables, proteins, and grains that you enjoy. Feel free to experiment with different dressings, herbs, and spices to create a salad that’s uniquely yours.
Whether you’re at work, school, or a picnic, a mason jar salad will keep you energized and satisfied throughout the day.
Ingredients:
- 1/4 cup dressing of choice
- 1/2 cup cherry tomatoes, halved
- 1/2 cup cucumber, diced
- 1/2 cup bell peppers, diced
- 1/2 cup cooked quinoa or brown rice
- 1/2 cup chickpeas or black beans, drained and rinsed
- 1 cup spinach or mixed greens
- Salt and pepper to taste
- Feta cheese or avocado (optional)
Instructions:
To prepare your mason jar salad, start by pouring the dressing into the bottom of a clean mason jar.
Next, layer the cherry tomatoes, cucumbers, bell peppers, cooked quinoa or brown rice, and chickpeas or black beans in that order, packing each layer gently to guarantee they fit snugly.
Finally, add the spinach or mixed greens on top, leaving a bit of space at the top of the jar to prevent squishing. Seal the jar tightly with a lid and store it in the refrigerator until you’re ready to eat.
Extra Tips:
For the best results, choose sturdy vegetables like bell peppers and cucumbers that won’t get mushy when layered.
If you’re incorporating softer ingredients like avocado or feta cheese, consider placing them in the jar right before eating to keep them fresh.
Additionally, try to use a wide-mouth mason jar for easier access to your salad, and don’t hesitate to shake the jar before serving to mix the dressing evenly throughout the salad.
Enjoy your nutritious and colorful meal!
Peanut Butter Banana Roll-Ups

Peanut Butter Banana Roll-Ups are a delightful and nutritious option for a healthy lunchbox. This simple yet satisfying recipe combines the rich creaminess of peanut butter with the natural sweetness of bananas, all wrapped up in a soft tortilla. It’s perfect for kids and adults alike, making it a versatile choice for anyone looking to add some fun to their lunch routine.
Plus, it takes just a few minutes to prepare, making it an ideal option for busy days. To elevate the flavor, you can customize the roll-ups by adding a sprinkle of cinnamon or a drizzle of honey. These roll-ups aren’t only delicious but also packed with protein and healthy fats from the peanut butter, along with essential vitamins and minerals from the bananas.
Whether you enjoy them as a snack or part of a meal, Peanut Butter Banana Roll-Ups are sure to be a hit!
Ingredients:
- 1 large tortilla (whole wheat or regular)
- 2 tablespoons peanut butter (or any nut butter of choice)
- 1 medium banana
- Honey (optional)
- Cinnamon (optional)
Instructions:
Spread the peanut butter evenly over the tortilla, leaving a small border around the edges. Place the banana at one end of the tortilla and gently roll it up tightly, ensuring the banana is wrapped snugly in the peanut butter-covered tortilla.
If desired, drizzle a little honey and sprinkle some cinnamon on top before rolling. Slice the roll-up into bite-sized pieces and serve.
Extra Tips:
For a fun variation, try using different fruits like strawberries or apples instead of bananas. You can also use flavored nut butters, such as almond or cashew, for a different taste experience.
To make the roll-ups even more nutritious, consider adding some chia seeds or granola inside for added texture and crunch. These roll-ups can be made ahead of time and stored in the refrigerator, making them a convenient option for meal prep!
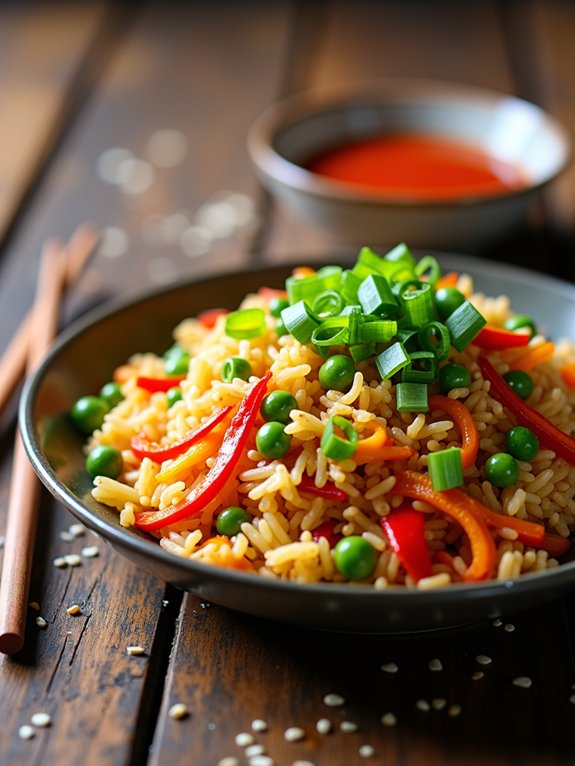
Veggie Fried Rice
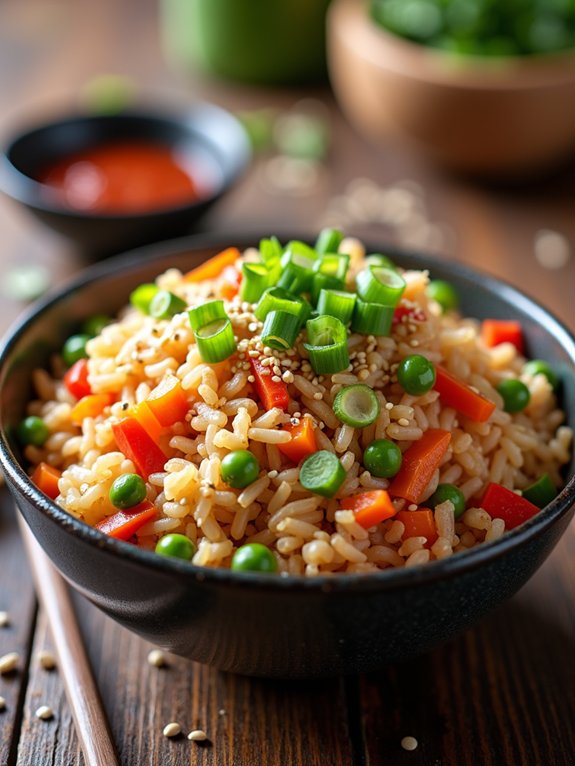
Veggie fried rice is a delicious and versatile dish that can be enjoyed as a main course or a side. It’s a great way to use up leftover rice and incorporate a variety of vegetables, making it a perfect option for a healthy lunchbox. Packed with flavor and nutrients, this dish can be customized to suit your taste preferences, whether you prefer a bit of spice or a milder flavor.
Plus, it can be made in under 30 minutes, making it a quick and easy meal for busy days.
To make veggie fried rice, you’ll need cooked rice, which is best if it’s been chilled in the refrigerator for a few hours or overnight. This helps to prevent the rice from becoming mushy during cooking. You can mix and match your favorite vegetables, such as carrots, peas, bell peppers, and green onions, and even add some protein like tofu, eggs, or chicken if desired. The combination of ingredients and the savory sauce is what makes this dish so tasty.
Ingredients:
- 2 cups cooked rice (preferably chilled)
- 1 cup mixed vegetables (carrots, peas, bell peppers, etc.)
- 2 tablespoons soy sauce
- 1 tablespoon sesame oil
- 1 tablespoon vegetable oil
- 2 green onions, chopped
- 2 cloves garlic, minced
- 1 teaspoon ginger, minced
- Salt and pepper to taste
- Optional: 1 egg or tofu for added protein
Cooking Instructions:
In a large skillet or wok, heat the vegetable oil over medium-high heat. Add the minced garlic and ginger, sautéing for about 30 seconds until fragrant.
Stir in the mixed vegetables and cook for 3-4 minutes until they’re tender. Push the vegetables to one side of the skillet, crack the egg (if using) into the other side, and scramble it until fully cooked.
Add the chilled rice, soy sauce, sesame oil, and green onions, mixing everything together thoroughly. Cook for an additional 3-5 minutes, stirring occasionally, until the rice is heated through and slightly crispy. Season with salt and pepper to taste.
Extra Tips:
For the best results, use day-old rice that has been refrigerated, as it helps keep the grains separate and prevents clumping.
Feel free to experiment with different vegetables and proteins based on what you have on hand. You can also add a sprinkle of sesame seeds or a drizzle of sriracha for extra flavor and garnish.


