
Have you ever wondered how to satisfy your snack cravings without gluten? Finding easy, delicious options can be a challenge. Luckily, there are plenty of gluten-free snacks that are not only simple to prepare but also packed with flavor and nutrition. From fresh fruit paired with nut butter to crunchy baked sweet potato fries, these snacks can fit any occasion. Let’s explore some tasty choices that could transform your snacking routine.
Fresh Fruit and Nut Butter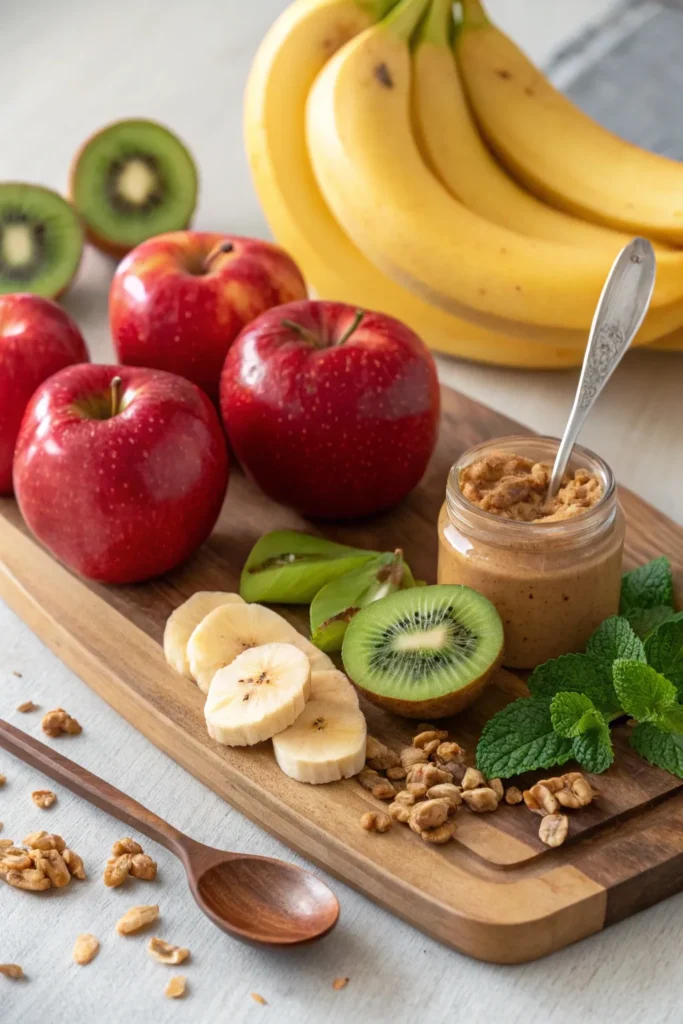
Fresh fruit and nut butter is a simple yet delicious gluten-free snack that combines the natural sweetness of fruit with the rich, creamy texture of nut butter. This wholesome treat isn’t only nutritious but also incredibly versatile, allowing you to use your favorite fruits and nut butters.
Whether you’re looking for a quick pick-me-up during the day or a satisfying addition to your breakfast, this snack can be tailored to suit your taste preferences.
To make fresh fruit and nut butter even more enjoyable, consider adding toppings like honey, cinnamon, or chia seeds for an extra layer of flavor and texture. This recipe is perfect for anyone who follows a gluten-free diet or simply wants to indulge in a healthy snack.
With just a few minutes of preparation, you can enjoy a delightful combination that nourishes both body and soul.
Ingredients:
- 1 apple, pear, or banana
- 2 tablespoons of almond butter, peanut butter, or cashew butter
- Optional toppings: honey, cinnamon, chia seeds, or shredded coconut
Cooking Instructions:
Start by washing and slicing the fruit of your choice into manageable pieces, guaranteeing they’re bite-sized for easy dipping.
Place the nut butter in a small bowl or directly on a plate, and arrange the sliced fruit around it. If desired, sprinkle your chosen toppings over the nut butter or fruit slices to enhance the flavor and visual appeal. Enjoy immediately for a revitalizing and satisfying snack.
Extra Tips:
When selecting your fruit, aim for ripe yet firm options to confirm they hold up well against the nut butter.
Experiment with different combinations of fruits and nut butters to discover your favorite pairings. Additionally, consider preparing a batch of sliced fruit ahead of time to have on hand for quick snacks during the week. Just be sure to store them in an airtight container to maintain freshness!
Veggie Sticks With Hummus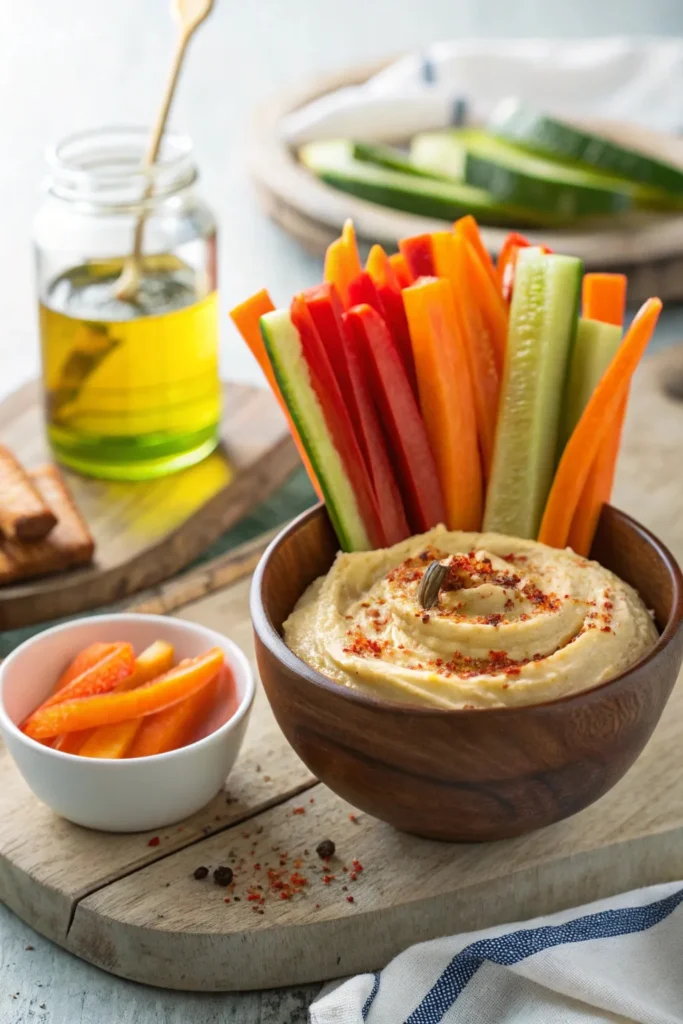
Veggie sticks with hummus make for a delightful and nutritious gluten-free snack that’s perfect for any time of the day. Not only are they invigorating and crunchy, but they’re also packed with vitamins and minerals. Pairing fresh vegetables with creamy hummus creates a satisfying combination that will keep you energized and full. This snack isn’t only easy to prepare but also beautifully colorful, making it an appealing option for both kids and adults.
To prepare veggie sticks with hummus, you can choose a variety of vegetables to suit your taste. Carrots, cucumbers, bell peppers, and celery are popular choices, but feel free to get creative with your selections. Hummus can be store-bought or homemade, allowing you to customize the flavors to match your preferences, whether you prefer classic garlic hummus, roasted red pepper, or spicy variations. This dish is ideal for parties, lunchboxes, or simply as a healthy snack at home.
Ingredients:
- Carrots
- Cucumbers
- Bell peppers (red, yellow, green)
- Celery
- Hummus (store-bought or homemade)
- Olive oil (optional)
- Lemon juice (optional)
- Salt and pepper (to taste)
To make veggie sticks with hummus, begin by washing and peeling the carrots if desired. Cut the vegetables into long, thin sticks, ensuring they’re of similar size for easy dipping. Arrange the veggie sticks on a platter or in a container, and serve them alongside a bowl of hummus. You can drizzle a little olive oil and lemon juice on the hummus for added flavor, and sprinkle with salt and pepper if desired.
When preparing your veggie sticks and hummus, keep in mind that freshness is key. Use crisp, vibrant vegetables for the best taste and texture. If you want to make your hummus from scratch, consider blending canned chickpeas, tahini, garlic, lemon juice, and olive oil until smooth. Additionally, you can add spices like cumin or paprika for a unique twist.
Store any leftovers in an airtight container in the refrigerator to maintain their freshness. Enjoy this guilt-free snack that’s both satisfying and nutritious!
Greek Yogurt Parfait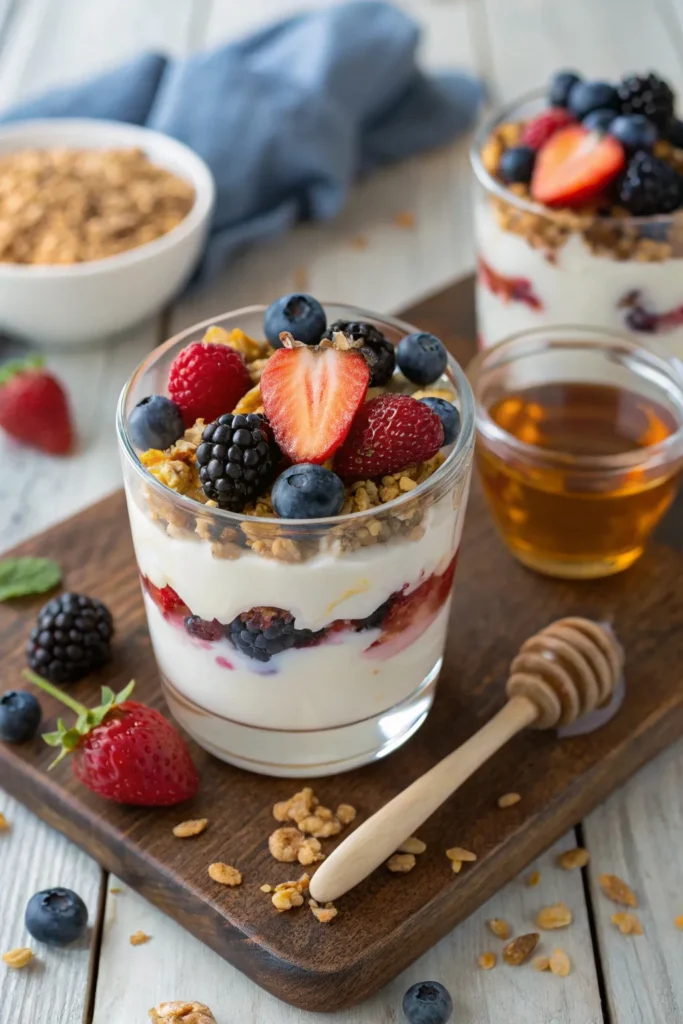
A Greek yogurt parfait is a delicious and nutritious snack that’s perfect for any time of the day. This easy-to-make dish combines creamy Greek yogurt with layers of fresh fruits, crunchy granola, and a drizzle of honey. Not only is it gluten-free, but it also provides a wonderful balance of protein, healthy fats, and carbohydrates, making it an ideal choice for a quick breakfast or an afternoon pick-me-up.
This delightful parfait is highly customizable, allowing you to mix and match your favorite fruits and toppings. Whether you prefer berries, bananas, or stone fruits, the combination of flavors and textures will make each bite a delightful experience.
Additionally, you can prepare these parfaits in advance for meal prep or serve them at gatherings to impress your guests with a healthy dessert option.
Ingredients:
- 2 cups Greek yogurt (plain or flavored)
- 1 cup granola (gluten-free)
- 1 cup mixed fresh fruits (e.g., strawberries, blueberries, bananas)
- 2 tablespoons honey or maple syrup
- 1 teaspoon vanilla extract (optional)
- Chopped nuts or seeds (optional, for topping)
Instructions:
In a clear glass or bowl, start by adding a layer of Greek yogurt at the bottom, followed by a layer of granola, then a layer of mixed fresh fruits.
Repeat the layers until you reach the top of the glass, finishing off with a final layer of yogurt. Drizzle honey or maple syrup on top, sprinkle with nuts or seeds if desired, and enjoy your delicious and healthy Greek yogurt parfait!
Extra Tips:
For the best flavor and texture, use full-fat Greek yogurt, which will give your parfait a creamier consistency.
You can also experiment with different flavor combinations by adding spices like cinnamon or nutmeg to the yogurt. If you want to make the parfait ahead of time, consider storing the granola separately to maintain its crunchiness until you’re ready to enjoy your snack.
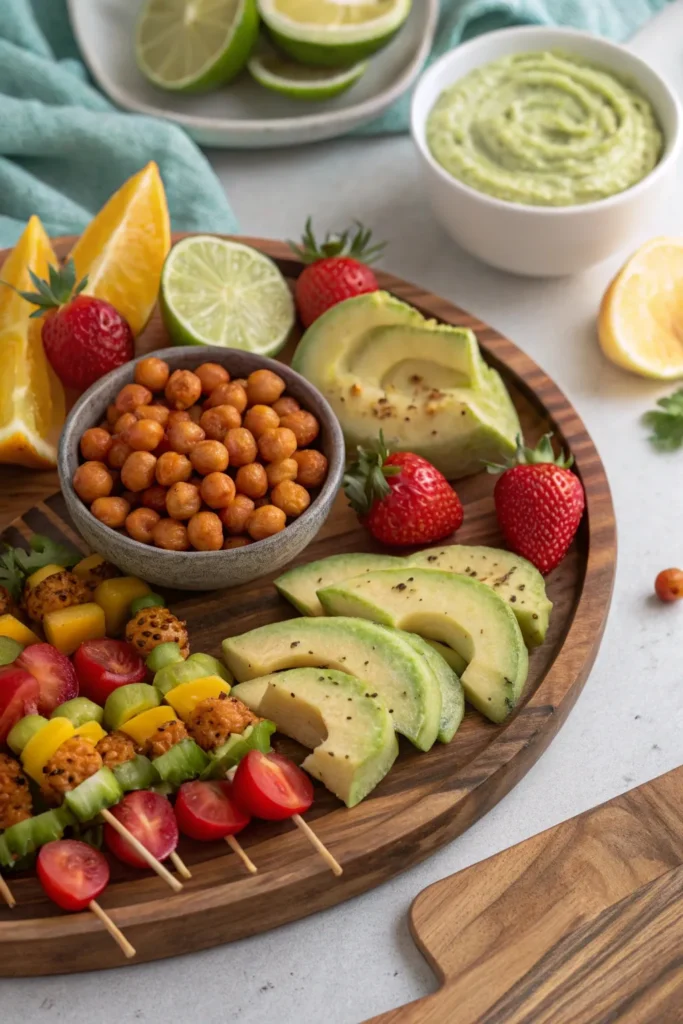
Rice Cakes With Avocado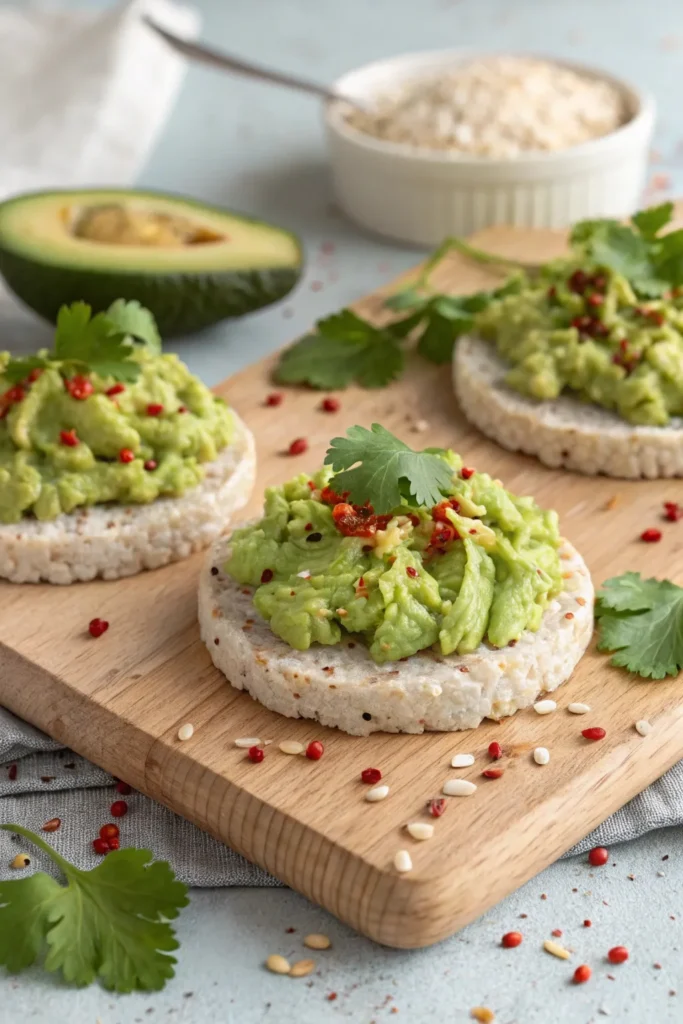
Rice cakes topped with avocado are a delicious and nutritious gluten-free snack that can be enjoyed any time of the day. They aren’t only quick to prepare but also incredibly versatile. You can customize them with various toppings or seasonings to suit your taste.
Whether you’re looking for a light breakfast, a midday snack, or a post-workout treat, rice cakes with avocado are a fantastic option.
Avocado is packed with healthy fats, vitamins, and minerals, making it a perfect companion for the crunchy texture of rice cakes. To elevate the dish, consider adding ingredients like cherry tomatoes, radishes, or a sprinkle of seeds to enhance both flavor and presentation.
With a few simple steps, you can create a satisfying and wholesome snack that’s sure to please.
Ingredients:
- 2 rice cakes
- 1 ripe avocado
- Salt, to taste
- Pepper, to taste
- Optional toppings: cherry tomatoes, radish slices, sesame seeds, lemon juice, or red pepper flakes
Instructions:
Start by toasting the rice cakes lightly until they’re crisp, if desired.
While the rice cakes are toasting, cut the avocado in half, remove the pit, and scoop the flesh into a bowl. Mash the avocado with a fork until it reaches your preferred consistency. Season it with salt and pepper, and mix in any optional ingredients you like.
Once the rice cakes are ready, spread the mashed avocado generously on top of each cake and add any additional toppings you prefer.
Extra Tips:
For added flavor, try drizzling a little lemon juice over the avocado to prevent browning and enhance freshness.
If you want a spicy kick, sprinkle some red pepper flakes on top. You can also experiment with different types of rice cakes, such as brown rice or flavored varieties, to find your favorite combination.
Enjoy your healthy gluten-free snack!
Trail Mix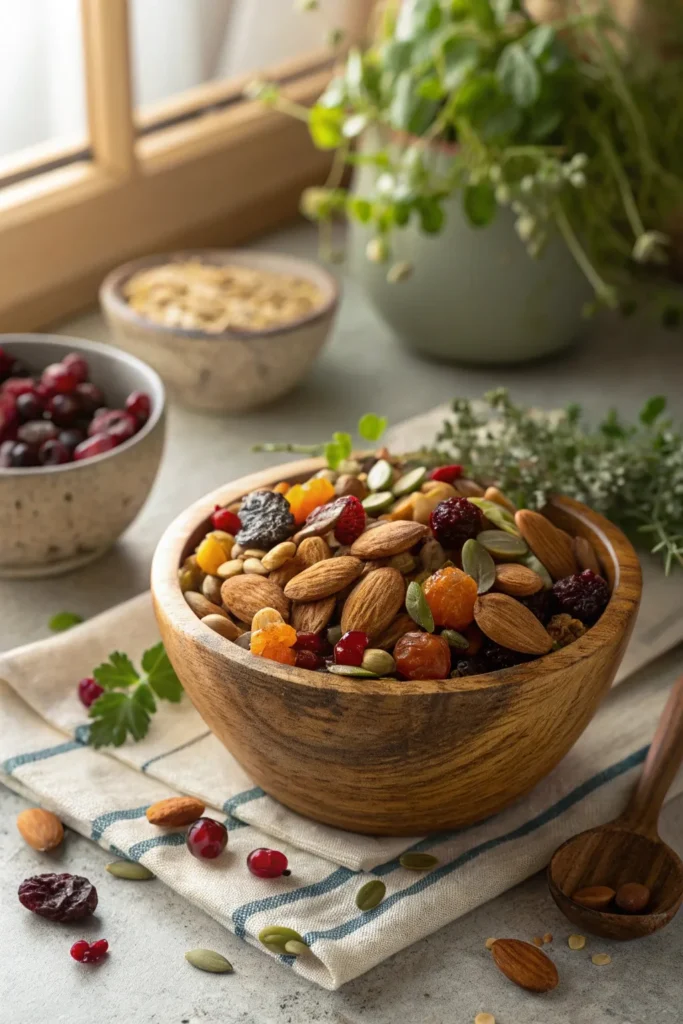
Trail mix is a versatile and nutritious snack that can be tailored to suit your taste preferences and dietary needs. Perfect for on-the-go munching, it combines a variety of ingredients for a delightful mix of flavors and textures. Gluten-free trail mix allows you to enjoy a delicious snack without worrying about gluten, making it an ideal choice for people with gluten sensitivities or celiac disease.
Creating your own gluten-free trail mix isn’t only simple but also allows you to customize it to your liking. You can include your favorite nuts, seeds, dried fruits, and even some gluten-free chocolate for a touch of sweetness. This recipe will guide you through the process of making a delicious gluten-free trail mix that you can enjoy anytime, whether you’re hiking, at work, or simply relaxing at home.
Ingredients:
- 1 cup mixed nuts (almonds, cashews, walnuts)
- 1 cup seeds (pumpkin seeds, sunflower seeds)
- 1 cup dried fruit (raisins, cranberries, apricots)
- 1/2 cup gluten-free chocolate chips or yogurt-covered raisins (optional)
- 1 teaspoon cinnamon (optional)
- 1 tablespoon honey or maple syrup (optional for sweetness)
Instructions:
In a large mixing bowl, combine all of the ingredients, ensuring that the nuts, seeds, and dried fruits are evenly distributed.
If you choose to add cinnamon and honey or maple syrup, drizzle it over the mixture and toss well until everything is coated and mixed thoroughly.
Once combined, transfer the trail mix to an airtight container for storage or enjoy it immediately as a nutritious snack.
Extra Tips:
Feel free to experiment with different ingredients to make your trail mix unique! You can add gluten-free pretzels, coconut flakes, or even gluten-free granola for added crunch.
Store your trail mix in a cool, dry place to maintain its freshness, and consider portioning it into small bags for easy grab-and-go snacks.
Popcorn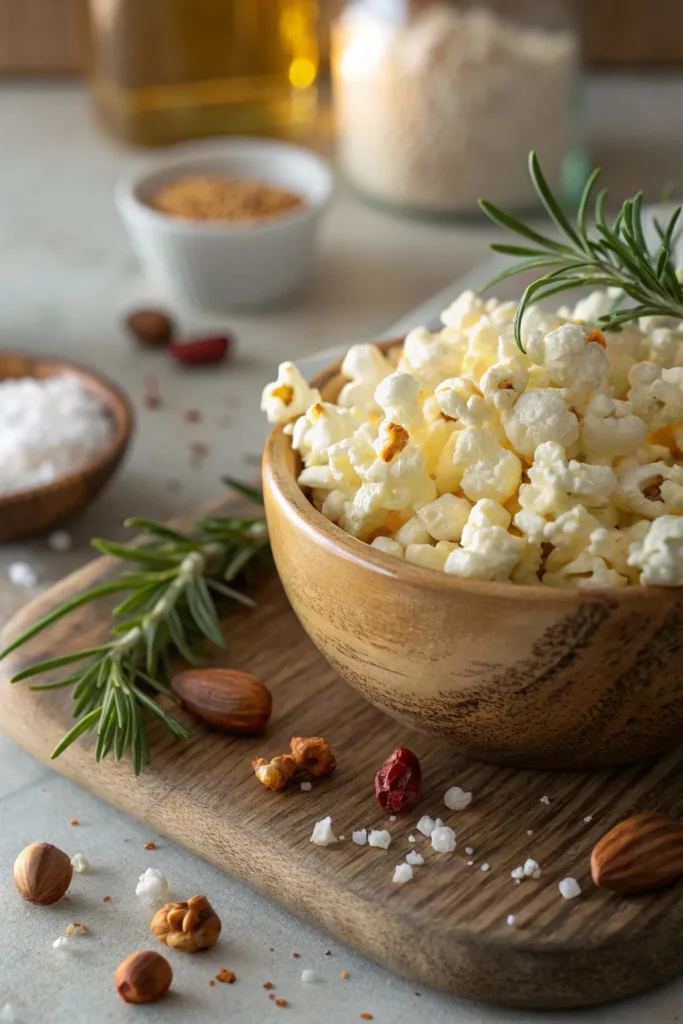
Popcorn is one of the most versatile and beloved snacks around, and the best part is that it’s naturally gluten-free! Whether you’re watching a movie, hosting a game night, or simply craving a light snack, homemade popcorn can be a perfect choice.
With just a few ingredients and a few minutes of your time, you can enjoy delicious, fluffy popcorn that you can customize to your taste preferences.
To make popcorn at home, all you need is some popcorn kernels and a heating method of your choice. While you can use an air popper, stovetop method, or even a microwave, this recipe focuses on the stovetop method, which gives you greater control over the cooking process.
Plus, it allows you to add your favorite seasonings right as the popcorn pops, ensuring that each bite is packed with flavor.
Ingredients
- 1/2 cup popcorn kernels
- 3 tablespoons vegetable oil (or coconut oil)
- Salt to taste
- Optional toppings: melted butter, nutritional yeast, or your favorite seasonings
Cooking Instructions
In a large pot, heat the vegetable oil over medium-high heat. Add a few popcorn kernels to the pot and cover it with a lid.
Once the kernels pop, you’ll know the oil is hot enough. Remove the test kernels and add the rest of the popcorn kernels to the pot, spreading them evenly.
Cover the pot with a lid, leaving it slightly ajar to allow steam to escape. Shake the pot occasionally to prevent burning, and continue cooking until the popping slows down to about 2-3 seconds between pops.
Once done, remove from heat, carefully pour the popcorn into a large bowl, and season with salt and any additional toppings you desire.
Extra Tips
For an extra crunch and flavor, consider experimenting with different toppings like garlic powder, paprika, or even a sprinkle of cheese powder.
If you prefer a healthier option, skip the butter and drizzle a bit of olive oil or sprinkle nutritional yeast for a cheesy flavor without the dairy.
Always store any leftover popcorn in an airtight container to keep it fresh and crispy for your next snack time!
Cheese and Gluten-Free Crackers
Cheese and gluten-free crackers make for an irresistible snack that’s both satisfying and healthy. This delicious combination is perfect for parties, movie nights, or even a quick bite during the day. With the rise of gluten-free diets, finding the right crackers that pair well with your favorite cheeses is essential. Thankfully, making your own gluten-free crackers isn’t only simple but also allows you to customize the flavors to your liking.
In this recipe, we’ll guide you through creating crispy, flavorful gluten-free crackers that complement a wide variety of cheeses. Whether you prefer sharp cheddar, creamy brie, or tangy goat cheese, these crackers will enhance the overall tasting experience. So, roll up your sleeves and get ready to whip up a delightful treat that everyone can enjoy!
Ingredients
- 1 cup gluten-free all-purpose flour
- 1/2 cup grated parmesan cheese
- 1/4 teaspoon garlic powder
- 1/4 teaspoon onion powder
- 1/2 teaspoon salt
- 3 tablespoons olive oil
- 1/4 cup cold water
- Optional: herbs (like rosemary or thyme) for additional flavor
Instructions
In a mixing bowl, combine the gluten-free flour, parmesan cheese, garlic powder, onion powder, and salt. Add the olive oil and mix until crumbly.
Gradually pour in the cold water, mixing until a dough forms. Roll the dough out on a parchment-lined baking sheet to your desired thickness, then use a pizza cutter or knife to score into squares.
Bake at 350°F (175°C) for 15-20 minutes, or until golden brown and crispy, turning halfway through for even cooking.
Extra Tips
For added flavor, consider experimenting with different cheeses in the dough or sprinkling additional herbs and spices on top before baking.
You can also adjust the thickness of the crackers based on your preference; thinner crackers will be crispier, while thicker ones will be chewier.
Finally, store any leftovers in an airtight container to maintain their crunch. Enjoy your homemade gluten-free crackers with an array of cheese options for a fantastic snack experience!
Hard-Boiled Eggs
Hard-boiled eggs are a simple yet versatile snack that can fit seamlessly into a gluten-free diet. They’re packed with protein, making them a great option for a quick energy boost, whether you’re at home, at work, or on the go.
Plus, they can be enjoyed plain, seasoned, or used as a key ingredient in a variety of dishes. This classic preparation method allows you to achieve perfectly cooked eggs every time, ensuring a creamy yolk and a firm white.
Cooking hard-boiled eggs is incredibly easy, and requires minimal ingredients, making it a perfect snack for anyone looking to maintain a healthy lifestyle. Whether you’re preparing them for breakfast, a picnic, or meal prep for the week, you can customize your hard-boiled eggs with various dips and toppings to suit your taste.
So, let’s get started on this straightforward recipe for hard-boiled eggs!
Ingredients:
- Eggs
- Water
- Ice (for ice bath)
Cooking Instructions:
To cook hard-boiled eggs, start by placing the eggs in a saucepan and covering them with cold water, ensuring that there’s about an inch of water above the eggs.
Bring the water to a rolling boil over medium-high heat. Once boiling, remove the pan from heat, cover it with a lid, and let the eggs sit for 9 to 12 minutes, depending on your preferred level of doneness.
After the time is up, carefully transfer the eggs to an ice bath (a bowl filled with ice and water) to stop the cooking process. Leave them in the ice bath for about 5 to 10 minutes before peeling.
Extra Tips:
For easier peeling, you might want to use slightly older eggs rather than fresh ones, as they tend to peel more easily.
Additionally, adding a teaspoon of baking soda to the water can help with the peeling process. If you’re planning to store your hard-boiled eggs, keep them in their shells in the refrigerator for up to one week for maximum freshness.
Experiment with different seasonings or dips like salt, pepper, or a sprinkle of paprika to enhance the flavor of your hard-boiled eggs!
Chocolate-Covered Almonds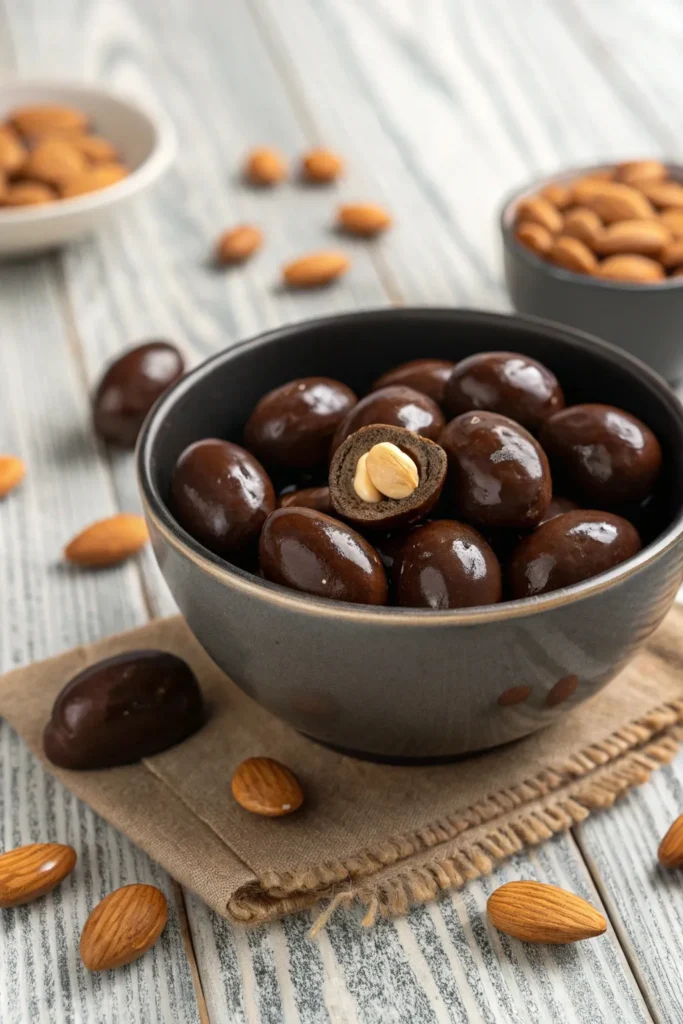
Chocolate-covered almonds are a delightful and healthful treat that satisfies your sweet tooth while offering the benefits of nuts. They combine the rich, smooth flavor of chocolate with the crunchy, satisfying texture of almonds, making them an irresistible snack. Additionally, they’re gluten-free, making them perfect for those with dietary restrictions or anyone looking to indulge in a guilt-free dessert.
Preparing chocolate-covered almonds at home is simple and allows you to customize the flavor to your liking. You can use dark, milk, or white chocolate depending on your preferences, and you can even add toppings such as sea salt or crushed nuts for an extra crunch. These treats are perfect for snacking, gifting, or even as a topping for your favorite desserts.
Ingredients:
- 1 cup raw almonds
- 1 cup chocolate chips (dark, milk, or white)
- 1 tablespoon coconut oil (optional)
- Sea salt (optional, for garnish)
Cooking Instructions:
Start by preheating your oven to 350°F (175°C) and spread the raw almonds on a baking sheet. Toast them in the oven for about 10 minutes, or until they’re lightly golden and fragrant.
While the almonds are cooling, melt the chocolate chips and coconut oil together in a microwave-safe bowl in 30-second intervals, stirring in between, until smooth. Once the almonds have cooled, dip each almond into the melted chocolate, allowing any excess to drip off before placing them on a parchment-lined baking sheet.
If desired, sprinkle a pinch of sea salt on top before the chocolate sets. Refrigerate the almonds until the chocolate hardens, about 30 minutes.
Extra Tips:
For a fun twist, consider adding a dash of flavor to your chocolate by mixing in a teaspoon of vanilla extract or a pinch of cinnamon before dipping the almonds.
You can also experiment with different types of chocolate or even try adding toppings like crushed pretzels or coconut flakes after dipping. Store your chocolate-covered almonds in an airtight container in the refrigerator to keep them fresh and crunchy. Enjoy your homemade treat!
Smoothie Bowls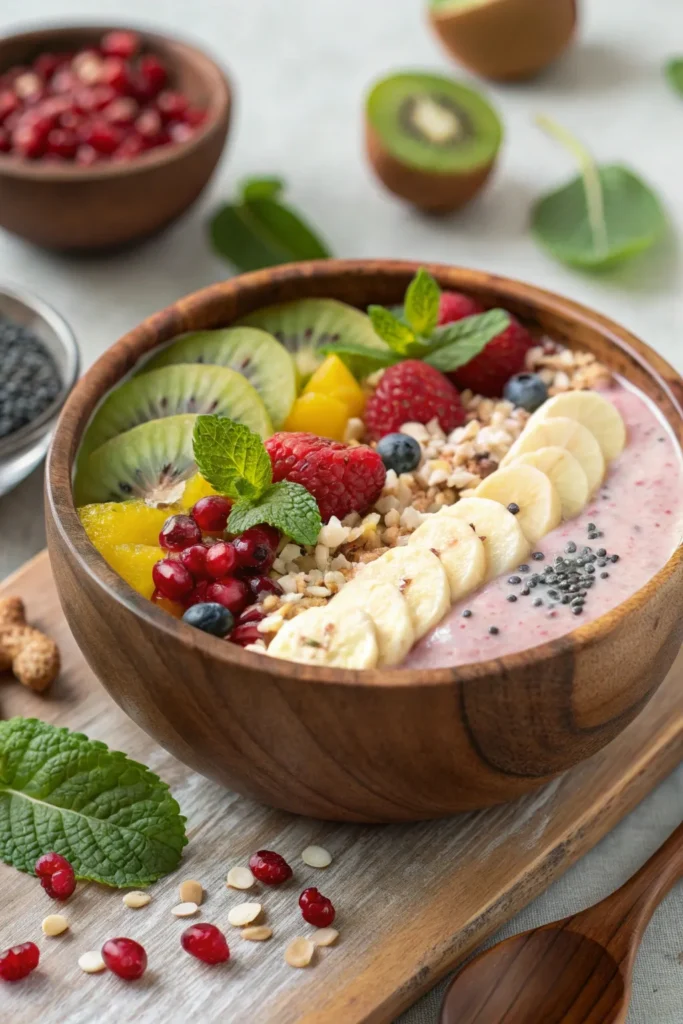
Smoothie bowls are a delicious and nutritious way to start your day or enjoy a revitalizing snack. They’re versatile and can be customized to suit your taste preferences and dietary needs, making them an excellent gluten-free option.
By blending your favorite fruits and vegetables into a creamy base, then topping it with a variety of crunchy and colorful toppings, you can create a visually appealing and satisfying meal.
To make a smoothie bowl, you’ll want to focus on balancing flavors and textures. The key to a great smoothie bowl lies in achieving the perfect creamy consistency, which can be accomplished by using frozen fruits and a splash of your choice of milk or yogurt.
From there, the options for toppings are endless—think granola, nuts, seeds, fresh fruit, and even nut butter. This allows you to pack in extra nutrients while keeping the dish gluten-free.
Ingredients:
- 1 cup frozen banana slices
- 1/2 cup frozen berries (strawberries, blueberries, or mixed)
- 1/2 cup almond milk (or any non-dairy milk)
- 1 tablespoon chia seeds
- 1 tablespoon almond butter (optional)
- Toppings: granola, sliced fresh fruit, nuts, seeds, coconut flakes
Instructions:
In a blender, combine the frozen banana slices, frozen berries, almond milk, chia seeds, and almond butter (if using). Blend until smooth and creamy, scraping down the sides as needed to confirm everything is well combined.
Pour the mixture into a bowl and use a spoon to create a swirl effect if desired.
Extra Tips:
For added nutrition, consider incorporating spinach or kale into your smoothie base, as they blend well and are nearly undetectable in flavor.
Experiment with different combinations of fruits and toppings to keep your smoothie bowl exciting and varied. Additionally, using a high-speed blender will help achieve that ultra-smooth texture that makes smoothie bowls so enjoyable.
Nut Energy Balls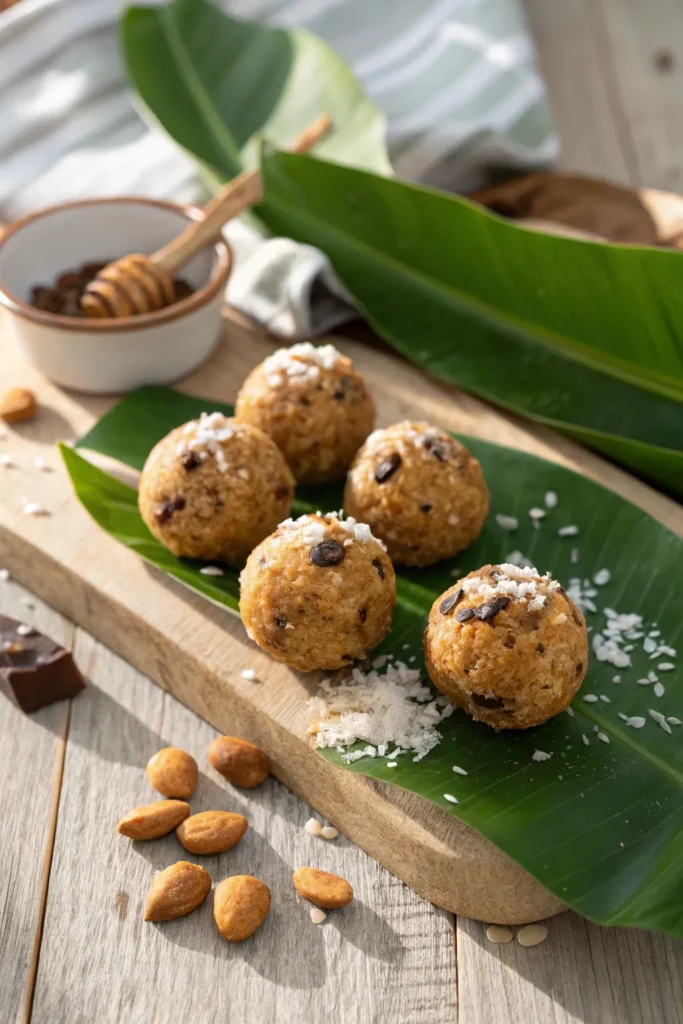
Nut energy balls are a delicious and nutritious snack that are perfect for those on a gluten-free diet. Packed with healthy fats, protein, and fiber, these bite-sized treats aren’t only satisfying but also provide a quick energy boost for busy days.
They’re incredibly versatile and can be customized with your favorite nuts, seeds, and flavorings, making them an ideal option for any palate. Making nut energy balls is quick and easy, requiring no baking, which means you can whip them up in no time.
These delightful snacks also store well in the fridge or freezer, making them a convenient choice for meal prep. Whether you need a post-workout snack or a midday pick-me-up, these nut energy balls will keep you fueled and satisfied.
Ingredients:
- 1 cup mixed nuts (almonds, walnuts, cashews, etc.)
- 1 cup rolled oats (gluten-free)
- 1/2 cup nut butter (almond butter, peanut butter, etc.)
- 1/4 cup honey or maple syrup
- 1/4 cup mini chocolate chips or dried fruit (optional)
- 1 teaspoon vanilla extract
- A pinch of salt
Instructions:
In a food processor, combine the mixed nuts and rolled oats, and pulse until finely chopped. Add the nut butter, honey or maple syrup, chocolate chips or dried fruit (if using), vanilla extract, and salt.
Process until the mixture is well combined and holds together when pressed. Scoop out tablespoon-sized portions and roll them into balls. Place the energy balls on a lined baking sheet and refrigerate for at least 30 minutes to firm up before enjoying.
Extra Tips:
Feel free to experiment with different combinations of nuts, seeds, and add-ins to create your perfect energy ball. You can also roll them in unsweetened coconut or chia seeds for an added texture and flavor.
If the mixture seems too dry, add a splash of water or more nut butter to help bind it together. Store the energy balls in an airtight container in the fridge for up to a week, or freeze them for longer shelf life. Enjoy!
Baked Sweet Potato Fries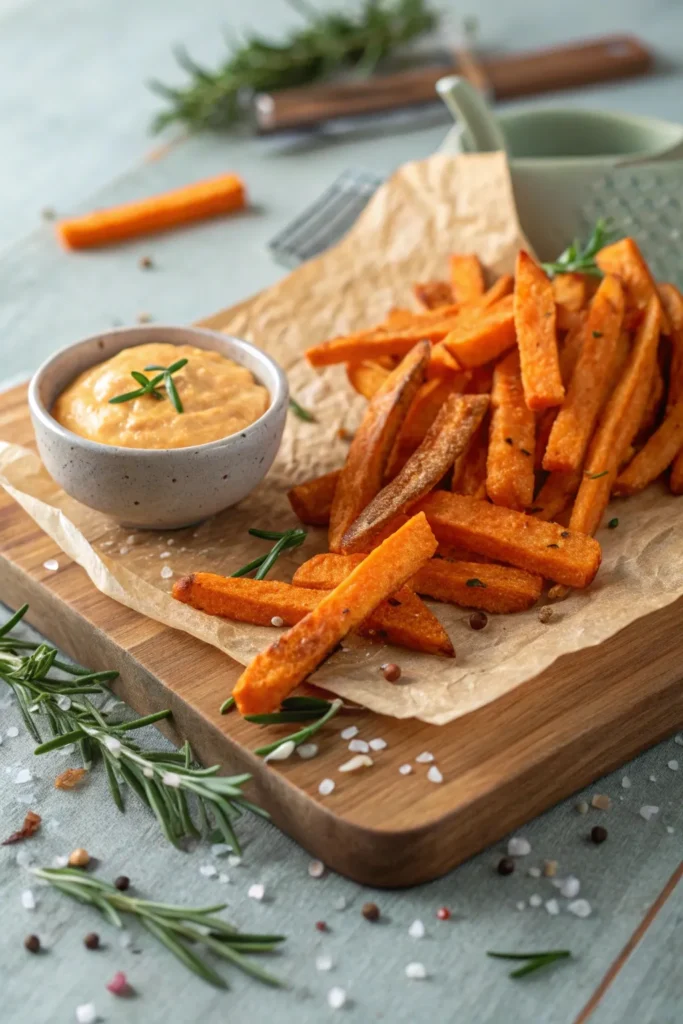
Baked sweet potato fries are a delicious and healthy alternative to traditional fries, making them the perfect gluten-free snack. Their natural sweetness, combined with a crispy texture and savory seasonings, makes them a favorite for both kids and adults.
Plus, sweet potatoes are packed with vitamins, minerals, and antioxidants, which add to their nutritional value.
Making baked sweet potato fries is incredibly simple and can be done in about 30 minutes. Whether you’re looking for a side dish to complement your meal or a quick snack to satisfy your cravings, these fries are sure to please.
With just a few ingredients and a little bit of time, you can whip up a batch of these tasty treats that everyone will love.
Ingredients:
- 2 large sweet potatoes
- 2 tablespoons olive oil
- 1 teaspoon paprika
- 1 teaspoon garlic powder
- 1/2 teaspoon salt
- 1/2 teaspoon black pepper
- Optional: fresh herbs for garnish (like parsley or cilantro)
Cooking Instructions:
Preheat your oven to 425°F (220°C) and line a baking sheet with parchment paper.
Peel the sweet potatoes and cut them into thin fries, about 1/4 inch thick. In a large bowl, toss the sweet potato fries with olive oil, paprika, garlic powder, salt, and black pepper until evenly coated.
Spread the fries in a single layer on the prepared baking sheet and bake for 20-25 minutes, flipping them halfway through, until they’re golden brown and crispy.
Extra Tips:
For extra crispy fries, make sure to give the sweet potatoes enough space on the baking sheet; overcrowding can cause them to steam instead of bake.
You can also experiment with different seasonings like cayenne pepper for a spicy kick or cinnamon for a sweet twist.
If you want to make them even healthier, consider using an air fryer for a quicker cooking time and less oil.
Enjoy your baked sweet potato fries with your favorite dipping sauce!
Gluten-Free Granola Bars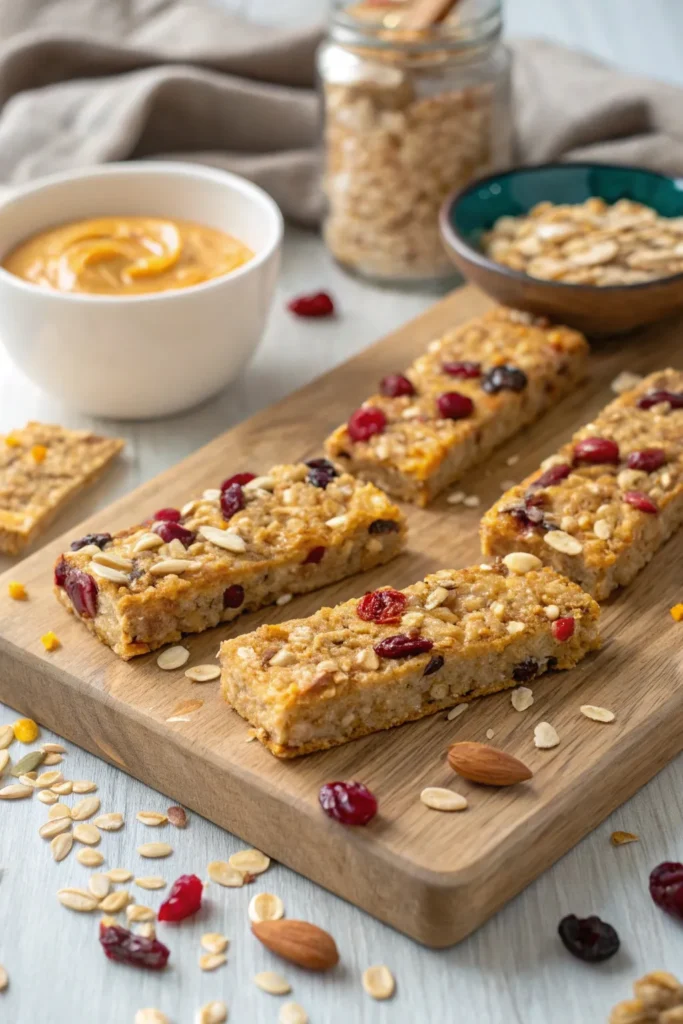
Gluten-free granola bars are a fantastic and nutritious snack option that can be enjoyed by everyone, regardless of dietary restrictions. They aren’t only easy to make but also customizable to suit your taste preferences or what you have on hand. Packed with wholesome ingredients, these bars provide a perfect balance of energy and satisfaction, making them ideal for on-the-go snacking, lunchboxes, or even a healthy dessert.
Making your own gluten-free granola bars allows you to control the ingredients and avoid any preservatives or additives often found in store-bought varieties. You can mix and match your favorite nuts, seeds, and dried fruits to create a unique flavor profile that you and your family will love. Plus, these bars can be easily stored for a week or two, so you can always have a delicious snack ready when cravings strike.
Ingredients:
- 2 cups gluten-free rolled oats
- 1 cup almond butter (or any nut/seed butter)
- 1/4 cup honey or maple syrup
- 1/2 cup chopped nuts (almonds, walnuts, pecans)
- 1/2 cup dried fruit (raisins, cranberries, apricots)
- 1/4 cup mini chocolate chips (optional)
- 1/2 teaspoon vanilla extract
- 1/4 teaspoon salt
To prepare the granola bars, start by preheating your oven to 350°F (175°C) and lining an 8×8 inch baking dish with parchment paper. In a large mixing bowl, combine the gluten-free rolled oats, chopped nuts, dried fruit, and salt.
In a separate bowl, mix together the almond butter, honey (or maple syrup), and vanilla extract until well-combined. Pour the wet mixture into the dry ingredients and stir until everything is fully coated. Press the mixture firmly into the prepared baking dish and bake for 20-25 minutes, or until the edges are golden brown.
Allow the bars to cool completely before cutting them into squares or rectangles.
When making gluten-free granola bars, feel free to get creative! You can substitute different nut butters, use a variety of nuts and seeds, or add spices like cinnamon or nutmeg for extra flavor. If you prefer a crunchier texture, consider adding puffed rice or quinoa.
Make sure to store your bars in an airtight container to maintain freshness, and they can be kept in the refrigerator for an even longer shelf life. Enjoy your homemade snack with confidence, knowing it’s tailored to your preferences!
Cucumber Sandwiches
Cucumber sandwiches are a revitalizing and light snack that are perfect for any occasion, whether it be an afternoon tea, a picnic, or just a simple treat at home.
These sandwiches aren’t only gluten-free but also incredibly easy to make. With crisp cucumbers and a creamy spread, they offer a delightful crunch paired with smooth textures, making them a favorite among all age groups.
To prepare these sandwiches, you can use gluten-free bread or even opt for cucumber slices as the base for a low-carb alternative. The filling can be customized by adding herbs, spices, or even a hint of lemon for an extra zing. This versatile snack can be served as an appetizer or a light meal, ensuring everyone can enjoy a gluten-free option without sacrificing flavor.
Ingredients:
- 4 slices of gluten-free bread
- 1 medium cucumber
- 4 oz cream cheese (or dairy-free alternative)
- 1 tablespoon fresh dill, chopped (or your favorite herb)
- Salt and pepper to taste
- Optional: lemon zest for added flavor
Cooking Instructions:
Start by spreading a layer of cream cheese on each slice of gluten-free bread. In a small bowl, mix together the cream cheese, chopped dill, salt, and pepper until well combined.
Thinly slice the cucumber and layer the slices evenly on two of the bread slices. Top with the remaining slices of bread to form sandwiches, then cut them into halves or quarters for serving.
Extra Tips:
For an added touch, consider toasting the gluten-free bread lightly before assembling the sandwiches; this enhances the flavor and adds a delightful crunch.
You can also experiment with different spreads such as hummus or avocado for a twist. If you prepare these sandwiches in advance, store them in an airtight container to prevent the bread from becoming soggy, and enjoy them fresh!


