

[wprm-recipe-snippet]Imagine a vibrant plate filled with zesty lemon herb roasted salmon beside a hearty sweet potato and bacon hash. These dishes not only satisfy your taste buds but also align perfectly with a clean eating lifestyle. If you’re looking to embrace wholesome ingredients without compromising flavor, you’re in the right place. Ready to explore a variety of delicious paleo recipes that can transform your meals?
Zucchini Noodles With Pesto and Grilled Chicken
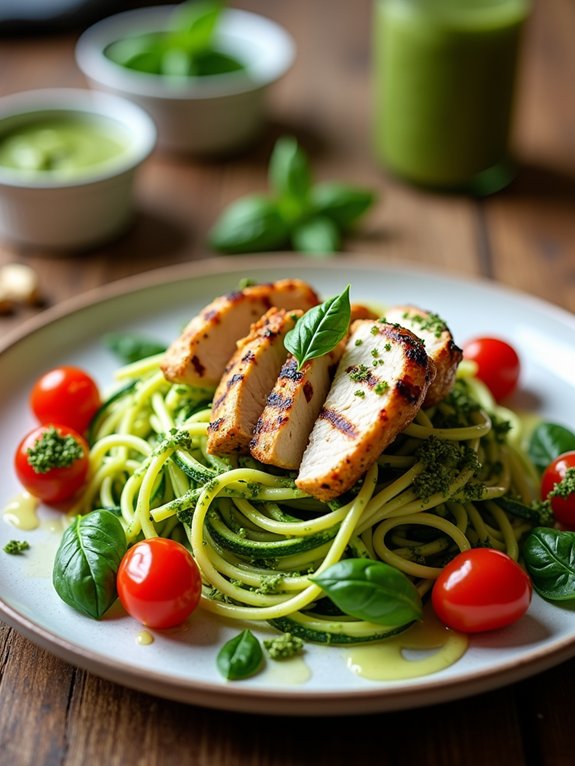
Zucchini noodles, often referred to as “zoodles,” are a fantastic low-carb alternative to traditional pasta and provide a fresh, vibrant base for various dishes. When paired with a flavorful pesto and grilled chicken, they become a satisfying meal that aligns perfectly with clean eating principles.
This dish isn’t only simple to prepare but also bursting with flavor, making it a great option for lunch or dinner. Grilling the chicken adds a lovely smoky flavor that complements the herby notes of the pesto, while the zucchini noodles offer a delightful crunch.
This recipe is versatile, allowing you to customize the pesto with your favorite nuts or greens. Plus, it’s a great way to sneak in some extra veggies into your diet without sacrificing taste!
Ingredients:
- 2 medium zucchinis
- 1 cup fresh basil leaves
- 1/4 cup pine nuts (or walnuts)
- 1/4 cup grated Parmesan cheese (or nutritional yeast for a vegan option)
- 2 garlic cloves
- 1/3 cup extra virgin olive oil
- Salt and pepper to taste
- 2 boneless, skinless chicken breasts
- Olive oil for grilling
Instructions:
Start by spiralizing the zucchinis to create noodles and set them aside. To make the pesto, combine basil, pine nuts, Parmesan cheese, garlic, and olive oil in a food processor, blending until smooth. Season with salt and pepper.
Preheat a grill or grill pan over medium heat and brush the chicken breasts with olive oil, seasoning them with salt and pepper. Grill the chicken for about 6-7 minutes on each side, or until cooked through. Once cooked, slice the chicken into strips.
In a large bowl, toss the zucchini noodles with the pesto until well coated, then plate them and top with the grilled chicken.
Extra Tips:
For added flavor, consider marinating the chicken in the pesto for a couple of hours before grilling. You can also sauté the zucchini noodles in a little olive oil for a few minutes if you prefer a softer texture.
Feel free to add cherry tomatoes or spinach to the dish for extra nutrition and color. Enjoy this dish immediately, as zucchini noodles can lose their texture if left to sit too long.
Sweet Potato and Bacon Hash
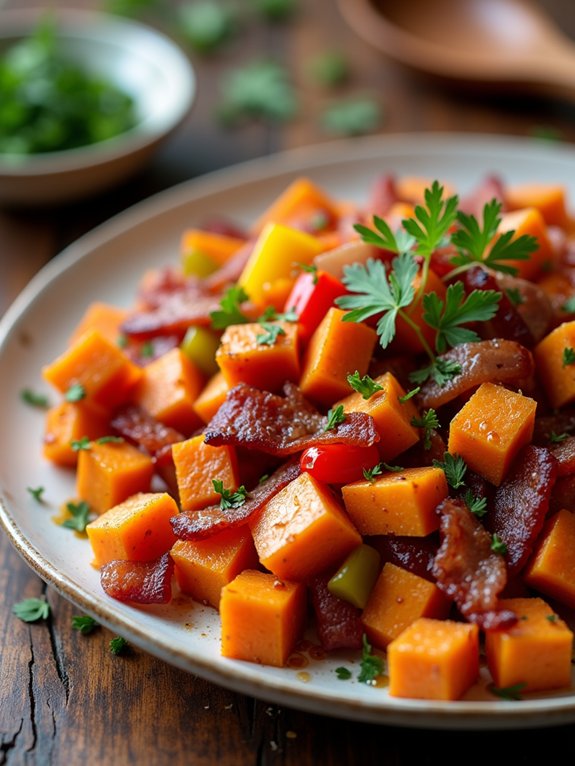
Sweet Potato and Bacon Hash is a savory and satisfying dish that combines the natural sweetness of sweet potatoes with the rich, smoky flavor of bacon. This hearty meal is perfect for breakfast, brunch, or even dinner, and it’s packed with nutrients that will keep you energized throughout the day.
The crispy edges of the sweet potatoes paired with the crispy bacon create a delightful texture that complements each bite. This recipe isn’t only easy to prepare but also allows for customization based on your dietary preferences.
Feel free to add in your favorite vegetables or spices to enhance the flavors even more. Whether you’re following a Paleo diet or simply looking to incorporate clean eating into your meals, this Sweet Potato and Bacon Hash is a delicious option that everyone will love.
Ingredients:
- 2 medium sweet potatoes, peeled and diced
- 4 slices of bacon, chopped
- 1 small onion, diced
- 1 bell pepper, diced (any color)
- 2 cloves garlic, minced
- 1 teaspoon smoked paprika
- Salt and pepper to taste
- Fresh parsley, chopped (for garnish)
Cooking Instructions:
In a large skillet over medium heat, cook the chopped bacon until crispy, about 5-7 minutes. Remove the bacon from the skillet and set aside, leaving the drippings in the pan.
Add the diced sweet potatoes to the skillet and cook for 10-12 minutes, stirring occasionally, until they start to soften and get golden brown. Then add the onion, bell pepper, and garlic, cooking for an additional 5 minutes.
Stir in the cooked bacon, smoked paprika, salt, and pepper, mixing well to combine. Cook for another 2-3 minutes until everything is heated through and well incorporated.
Extra Tips:
For added flavor, consider using different types of bacon, such as applewood smoked or peppered bacon. You can also experiment with additional spices like cayenne pepper for some heat or Italian herbs for a more aromatic dish.
If you prefer a softer texture, you can steam the sweet potatoes for a few minutes before adding them to the skillet. Don’t forget to garnish with fresh parsley for a pop of color and freshness!
Cauliflower Fried Rice
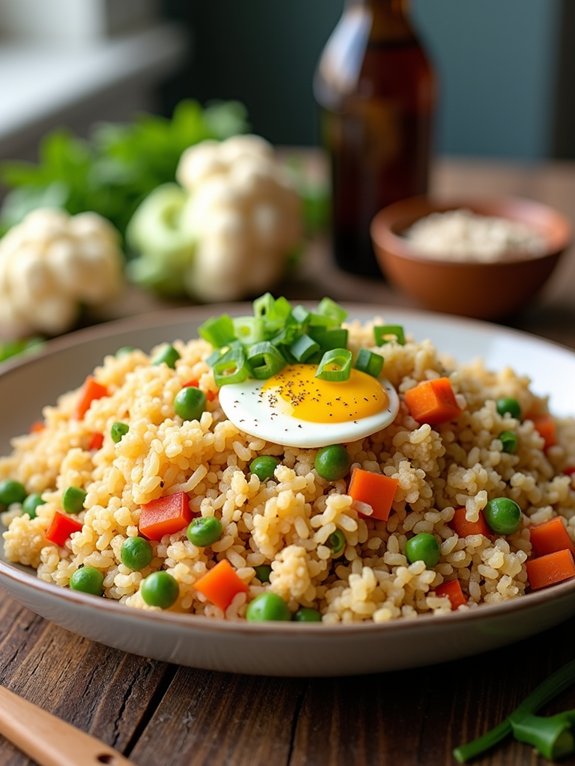
Cauliflower fried rice is a delicious and healthy alternative to traditional fried rice, making it an excellent choice for anyone following a Paleo diet or looking to eat clean. This dish isn’t only low in carbohydrates but also packed with nutrients, thanks to the cauliflower, which serves as a fantastic base.
With the addition of colorful vegetables and protein, cauliflower fried rice can be customized to suit your taste preferences, making it a versatile meal option. Preparing cauliflower fried rice is quick and easy, making it perfect for busy weeknight dinners.
By using a food processor or grating the cauliflower, you can create rice-sized pieces in minutes. This recipe isn’t only a great way to sneak more veggies into your meal but also provides a satisfying texture and flavor that you and your family will love. So let’s get started on this wholesome dish!
Ingredients:
- 1 medium head of cauliflower, riced
- 2 tablespoons coconut oil (or olive oil)
- 1 small onion, diced
- 2 cloves garlic, minced
- 1 cup mixed vegetables (carrots, peas, bell peppers)
- 2 eggs, lightly beaten
- 3 tablespoons coconut aminos (or soy sauce alternative)
- Salt and pepper to taste
- Green onions, chopped (for garnish)
Cooking Instructions:
In a large skillet or wok, heat the coconut oil over medium heat, then add the diced onion and minced garlic, sautéing until fragrant and the onions are translucent.
Stir in the riced cauliflower and mixed vegetables, cooking for about 5-7 minutes until the cauliflower is tender. Push the mixture to one side of the skillet, pour in the beaten eggs on the other side, and scramble until fully cooked.
Finally, mix everything together, add the coconut aminos, and season with salt and pepper to taste. Garnish with chopped green onions before serving.
Extra Tips:
For an even heartier meal, feel free to add cooked chicken, shrimp, or tofu to your cauliflower fried rice. You can also experiment with different vegetables or spices to enhance the flavors.
Make sure to use fresh cauliflower for the best texture, and remember that overcooking the cauliflower can lead to a mushy consistency, so keep an eye on it while cooking!
Lemon Herb Roasted Salmon
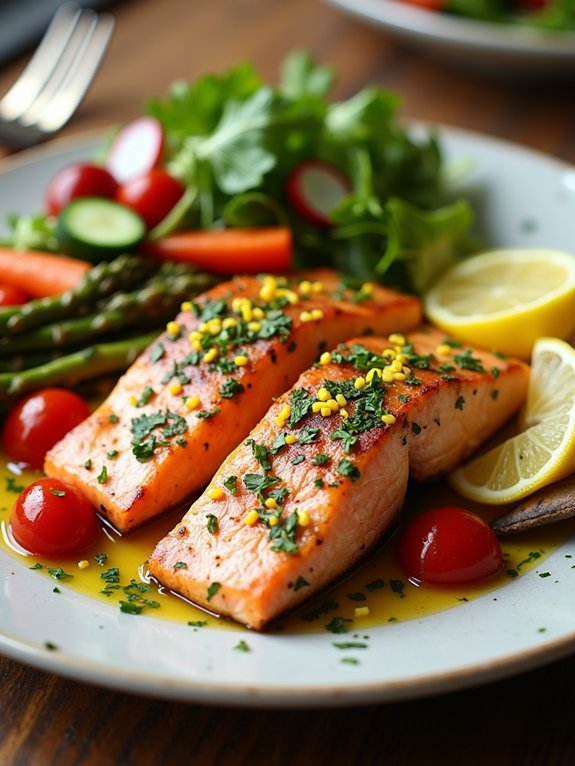
Lemon Herb Roasted Salmon is a delightful and healthy dish that showcases the natural flavors of fresh salmon complemented by zesty lemon and fragrant herbs. This recipe is perfect for a clean eating lifestyle, as it emphasizes whole, unprocessed ingredients that aren’t only nutritious but also satisfying.
The combination of lemon juice, garlic, and herbs creates a bright and invigorating flavor profile that pairs beautifully with the rich, buttery taste of salmon. Preparing this dish is simple and quick, making it an ideal option for busy weeknights or special occasions alike.
The salmon is roasted to perfection, ensuring that it remains moist and flaky while allowing the herbs to infuse their flavors deeply. Serve it alongside some roasted vegetables or a fresh salad for a complete meal that feels indulgent without compromising your clean eating goals.
Ingredients:
- 4 salmon fillets
- 2 lemons (juiced and zested)
- 3 tablespoons olive oil
- 2 cloves garlic (minced)
- 1 tablespoon fresh dill (chopped)
- 1 tablespoon fresh parsley (chopped)
- Salt and pepper to taste
Cooking Instructions:
Preheat your oven to 400°F (200°C). In a small bowl, whisk together the lemon juice, lemon zest, olive oil, minced garlic, dill, parsley, salt, and pepper.
Place the salmon fillets on a lined baking sheet, and pour the lemon herb mixture over them, ensuring they’re well coated. Roast the salmon in the preheated oven for 12-15 minutes or until it flakes easily with a fork.
Extra Tips:
For an even more flavorful dish, marinate the salmon in the lemon herb mixture for 30 minutes before cooking to allow the flavors to penetrate.
Additionally, feel free to experiment with other herbs such as thyme or basil to customize the flavor to your liking. Always check the salmon for doneness, as cooking times may vary based on the thickness of the fillets.
Enjoy your healthy and delicious Lemon Herb Roasted Salmon!
Spaghetti Squash With Meatballs
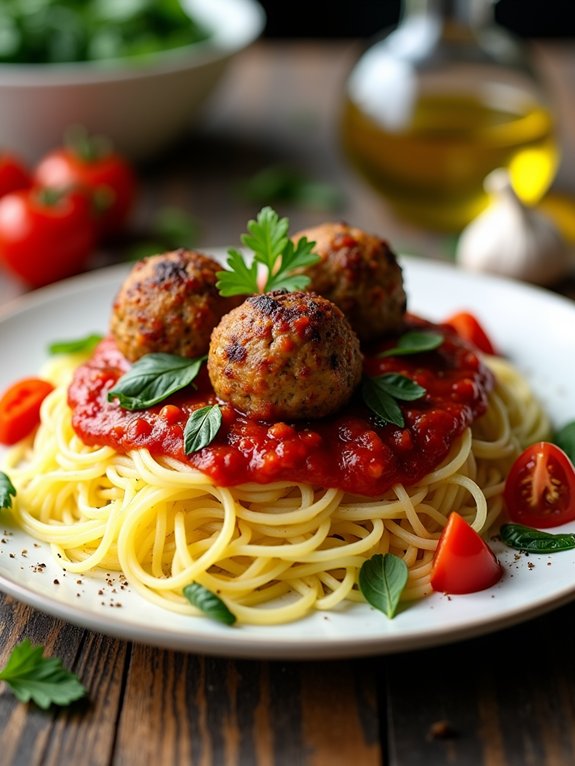
Spaghetti squash is a fantastic alternative to traditional pasta, especially for those following a Paleo diet or looking to incorporate more vegetables into their meals. Its unique texture and mild flavor make it an ideal base for savory meatballs. This dish not only satisfies your pasta cravings but also delivers a hearty serving of nutrients, making it a perfect choice for clean eating.
By pairing spaghetti squash with homemade meatballs, you guarantee that your meal is free from preservatives and unnecessary additives, keeping it wholesome and delicious.
Cooking spaghetti squash with meatballs is both simple and rewarding. The squash can be roasted or microwaved to create tender strands that resemble spaghetti, while the meatballs can be made from lean ground meats and seasoned with fresh herbs and spices. This recipe brings together the best of both worlds, allowing you to enjoy a comforting and filling meal without compromising your clean eating goals.
Ingredients:
- 1 medium spaghetti squash
- 1 pound ground beef or turkey
- 1/2 cup almond flour
- 1/4 cup fresh parsley, chopped
- 1 egg
- 2 cloves garlic, minced
- 1 teaspoon onion powder
- 1 teaspoon salt
- 1/2 teaspoon black pepper
- 1 cup marinara sauce (sugar-free)
- Olive oil for drizzling
Cooking Instructions:
Preheat your oven to 400°F (200°C). Cut the spaghetti squash in half lengthwise and scoop out the seeds. Drizzle the insides with olive oil and sprinkle with salt and pepper.
Place the halves cut-side down on a baking sheet and roast for about 30-40 minutes, or until the flesh is tender and can be easily shredded with a fork.
While the squash is roasting, mix the ground meat, almond flour, parsley, egg, garlic, onion powder, salt, and pepper in a bowl until well combined. Form the mixture into meatballs and bake them at the same temperature for 20-25 minutes, or until cooked through.
Once everything is ready, use a fork to scrape the spaghetti squash strands into a bowl, top with meatballs, and warm marinara sauce.
Extra Tips:
To enhance the flavor of your dish, consider adding spices such as oregano or Italian seasoning to the meatball mixture. You can also experiment with different types of ground meat, such as chicken or pork, to suit your taste.
For added nutrition, incorporate some sautéed vegetables, like spinach or bell peppers, into the marinara sauce. Finally, serve with a sprinkle of nutritional yeast or a drizzle of homemade pesto for an extra layer of flavor. Enjoy your clean and healthy spaghetti squash with meatballs!
Coconut Curry Shrimp

Coconut curry shrimp is a delightful dish that brings together the rich flavors of coconut milk and aromatic spices, creating a delectable meal that’s perfect for clean eating enthusiasts. This dish not only highlights the sweetness of shrimp but also incorporates a medley of vegetables, making it both nutritious and satisfying. The combination of coconut milk and curry powder creates a creamy sauce that clings beautifully to the shrimp, while fresh herbs add a burst of flavor.
Preparing coconut curry shrimp is a breeze, making it an excellent choice for a weeknight dinner or a special occasion. With minimal prep time and quick cooking, you can have this dish on the table in under 30 minutes. Serve it over cauliflower rice or alongside steamed vegetables for a complete meal that adheres to Paleo principles, ensuring you enjoy every bite without compromising your dietary goals.
Ingredients:
- 1 pound shrimp, peeled and deveined
- 1 can (13.5 oz) coconut milk
- 2 tablespoons coconut oil
- 1 onion, diced
- 3 cloves garlic, minced
- 1 tablespoon fresh ginger, grated
- 1 tablespoon curry powder
- 1 bell pepper, sliced
- 1 cup snap peas
- Salt and pepper, to taste
- Fresh cilantro, for garnish
- Lime wedges, for serving
In a large skillet, heat the coconut oil over medium heat. Add the diced onion, minced garlic, and grated ginger, sautéing until the onion becomes translucent. Stir in the curry powder and cook for another minute until fragrant.
Next, pour in the coconut milk and bring the mixture to a gentle simmer. Add the shrimp, bell pepper, and snap peas, cooking for about 5-7 minutes or until the shrimp turn pink and opaque. Season with salt and pepper to taste, and remove from heat.
For the best flavor, let the coconut curry shrimp sit for a few minutes before serving to allow the spices to meld together. Additionally, feel free to customize the vegetables based on your preference or what you have on hand. You can also adjust the level of spice by adding a pinch of cayenne pepper or serving it with a side of hot sauce.
Enjoy this delicious dish with a squeeze of fresh lime juice and a sprinkle of cilantro for an added burst of freshness.
Stuffed Bell Peppers
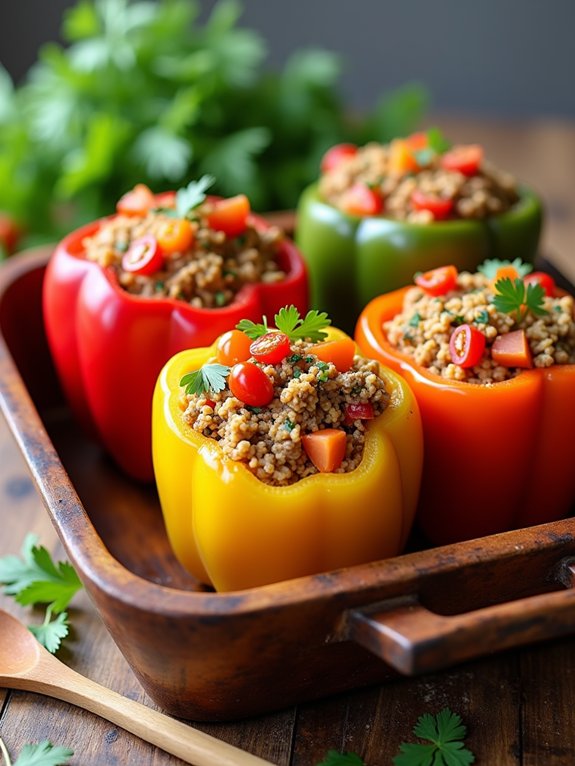
Stuffed bell peppers are a delicious and nutritious meal option that fits perfectly within the paleo diet. These vibrant vegetables not only provide a great source of vitamins and minerals, but they also serve as an excellent vessel for a variety of flavorful fillings.
Whether you’re looking for a satisfying lunch or a hearty dinner, stuffed bell peppers can be tailored to your taste preferences while keeping your clean-eating goals in mind.
This recipe features a savory filling made from ground meat, vegetables, and spices, all encased in colorful bell peppers. The combination of textures and flavors makes this dish a favorite among paleo enthusiasts. Plus, it’s easy to prepare and can be customized with your favorite ingredients, making it a versatile option for meal prep or family dinners.
Ingredients:
- 4 large bell peppers (any color)
- 1 pound ground beef, turkey, or chicken
- 1 cup chopped onions
- 2 cloves garlic, minced
- 1 cup diced tomatoes (fresh or canned)
- 1 cup cauliflower rice
- 1 teaspoon Italian seasoning
- 1 teaspoon paprika
- Salt and pepper to taste
- Olive oil for sautéing
- Fresh parsley for garnish (optional)
Cooking Instructions:
Preheat your oven to 375°F (190°C). Start by cutting the tops off the bell peppers and removing the seeds and membranes.
In a skillet, heat a drizzle of olive oil over medium heat and sauté the onions and garlic until they’re translucent. Add the ground meat and cook until browned.
Stir in the diced tomatoes, cauliflower rice, Italian seasoning, paprika, salt, and pepper. Mix well and let it simmer for about 5 minutes.
Stuff each bell pepper with the meat mixture, place them upright in a baking dish, and bake for about 25-30 minutes or until the peppers are tender.
Extra Tips:
For added flavor, feel free to include other vegetables like zucchini or mushrooms in the filling.
You can also experiment with different herbs and spices to match your taste preferences. If you want a bit of heat, consider adding some diced jalapeños or a sprinkle of red pepper flakes.
These stuffed peppers can also be made in advance and stored in the refrigerator, making them a convenient meal option for busy weeknights. Enjoy your healthy and delicious paleo meal!
Egg and Avocado Breakfast Bowl

Egg and Avocado Breakfast Bowl is a delicious and nutritious way to start your day. This dish combines the creaminess of ripe avocado with the protein-packed goodness of eggs, making it a perfect choice for those on a paleo diet.
Whether you’re rushing out the door or have a leisurely morning ahead, this breakfast bowl is quick to prepare and can keep you satisfied until lunchtime.
Not only is this recipe easy to make, but it also offers a variety of health benefits. Avocados are rich in healthy fats and fiber, while eggs provide essential nutrients and energy. Together, they create a harmonious blend of flavors and textures that will elevate your breakfast experience.
Plus, you can customize the bowl by adding your favorite toppings or seasonings for an extra burst of flavor.
Ingredients:
- 2 large eggs
- 1 ripe avocado
- Salt, to taste
- Pepper, to taste
- Fresh herbs (e.g., chives, cilantro, or parsley), optional
- Hot sauce, optional
- Lemon juice, optional
Cooking Instructions:
Begin by cooking the eggs to your preference—poached, scrambled, or fried—in a non-stick skillet over medium heat.
While the eggs are cooking, slice the avocado in half, remove the pit, and scoop the flesh into a bowl. Mash the avocado lightly with a fork, adding salt, pepper, and a squeeze of lemon juice if desired.
Once the eggs are cooked, place them on top of the mashed avocado, and garnish with fresh herbs and hot sauce if you like.
Extra Tips:
For added nutrition, consider topping your breakfast bowl with sliced tomatoes, sautéed spinach, or cooked bacon.
If you prefer a creamier texture, use a fork to mix in a tablespoon of olive oil or a dollop of coconut yogurt with the avocado.
This dish is versatile, so feel free to experiment with different spices and toppings to suit your taste preferences. Enjoy your wholesome breakfast bowl!
Grilled Veggie Skewers
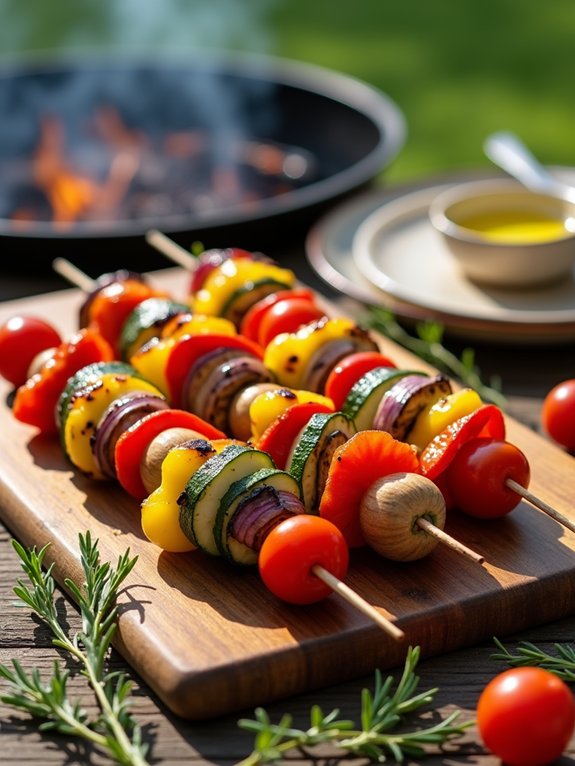
Grilled veggie skewers are a delightful and colorful addition to any meal, especially for those who follow a paleo diet. Packed with nutrients and bursting with flavor, these skewers can be tailored to your taste preferences by incorporating a variety of vegetables. They make for a perfect side dish for grilled meats or can be enjoyed as a light main course, especially during the warmer months when grilling is in full swing.
To make grilled veggie skewers, it’s crucial to choose the freshest vegetables available. Seasonal produce not only tastes better but also provides the best nutritional value. Whether you prefer classic combinations like bell peppers and zucchini or want to experiment with mushrooms and cherry tomatoes, the possibilities are endless.
Elevate your skewers by marinating the vegetables beforehand, allowing them to soak up delicious flavors that complement the smoky taste from the grill.
Ingredients:
- 1 red bell pepper, cut into chunks
- 1 yellow bell pepper, cut into chunks
- 1 zucchini, sliced into thick rounds
- 1 red onion, cut into wedges
- 8 ounces of cherry tomatoes
- 1 cup of mushrooms, halved
- 3 tablespoons olive oil
- 2 teaspoons garlic powder
- 1 teaspoon dried oregano
- Salt and pepper to taste
- Skewers (wooden or metal)
To prepare the skewers, start by soaking wooden skewers in water for about 30 minutes to prevent them from burning on the grill. In a large bowl, combine all the chopped vegetables, olive oil, garlic powder, oregano, salt, and pepper. Toss everything together until the vegetables are well-coated.
Thread the marinated veggies onto the skewers, alternating between different types for a vibrant presentation. Preheat the grill to medium-high heat and grill the skewers for about 10-15 minutes, turning occasionally, until the vegetables are tender and have nice grill marks.
For the best results, try to use a variety of colorful vegetables to enhance both the visual appeal and the nutritional profile of your skewers. You can also add a splash of lemon juice or balsamic vinegar for extra flavor before serving.
Feel free to experiment with different herbs and spices in the marinade to find your perfect combination. Finally, remember to keep an eye on the skewers while grilling to avoid overcooking and guarantee they maintain a slight crunch. Enjoy your delicious and healthy grilled veggie skewers!
Almond Butter Energy Bites

Almond Butter Energy Bites are a delicious and nutritious snack that are perfect for anyone looking to maintain a clean eating lifestyle. Packed with healthy fats, protein, and fiber, these bites aren’t only easy to make but also incredibly satisfying.
Whether you need a quick pick-me-up before a workout or a wholesome treat to curb sweet cravings, these energy bites are your go-to solution. Plus, they require no baking, making them a convenient option for any busy schedule.
Making Almond Butter Energy Bites is a simple process that can be customized according to your taste preferences. You can add in various mix-ins like dark chocolate chips, dried fruits, or seeds to enhance the flavor and nutritional value.
These bites are also perfect for meal prepping, as you can make a batch at the beginning of the week and enjoy them throughout. With just a handful of ingredients, you can whip up a delightful snack that aligns perfectly with a Paleo diet.
Ingredients:
- 1 cup almond butter
- 1 cup rolled oats
- 1/4 cup honey or maple syrup
- 1/2 cup shredded coconut
- 1/4 cup mini dark chocolate chips (optional)
- 1 teaspoon vanilla extract
- 1/2 teaspoon cinnamon
- Pinch of salt
To prepare the Almond Butter Energy Bites, start by combining all the ingredients in a large mixing bowl. Stir until well combined and a sticky dough forms.
Use your hands to roll the mixture into small balls, about 1 inch in diameter. Place the energy bites on a baking sheet lined with parchment paper and refrigerate for at least 30 minutes to firm up.
Once set, you can transfer them to an airtight container for storage. When making these energy bites, feel free to experiment with different nut butters or sweeteners to suit your taste.
If the mixture feels too dry, add a splash of almond milk or more honey to achieve the desired consistency. You can also roll the bites in additional shredded coconut or chopped nuts for added texture.
Store the energy bites in the refrigerator for up to a week, or freeze them for longer shelf life. Enjoy your healthy snack!


